wikiHow is a “wiki,” similar to Wikipedia, which means that many of our articles are co-written by multiple authors. To create this article, volunteer authors worked to edit and improve it over time.
The wikiHow Tech Team also followed the article's instructions and verified that they work.
This article has been viewed 167,407 times.
Learn more...
When viewing images on an LCD (Liquid Crystal Display) monitor, the images should be crisp and clear and the colors should be rich and vibrant. Typically, setting the LCD monitor colors to its native resolution (the LCD monitor's initial display setting provided by the manufacturer) should provide the optimal image. However, if the native resolution setting is not delivering the best appearance, the LCD monitor settings can be easily calibrated to enhance the screen's appearance.
Steps
Adjust LCD Monitor Resolution
-
1Turn on the computer. Wait for the main screen to appear.
-
2Ensure that no other programs are running.Advertisement
-
3Move the cursor over "Start" (or the Microsoft Windows logo) from the lower left hand corner of the screen, single click, and hold the mouse button down to view other menu items.
-
4Select "Control Panel."
-
5Locate the heading, "Appearance and Personalization," then select the sub-category, "Adjust screen resolution."
-
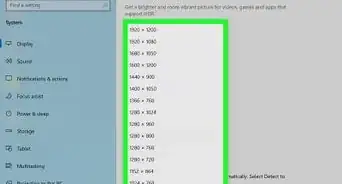
6Click "Resolution" and wait for a drop-down slider control to appear.
-
7Drag the slider up or down until the desired resolution is selected. Click "Apply." If a compatible resolution was chosen, the screen will revert to these settings (If the resolution is incompatible, select another resolution).
-
8Wait for the system to ask if the settings are acceptable. Select "yes" if the settings are accurate, otherwise continue changing the resolution until the desired effect is achieved.


Calibrate the LCD Color Monitor
-
1Move the cursor over "Start" (or the Microsoft Windows logo) from the lower left hand corner of the screen, single click, then select "Control Panel."
-
2Click Appearance and Personalization>Display>Calibrate Color.
-
3Click "Next" when "Display Color Calibration" window appears.
-
4Follow the steps on the screen to adjust gamma, brightness, contrast, and color balance. After modifying each item, select "Next" until every step is completed.
-
5View the "You've successfully created a new calibration" page.
-
6Click the "Previous Calibration" button to view the screen before calibration.
-
7Click the "Current Calibration" button to view the screen with changes.
-
8Compare both calibrations and determine the option with the best appearance.
-
9Select the "Finish" option to adopt the new calibration.
-
10Select "Cancel" to revert back to the old calibration.
-
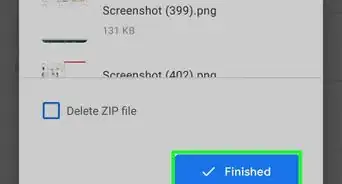
11Finished.