This article was co-authored by Connie Tao and by wikiHow staff writer, Danielle Blinka, MA, MPA. Connie Tao is a Bridal Designer and the Founder of Connie Tao Designs in Pasadena, California. Connie has over 12 years of experience and specializes in creating handmade custom wedding dresses and evening gowns. She and her team also do alterations and redesigns to existing garments. Connie received her Bachelors Degree in Fashion Design from Otis College of Art and Design.
This article has been viewed 692,620 times.
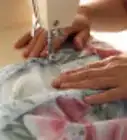
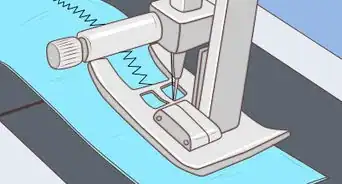
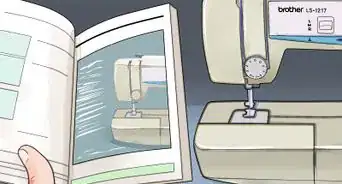
Using a sewing machine makes sewing projects quicker and easier, but first you need to know how to wind a bobbin. The bobbin helps your sewing machine create a stitch by supplying thread to the needle. Once you’ve chosen the thread you want to use for your project, you will need to wind it onto your bobbin before you can continue with your project. While machines differ, the process for winding a bobbin is the same. With a little practice, you’ll be sewing great projects in no time.
Steps
Removing Your Bobbin
-
1Open the shuttle cover. The shuttle cover is located below the needle. If you find the metal plate where the needle pushes through with the thread, then you should see the shuttle cover on one side of the machine.[1]
-
2Pull out the bobbin casing. The bobbin casing is located just inside the shuttle cover. It will look like a metal cylinder.[2]Advertisement
-
3Remove the bobbin from the casing. Slide out the bobbin. If your bobbin is secured within the casing, then you may have to open the casing first.[3]

Preparing the Thread
-
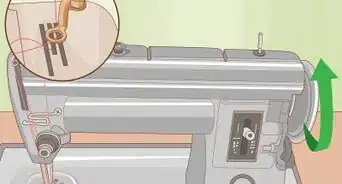
1Find the spool pin. The spool pin is a piece on your sewing machine that holds the thread while you wind the bobbin. It will be a cylindrical piece that fits the hole in the spool of thread. The spool pin is commonly located on the top or side of the machine.
-
2Loosen your thread. Start the spool or remove the end of the thread from the hook so that you can easily transfer thread from the spool once it's secured to the spool pin.
-
3Place your spool of thread on the spool pin. The spool pin should fit through the center of your thread.
- If it has a spool cap, place that on top of the thread to hold it in place.
- If your machine’s spool pin is on top of the machine, it may not have a spool cap.
-
4Slide the end of your thread through the thread guide. Most machines have a piece with a small hole near the spool that helps you guide the thread either when winding a bobbin or when threading the machine. If your machine does not have a thread guide, then skip this step.[4]
-
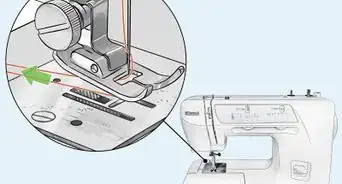
5Locate your machine’s tension disk. Your machine will have a small metal piece that will convey the thread as it’s wound around the bobbin. This piece should be near the thread guide and will look like a tiny knob.[5]
-
6Wrap the thread around the tension disk once. Your thread should form a triangle when held taut, with the top of the triangle located at the tension disk. Don't let go of your thread.[6]


Winding the Bobbin
-
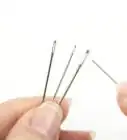
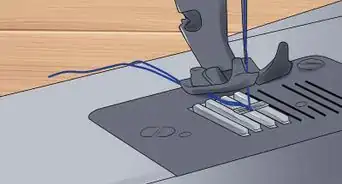
1Thread your bobbin. Your bobbin should have a tiny hole in the side. Some bobbins have several. Push the end of your thread through the hole in your bobbin. You only need to push the thread through one hole on one side.[7]
- If your bobbin has more than one hole in it, you can use any of the holes.
-
2Find your bobbin winder. The bobbin winder is a cylindrical metal piece that looks similar to the spool pin and is about the size of the hole in the center of your bobbin. Next to the bobbin winder, you should see a round plastic piece.[8]
-
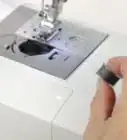
3Put your bobbin on the winder. Line up the bobbin winder with the hole in the center of the bobbin and push the bobbin down onto the winder.[9]
-
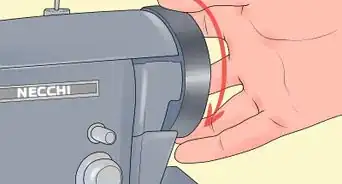
4Lock your bobbin winder. Push the bobbin winder toward the plastic disk next to the winder. When the your winder is securely in place, you should hear a click.[10]
-
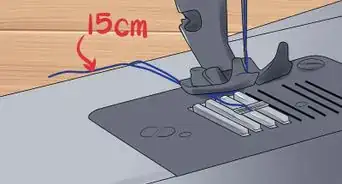
5Hold the end of the thread. As you start to wind the bobbin, hold the end of the thread that you looped through the hole in your bobbin to keep it from slipping back out.[11]
-
6Push down on your foot pedal. Continuing working your pedal as your bobbin fills with thread. Move at a comfortable speed.[12]
- You may want to start by pushing your pedal slowly to find your rhythm, but there’s no reason to wind your bobbin at a slow speed.
- If your bobbin fills unevenly, you have likely wound your thread around the tension disk in the wrong spot. Check your placement of the thread. If you believe you have done it correctly, then wrap it a second time to ensure that your thread is winding evenly.
- If your thread catches on the notch of the spool, try turning the spool over and working in the opposite direction of that notch.
-
7Fill up your bobbin with thread. You may be unsure of how much thread you’ll use, but it’s a good idea to fill up your bobbin each time you wind it so that you don’t run out of thread.[13]
- Your bobbin is full when you reach the edges of the sides of the bobbin, making your thread flush with the outside edge. If you keep loading your bobbin past the sides, then the thread will slide off and unwind.
-
8Cut the thread. Use your scissors to disconnect the thread between your bobbin and the spool. Be careful to not let go of the end of your thread on the bobbin so that it doesn’t start to unwind.[14]
-
9Push the bobbin winder back into the start position. You will again hear a click when the winder is securely in place.[15]
-
10Remove the bobbin from the winder. Your bobbin is now full of thread and ready to use.[16]


Community Q&A
-
QuestionHow do I fix broken thread when I am sewing?
 Community AnswerYour thread might be rotten. You need to rip out the seam and start over. If the thread keeps breaking, your bottom tension might be too tight, or the thread is old.
 -
QuestionWhat do I do if the bobbin thread is not catching?
 Community AnswerHave you cleaned the machine where the bobbin fits? Have you changed the needle? Is the bobbin evenly wound? All of these could prohibit the bobbin thread from catching.
 -
QuestionWhat do I do if my machine stops filling the bobbin before it is full?
 SarahBCommunity AnswerMost machines do not fill the bobbin right to the top of the bobbin spool.
Warnings
- Do not attempt to adjust the bobbin tension yourself. Generally, it's already adjusted correctly and it's best to adjust the upper thread tension until it is even.⧼thumbs_response⧽
- Sewing machines have moving parts that can injure. Know which parts they are and keep hands and other objects clear. Especially, do not put your hands under the needle.⧼thumbs_response⧽
- If you're experienced with sewing on a sewing machine, don't be afraid to make changes to your bobbin tension. The ability to make changes in tension allows you to use many different types of thread easily.⧼thumbs_response⧽
References
- ↑ https://www.apartmenttherapy.com/how-to-thread-a-sewing-machine-wind-a-bobbin-221841
- ↑ https://www.apartmenttherapy.com/how-to-thread-a-sewing-machine-wind-a-bobbin-221841
- ↑ https://www.apartmenttherapy.com/how-to-thread-a-sewing-machine-wind-a-bobbin-221841
- ↑ http://www.rufflesandstuff.com/2009/08/getting-started-threading-your-bobbin.html
- ↑ https://www.apartmenttherapy.com/how-to-thread-a-sewing-machine-wind-a-bobbin-221841
- ↑ https://www.apartmenttherapy.com/how-to-thread-a-sewing-machine-wind-a-bobbin-221841
- ↑ http://www.rufflesandstuff.com/2009/08/getting-started-threading-your-bobbin.html
- ↑ https://www.apartmenttherapy.com/how-to-thread-a-sewing-machine-wind-a-bobbin-221841
- ↑ https://www.apartmenttherapy.com/how-to-thread-a-sewing-machine-wind-a-bobbin-221841
- ↑ https://www.apartmenttherapy.com/how-to-thread-a-sewing-machine-wind-a-bobbin-221841
- ↑ http://www.rufflesandstuff.com/2009/08/getting-started-threading-your-bobbin.html
- ↑ https://www.apartmenttherapy.com/how-to-thread-a-sewing-machine-wind-a-bobbin-221841
- ↑ https://www.apartmenttherapy.com/how-to-thread-a-sewing-machine-wind-a-bobbin-221841
- ↑ http://www.rufflesandstuff.com/2009/08/getting-started-threading-your-bobbin.html
- ↑ https://www.apartmenttherapy.com/how-to-thread-a-sewing-machine-wind-a-bobbin-221841
- ↑ https://www.apartmenttherapy.com/how-to-thread-a-sewing-machine-wind-a-bobbin-221841
About This Article

To wind a bobbin, start by placing your spool of thread on the spool pin and sliding the end of the thread through the thread guide. Then, wrap the thread around the tension disk, which is the tiny knob near the thread guide. Next, push the end of the thread through the hole in your bobbin and put the bobbin onto the winder. Once the bobbin is locked on the winder, hold the end of the thread and push down on your foot pedal to fill the bobbin with thread. When you're finished, cut the thread and remove the bobbin from the winder. To learn how to remove the bobbin from your sewing machine, read on!