This article was co-authored by Daniela Gutierrez-Diaz. Daniela Gutierrez-Diaz is a professional pattern maker and clothing designer at DGpatterns in Vancouver, Canada. With over 5 years of experience, Daniela creates modern and unique silhouettes that are suitable for a busy everyday life. Her blog, On the Cutting Floor, contains sewing tips and PDF sewing patterns for a variety of projects and designs.
This article has been viewed 90,466 times.
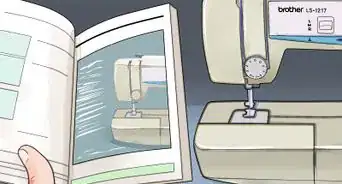
Sewing machines do vary a bit from model to model, so if you happen to have your manual handy, you may want to check that out -- it will likely have more specific instructions tailored to your particular machine. If you don't have your manual, though, it's not the end of the world! Just power the sewing machine on, take a second to familiarize yourself with the pieces, and then thread the bobbin and needle. It shouldn't take long to get your machine completely ready to sew.
Steps
Threading the Bobbin and Needle
-
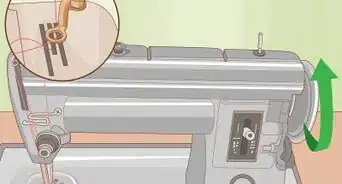
1Wind the bobbin. The bobbin is a small spool of thread that is loaded underneath your needle and it supplies the thread that comes up through the base of your machine. This thread connects with the thread on your needle and forms stitches.
- To wind the bobbin, insert the thread through the hole in your spool and then wind it around the bobbin a couple of times. Then, place the bobbin onto the small spool pin so that it is locked into place.
- Place your thread on the larger spool. Then, slowly apply pressure to your pedal and watch the bobbin wind with thread. Stop the pedal when the bobbin is nearly full.[1]
- If you have pre-threaded bobbins, then you do not have to worry about threading a bobbin.
-
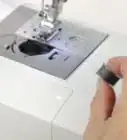
2Load the bobbin. Once the bobbin is threaded, you will need to load it into the bobbin case below your needle. Pop off the cover to reveal the case. Then, insert the bobbin into the case as indicated on your machine. There should be an arrow to show which direction the thread should be going.[2]
- If you have your manual, then be sure to check your machine’s specific instructions for loading the bobbin. With some machines, you just pop the bobbin into place, while others require you to remove the case and insert the bobbing before you load it.
- Put the cover back on after the bobbin is loaded.
Advertisement -
3Thread the top parts of your machine. After your bobbin is in place, you will need to guide your thread through the top area of your machine. To do this, place the thread on the larger spool pin located on the top of your machine. Your machine should indicate where the thread goes, or you can check your manual.
- Then, pull a piece of thread away from the spool and bring it across the top of the machine, and down through the first slot. Then bring the thread back up to the top of the machine, and down again towards the needle.
- Your machine should have a printed diagram on it or at least some arrows on it that indicate where the thread should go.[3]
-
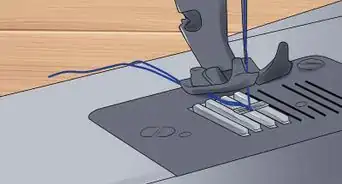
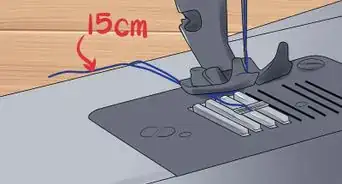
4Insert the thread through the eye of the needle. To thread the needle, bring the thread down and insert it through the eye of the needle on your machine. Then, pull the thread until it is taut.[4]
- You should leave at least a few inches of thread to help the top thread and lower thread to connect with each other.
- Plan on replacing the needle after going through 2–3 bobbins so it doesn't get dull. Otherwise, your stitches may look messy.[5]
-
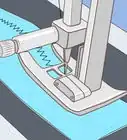
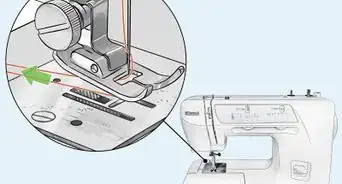
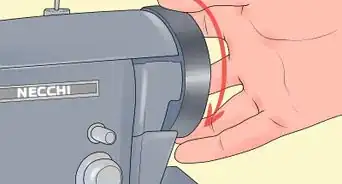
5Catch the thread. To catch the thread, turn the knob on the side of your machine once or twice. As you do this, you should see the bottom thread come up through the machine base. Use a ruler or other flat object to push the thread strands to the back of your machine.[6]
- Your machine is now threaded and ready to use!

Using Your Machine for the First Time
-
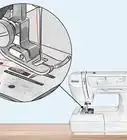
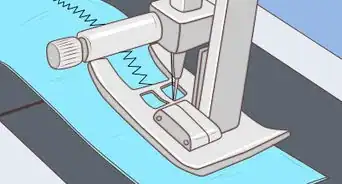
1Check your stitch setting. Before you begin sewing for the first time, make sure that you check your stitch setting. You can find the stitch setting by checking the knob or digital display on your sewing machine. Turn the knob or select a new stitch setting on your digital display to change the stitch setting.
- The basic stitch that most patterns call for is a straight stitch, which is setting number one on most machines. However, be sure to check your manual to find out if this is correct, and whether you need to make any other adjustments to use a specific stitch setting.
- For example, your machine may automatically adjust the tension for you, or you may need to adjust the tension manually depending on the type of machine you have.[7]
-
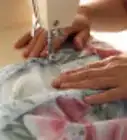
2Place your fabric under the needle. When your machine is set properly, you can raise the presser foot and insert your fabric. There should be a lever on the underside of your machine that you can flip to raise the presser foot. After you raise the presser foot, insert your fabric and then lower the presser foot to hold it in place.
- Check your manual if you cannot locate the presser foot.
- Try using a piece of scrap fabric to test the stitch before you work on a project.
-
3Apply gentle pressure to the pedal. When you are ready to sew, apply gentle pressure to the pedal with your foot. This will make the needle move and the teeth on your machine will move the fabric forward as you sew. Use your fingers to guide the fabric as you apply gentle pressure, but keep them away from the needle.
- Make sure that the pedal is somewhere that is easy for you reach and that will be comfortable for you to apply pressure to.
- If the fabric is going to fast or if the stitches look sloppy, then stop the machine and make adjustments. Most sewing manuals come with troubleshooting sections to help you solve problems. However, you can also go back through the threading process, check the tension on your machine, and check the stitch setting to find a solution.

References
- ↑ https://www.apartmenttherapy.com/how-to-thread-a-sewing-machine-wind-a-bobbin-221841
- ↑ https://www.apartmenttherapy.com/how-to-thread-a-sewing-machine-wind-a-bobbin-221841
- ↑ https://www.apartmenttherapy.com/how-to-thread-a-sewing-machine-wind-a-bobbin-221841
- ↑ https://www.youtube.com/watch?v=Er2Yih6K8Mg
- ↑ Daniela Gutierrez-Diaz. Clothing Designer. Expert Interview. 3 July 2019.
- ↑ https://www.youtube.com/watch?v=Er2Yih6K8Mg
- ↑ Daniela Gutierrez-Diaz. Clothing Designer. Expert Interview. 3 July 2019.
About This Article