This article was co-authored by wikiHow Staff. Our trained team of editors and researchers validate articles for accuracy and comprehensiveness. wikiHow's Content Management Team carefully monitors the work from our editorial staff to ensure that each article is backed by trusted research and meets our high quality standards.
This article has been viewed 80,130 times.
Learn more...
Necchi was an Italian company that began in 1919 shortly after the end of World War I. Their 20th Century sewing machines are still popular among sewing enthusiasts, but by the 1980s production of domestic Necchi sewing machines ceased in Italy and all domestic "Necchi" sewing machines made since were produced in Asian factories. There is a significant difference between the Italian made and Asian made machines. Necchi in Pavia Italy also made industrial sewing machines. On the 100th anniversary of the Necchi sewing machine, 2019, Janome and Toyota own the rights to the Necchi trademark name and produce models they call NECCHI.
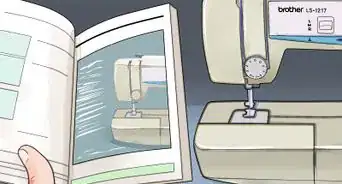
If you have a Necchi sewing machine, made for home use, that is missing its instructions, you might be wondering how to thread it. Threading a Necchi is similar to threading other popular types of sewing machines, but there are so many models that no one set of instructions will work for all. There are several guides for the thread, as well as a double needle option, which requires a slightly different process. You may also need to know how to load the bobbin into the special case and chamber below the machine.
Steps
Threading the Top Portion of the Machine
-
1Place a full spool of thread onto the front spool pin. The front spool pin is in the top center of the machine near the front, which is the part of the machine where the thread guides are visible. Push the spool of thread down onto the spool pin until you hear or feel it click into place.[1]
- There should be a spring-like piece that will keep the spool from flying off while you sew.
-
2Bring the end of the thread through the loop on the tension disc. Grasp the end of the thread and bring it over to the tension disc, which is in the area above the thread guides. There should be a loop on the tension disc. Insert the end of the thread through this loop and pull it through.[2]Advertisement
-
3Pull the thread towards the front of the machine and then down. Next, pull the end of the thread towards the front of the sewing machine so that it is directly over the grooved area to your right (when sitting in front of the machine). Bring the thread down into this groove until you reach the bottom of it.[3]
- There may be arrows on the front of your machine that indicate the direction in which to move the thread.
-
4Bring the thread back up and over the loop near the top of the machine. Once you reach the bottom of the first guide, reverse the direction of the thread by bringing it around the bottom of the guide and back up to the top. When you reach the top of the machine, bring the thread over the loop at the top of this guide.[4]
- At this point, the thread should be forming a narrow U-shape on the front part of your machine.
-
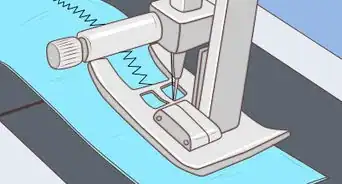
5Work the thread down through the 2 guides near the needle. Next, bring the thread back down through the next guide, which is located just to the left of the first guide. Bring the thread all the way down to the bottom of the guide and insert it through the guides located just above the sewing machine needle.[5]
- These 2 guides will help to ensure that the thread does not get caught on the needle or any of the other moving parts on your machine.
-
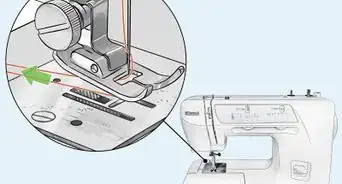
6Insert the end of the thread through the eye of the needle. Next, take the end of the thread, pull it downwards, and insert it through the eye of the needle. Pull several inches of thread through after you thread the needle to ensure that it will not come undone when you start the machine.[6]
- If the end of the thread is frayed or fuzzy, cut it to get a fresh edge. This will make it easier to thread the needle. You can also lick the end of the thread, or put a little water or beeswax on it to stiffen it.[7]


Threading a Double Needle
-
1Place a spool of thread onto each of the spool pins. If you are going to be using a double needle with your Necchi, place 1 spool onto each of the spool pins on top of the machine. There is a front spool near the front of the machine and a back spool near the back of the machine.[8]
-
2Wrap the front spool thread to the right and the back spool to the left. Moving towards the end of the machine (the side closest to the needle), wrap the end of the front spool around the tension disc coming from the right side of the tension disc and wrap the back spool thread around the left side of the tension disc. Then, insert both strands of thread through the loop.[9]
-
3Hold both strands together and thread the rest of the way as usual. After you have finished wrapping each strand around the tension disc, hold the 2 strands together and complete the rest of the threading process the same as you would with a single strand of thread until you get to the needles.[10]
-
4Insert each strand through the eye of a needle. Thread 1 strand through 1 needle’s eye and the other strand through the other needle’s eye. Pull several inches of each of the strands of thread through the eyes after you thread the needles. This will help to keep the strands secure.[11]
- If you notice that the ends of the threads are frayed or fuzzy, cut them to get fresh edges and make it easier to thread the needles. You can also lick the ends of the threads or add beeswax or water to them to stiffen them.[12]


Pulling Up Bobbin Thread
-
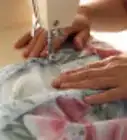
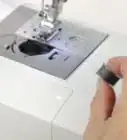
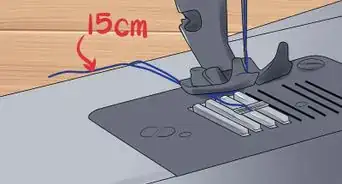
1Install a threaded bobbin in the case under the machine’s feed dogs. Your Necchi has a chamber below the feed dogs where you can place a full bobbin. Open the chamber and bobbin case beneath the needle, insert the bobbin into the case, pull out 10 centimetres (3.9 in) of thread, and then place the bobbin into the case. Close the case and the chamber.[13]
- Make sure that the needle is in the highest possible position to make it easier to put the bobbin into the chamber.
-
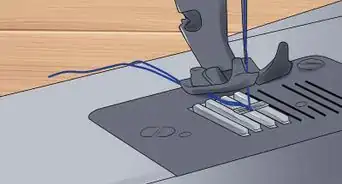
2Pull the end of the top thread and hold it. After you have finished loading the bobbin, grasp the end of the top thread with your left hand. This thread should already be through the eye of the needle, but if not, thread the needle and keep holding onto the thread after you bring it through the eye.[14]
-
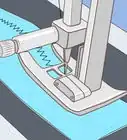
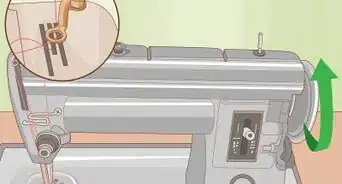
3Turn the wheel on the side of the machine a few times. To connect the top and bottom thread strands, turn the wheel on the right side of your machine using your right hand. You should only need to do this a few times to connect the strands and the bottom thread should now be visible.[15]
- If the threads are not connecting, you may need to adjust the tension on your machine. Turn the dial to tighten the tension by 1 or 2 notches and see if that helps.


Community Q&A
-
QuestionWhy does the thread keep breaking?
 Community AnswerCheck the tension in both the bobbin and the main. One of them is too tight.
 -
QuestionHow can I change the direction of my stitches from forward to reverse?
 Community AnswerTo change the direction of the stitches, you can just move the stitch length leaver to the top or bottom.
 -
QuestionHow do I loosen the stitch on a straight stitch?
 Community AnswerLengthen the stitch, or look at the tension control on your machine; it may be too tight.
Things You'll Need
- Thread spools
- Bobbins
- Scissors
References
- ↑ https://www.scribd.com/doc/294739520/Necchi-3537-3577-Instruction-Manual
- ↑ https://www.scribd.com/doc/294739520/Necchi-3537-3577-Instruction-Manual
- ↑ https://www.scribd.com/doc/294739520/Necchi-3537-3577-Instruction-Manual
- ↑ https://www.scribd.com/doc/294739520/Necchi-3537-3577-Instruction-Manual
- ↑ https://www.scribd.com/doc/294739520/Necchi-3537-3577-Instruction-Manual
- ↑ https://www.scribd.com/doc/294739520/Necchi-3537-3577-Instruction-Manual
- ↑ https://www.thesprucecrafts.com/needle-threading-tips-2977529
- ↑ https://www.scribd.com/doc/294739520/Necchi-3537-3577-Instruction-Manual
- ↑ https://www.scribd.com/doc/294739520/Necchi-3537-3577-Instruction-Manual
- ↑ https://www.scribd.com/doc/294739520/Necchi-3537-3577-Instruction-Manual
- ↑ https://www.scribd.com/doc/294739520/Necchi-3537-3577-Instruction-Manual
- ↑ https://www.thesprucecrafts.com/needle-threading-tips-2977529
- ↑ https://www.scribd.com/doc/294739520/Necchi-3537-3577-Instruction-Manual
- ↑ https://www.scribd.com/doc/294739520/Necchi-3537-3577-Instruction-Manual
- ↑ https://www.scribd.com/doc/294739520/Necchi-3537-3577-Instruction-Manual
About This Article