This article was co-authored by Seleh Rahman. Seleh Rahman is a Tailor, Furrier, and the Owner of Seleh de Federal Hill in Baltimore, Maryland. With over 45 years of experience, Seleh specializes in fur, alterations, and fashion illustration. Seleh studied Fashion Design and Tailoring at Bay College of Maryland. He holds certifications in fur, design, and tailoring.
wikiHow marks an article as reader-approved once it receives enough positive feedback. This article has 15 testimonials from our readers, earning it our reader-approved status.
This article has been viewed 1,879,472 times.
Sewing buttons is very easy once you get the hang of it. It's a very useful skill to possess, as buttons do fall off.
Steps
Two Holes
-
1Choose your button and thread. Select a suitable button and thread that matches the button, the garment, and any thread used to sew on other buttons. If you like, you can double the thread to make this job quicker.
-
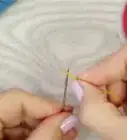
2Thread the needle. Simply pull the thread through the needle so that there is an equal length of thread extending from both sides.Advertisement
-
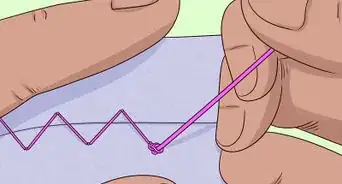
3Tie a knot at the end of the thread. One way to tie a knot is to wrap the thread around your finger as shown, roll the thread between your fingers, and pull it tight. If you doubled the thread, tie the ends together. Leave a long tail of thread, whether you are doubling the thread or using a single thread to sew the button.
-
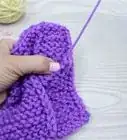
4Position the button on the fabric. Line the button up with the other buttons on the garment. Also check the buttonhole. Close the opposite flap or panel where you want it and make sure that the button lines up with the buttonhole.
-
5Push the threaded needle up through the fabric and through one hole in the button. Pull the thread all the way through on each stitch.[1]
-
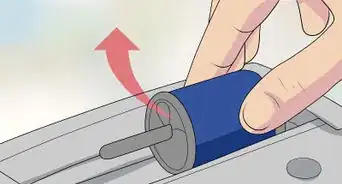
6Place a straight pin. Place a straight pin beneath the button, between the stitch you have made and where the next stitch will go, in order to keep the button from being stitched too tight. Then, push the needle down through the next hole and through the fabric. Pull the thread all the way through. It's best to hold the button in place so it does not move.
-
7Restart the process. Bring the needle up through the first hole again and pull the thread all the way through the fabric.[2]
-
8Strengthen the button. Repeat the sewing process enough times to make sure the button is securely in place.[3]
-
9On the last stitch, push the needle through the material, but not through a hole in the button.
-
10Remove the straight pin.
-
11Wrap the thread. Wrap the thread six times around the thread between the button and the material to reinforce the shank you have created.
-
12Push the needle back down through the material.
-
13Make three or four stitches to secure the thread. Make a few stitches below the button, going back and forth to make them strong. Tie this thread off.
-
14Cut off the excess.

Four Holes
-
1Choose what you will use. Select a suitable button and thread that matches the button, the garment, and any thread used to sew on other buttons.
-
2Thread the needle. If you like, you can double the thread to make this job quicker. Simply pull it through the needle so that there is an equal length of thread extending from both sides.
-
3Tie a knot at the end of the thread. One way to tie a knot is to wrap the thread around your finger as shown, roll the thread between your fingers, and pull it tight. If you doubled the thread, tie the ends together. Leave a long tail of thread, whether you are doubling the thread or using a single thread to sew the button.[4]
-
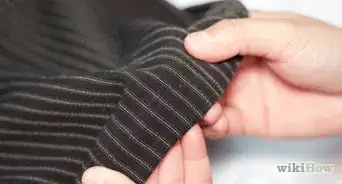
4Position the button on the fabric. Line the button up with the other buttons on the garment. Check the buttonhole. Close the opposite flap or panel where you want it and make sure that the button lines up with the buttonhole.[5]
-
5Push the threaded needle up through the fabric and through one hole in the button. Pull the thread all the way through on each stitch.
-
6Place a straight pin. Place a straight pin beneath the button, between the stitch you have made and where the next stitch will go, in order to keep the button from being stitched too tight.
-
7Push the needle down through the opposite hole and through the fabric. Pull the thread all the way through.
-
8Repeat through these holes twice, then switch to the other holes.
-
9Switch between opposing pairs until the button is strongly attached.
-
10On the last stitch, push the needle through the material, but not through a hole in the button.
-
11Remove the straight pin.
-
12Wrap the thread. Wrap the thread six times around the thread between the button and the material to reinforce the shank you have created.
-
13Push the needle back down through the material.
-
14Make three or four stitches to secure the thread. Make a few stitches below the button, going back and forth to make them strong. Tie this thread off.
-
15Cut off the excess.
-
16Finished.

Expert Q&A
-
QuestionHow do you reinforce buttons on a coat?
 Seleh RahmanSeleh Rahman is a Tailor, Furrier, and the Owner of Seleh de Federal Hill in Baltimore, Maryland. With over 45 years of experience, Seleh specializes in fur, alterations, and fashion illustration. Seleh studied Fashion Design and Tailoring at Bay College of Maryland. He holds certifications in fur, design, and tailoring.
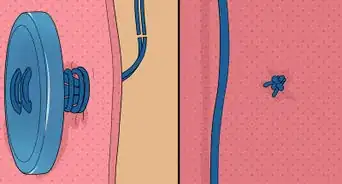
Professional Tailor & FurrierFor this, you'll need a button backing to secure the front button. This way, when you sew on it all together, the top button will come through the hole easily and it will have more security. -
QuestionThe buttons I sewed onto my sweater have a steel loop to sew. How can I get the button not to look like it is falling off? How can I secure it better?
 Community AnswerPut a little button on the other side of the fabric then sew the button on. The small button on the opposite side of the button will pull the external button straight outward and keep it neatly in place.
 -
QuestionDoes a button getting loose mean you're fat?
 Community AnswerNo, not generally. In some cases it could result from gaining weight, but more likely, the thread just came loose because that just happens over time, or it wasn't sewn on very well in the first place.
Warnings
- Take care not to poke yourself with the needle. If you are sewing heavy fabric, use a thimble to push the needle.⧼thumbs_response⧽
References
- ↑ https://www.sewmag.co.uk/how-to-sew/how-to-sew-a-two-hole-button
- ↑ https://www.ties.com/blog/how-to-sew-a-button
- ↑ https://www.allfreesewing.com/Basics-and-Tutorials/Hand-Sewing-Buttons
- ↑ https://www.apartmenttherapy.com/the-best-way-to-sew-on-a-button-221760
- ↑ https://sew4home.com/tips-resources/sewing-tips-tricks/how-sew-button-hand
About This Article

To sew a button, first thread a needle and tie a knot at the end of the thread. Place the button on the fabric where you want to sew it, making sure it’s lined up with the corresponding button hole. Then, bring the needle and thread up through one of the holes in the button. Place a straight pin underneath the button next to the stitch you just made, which will prevent it from getting stitched too tightly to the fabric. Next, bring the needle and thread down through the other hole. Repeat the process until the button feels secure. Then, push the needle and thread through the fabric, but this time don’t go through one of the holes in the button. Remove the straight pin, and wrap the thread around the stitching between the button and fabric 6 times. Bring the needle and thread down through the fabric again, and stitch 3-4 more stitches through the holes in the button. Finally, tie off the thread and cut the excess off with scissors. If you’re sewing a button with 4 holes instead of 2, follow the same process but alternate the pair of holes you’re stitching through. For help making your button more secure, scroll down!