wikiHow is a “wiki,” similar to Wikipedia, which means that many of our articles are co-written by multiple authors. To create this article, 18 people, some anonymous, worked to edit and improve it over time.
wikiHow marks an article as reader-approved once it receives enough positive feedback. This article received 11 testimonials and 87% of readers who voted found it helpful, earning it our reader-approved status.
This article has been viewed 566,395 times.
Learn more...
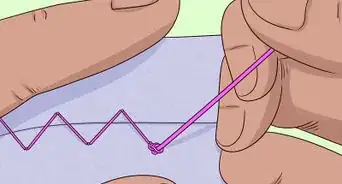
Blanket stitch is used for working the edges of table-covers, mantel valances, blankets, etc., or for edging any other material, including clothing. The blanket stitch is similar to the method used for the buttonhole stitch but there is more space between the stitches and a definite requirement for even regularity. This stitch is also quite easy and would be a good project to do with kids!
Steps
Beginning
-
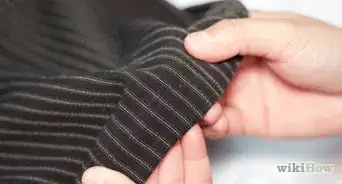
1Keep in mind the need for regular stitching when sewing blanket stitch. The blanket stitch is as much decoration as it is functional. Regular stitching with the same space between each one will make your finished product look nice and even.
- You can also alter the vertical stitches for a unique look if you choose. For example, you could have one stitch closer to the edge and the next farther from the edge, then closer again and so on.
-
2Choose your thread. Because the blanket stitch is decorative it is better to choose a slightly thicker thread. This way it will stand out against your fabric. It should be whichever color you prefer to go along with your fabric.Advertisement
-
3Thread your needle and tie a knot at the end of the long thread. Push the thread through the head of the needle to thread it. Leave one end long and the other shorter, about 6- 12 inches (15-30 cm). With kids, it might be better to do a double thread and tie both ends together at the long end. This way they do not get frustrated if the thread comes out of the needle.
-
4Choose your stitching direction. This will either be left to right or right to left. Many prefer left to right although either direction will work fine.
-
5Push the needle through the cloth from back to front about half an inch (1 cm) away from the edge. Use your left thumb to hold down the thread so it does not pull through the needle (if you have knotted both ends of the thread together then this is not necessary). Starting back to front will leave your knot on the back side where it won't be seen easily.
- If you are sewing one layer then the knot should be on the back side of your fabric.
- If you are sewing two layers then the knot should be between the two fabrics where it will not be seen. Once you have finished sewing the knot will be inside and the stitches will thus look neater.
- If you are sewing in from the edge (two pieces of fabric with one on top smaller than the other) then this first stitch should come out along the bottom edge of the fabric on top.[1]
-
6Bring the thread around the edge of the fabric and back through the same spot as the first stitch. Your first and last stitches should always be two jumps in the same spot. This way the first and last stitches are vertical like the others rather than on a diagonal.
-
7Push your needle through the loop you just made. If you are sewing left to right then your needle should be pushed through to the right along the edge of the fabric. The opposite is true if you are sewing right to left. This anchors your thread but is not a true stitch.


Edge Sewing
-
1Move a short distance to the right (or left if sewing right to left) and insert the needle at the upper end of the line. The thread will come out directly below on the lower line.
-
2Pull the needle through the loop that has now appeared. The loop should be underneath with your thread coming out over the top of it. You have just completed your first true blanket stitch! Proceed with the next stitch by moving to the right and inserting the needle at the upper end of the line once more .
-
3When you reach the corner, poke your needle down diagonally across from the corner. You could stitch down through the same hole as the previous one or simply make a hole on the diagonal.
-
4Pull your thread through the loop as in the normal blanket stitch. After poking the needle down, draw it through the loop as you would when stitching along the edge. You will now have completed your corner stitch!
-
5Push the thread through vertically on the next edge. This following stitch can either be in the same hole as the corner stitch and the last one on the preceding edge, or it can be a new hole. It is personal preference as to which option you choose.
Adding a New Thread
-
1Poke your needle down as if you are beginning a new stitch but do not finish the stitch.
- If you are sewing a single layer along the edge or sewing in from the edge then simply let the thread come out the back of the fabric.
- If you are sewing two layers along the edge then only push the needle through the upper layer, allowing the excess thread to come out between the layers.
-
2Leave enough of a loop for the next thread to pull through. This should not be so loose that there will be extra thread nor so tight that your next stitch will not be able to catch the loop as in the basic blanket stitch. You can pull the thread to the side where it would be pulled flat at the end of the stitch to determine how loose you must leave it.
-
3Tie a knot in the thread tight along the fabric. You will want to tie this knot right at the edge of the fabric (either on the back side or in between the two layers) so that the thread cannot become too loose.
-
4Thread your needle with your new thread. You can choose a different color for this next thread to add variety or use the same color thread. Tie a knot in the end of the thread, either in the longer end of the thread or tying both threads together at the end.
-
5Start by poking through your next thread. This will begin the stitches with your added thread.
- If you are sewing one layer along the edge then you should tie the new thread onto the knot at the end of the old thread, attaching the two together.
- If you are sewing two layers along the edge then your new thread should start in between the two layers and come out through the back of the fabric.
- If you are sewing in from the edge then your new thread should start the same as when you began your first stitch, from back to front along the bottom edge of the fabric.[2]
-
6Slide your needle under the loose loop you left from the previous thread. Sliding your needle under the loose loop will make it seem as though the stitching has not been interrupted. It is as though you are completing the second part of the basic blanket stitch (pulling the thread through the loop) with your new thread.
-
7Pull your thread tight and continue stitching as normal. After pulling the thread tight you will push the needle down along the upper line and pull it through the loop as in the basic blanket stitch.

Finishing
-
1Repeat this stitch-through-loop until you come to the end of the fabric.
-
2Connect your last stitch to your first stitch by sliding your needle sideways underneath your first stitch. This completes the edging of all your stitches.
- If you are sewing in from the edge you will not have a stitch to slide under. You can simply poke your needle down through the back on the right side of your last stitch. Then knot the thread at the back of the fabric.
-
3Poke the needle through the top of the first stitch you made and knot it at the back. This should result in two threads along the same line and complete your blanket stitch.
- If you are sewing two layers along the edge then do not poke your needle through at the top of the first stitch. Rather loop your thread underneath your first stitch once again and before pulling it tight send your needle through the loop to make a knot. Then pull it tight.
-
4Cut off the extra thread. Cut off any remaining thread to make your stitches look tidy.
- If you are sewing two layers along the edge then you can push your needle between the layers and out through the front about 1 inch (2.5 cm) from the edge. Then cut off the excess thread very close to the top layer of the fabric. The thread should be pulled inside, hiding the knot from view.
-
5Add variety if you choose. Now that you have mastered the blanket stitch you can experiment with new styles for different looks. The blanket stitch may be varied in many ways by:
- Sloping the stitches alternately to right and left
- Working two or three together, and leaving a space between them and the next set; or
- Working a second row around the edge of the cloth over the first with a different shade of wool.


Community Q&A
-
QuestionHow can I keep the stitches straight and evenly spaced?
 Community AnswerSet your sewing machine to make a long stitch and machine-baste along the edge where you are making the stitches. Use the stitches as a guide to where to place your blanket stitches. Remove the basting when you are done.
 -
QuestionHow do I tie the end easily? I always fail it!
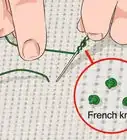
 PhoebeAmelia24Community AnswerJust make a loop, then pull the needle through. Then take the needle and pull it through the fabric to hide the end, then cut it off. Of course, you could always do a French knot and cut the end.
Things You'll Need
- Needle
- Thread
- Blanket or similar sewing project

References
About This Article
To sew a blanket stitch, choose your stitching direction, which will either be left to right or right to left. Push the needle through the fabric from back to front about ½ inch (1 cm) away from the edge. Next, bring the thread around the edge of the fabric and back through the same spot as the first stitch. Push the needle through the loop you just made, then move a short distance to the right (or left if sewing right to left), insert the needle at the upper end of the line, and pull the needle through the loop to complete your first blanket stitch. If you want to learn how to add more thread to your stitches, keep reading the article!