This article was co-authored by Lois Wade. Lois Wade has 45 years of experience in crafts including sewing, crochet, needlepoint, cross-stitch, drawing, and paper crafts. She has been contributing to craft articles on wikiHow since 2007.
wikiHow marks an article as reader-approved once it receives enough positive feedback. In this case, 88% of readers who voted found the article helpful, earning it our reader-approved status.
This article has been viewed 380,543 times.
Buttonholes are fairly quick and easy to sew. All it requires from you is a bit of patience and some careful marking and measuring beforehand. Keep reading to learn how to make them.
Steps
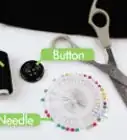
Machine Method
-
1Set your stitch length to "satin" or nearly zero in length.
-
2Put your buttonhole foot on the machine if you have one. While you can make a buttonhole with the "regular" presser foot attachment, the buttonhole foot helps you measure and make buttonholes of equal length easily.Advertisement
-
3Measure the placement of your needed buttonhole(s).
-
4Mark the placement with pins or tailor's chalk.
-
5Place your presser foot at one end of the buttonhole marking.
-
6Zig Zag or Satin Stitch a bar the entire width of the buttonhole. (See No. 1 in drawing)
-
7Set the stitch width to half the width and stitch down on side of the button hole to the other end. (See No. 2 in drawing)
-
8Zig Zag or Satin Stitch a bar the entire width of the button hole at the far end. (See No. 3 in drawing)
-
9Re-set your stitch width to half the width and return back to your starting point, keeping your second stitch line parallel to the first. (See No. 4 in drawing)
-
10Repeat the process for a thicker and more solid stitching line (and therefore buttonhole edge).
-
11Use a seam ripper or sharp scissor to open the area between the sewn edges. Take care not to cut into the threads.

Hand Method
-
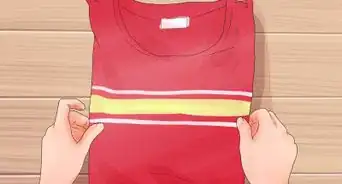
1Measure and mark your buttonhole carefully.
-
2Snip or cut the opening, taking care to leave few, if any, loose threads.
-
3
-
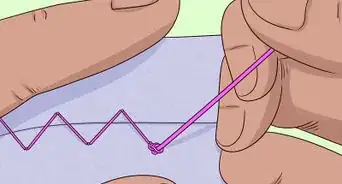
4Bring the needle up from the back side of the material.
-
5Loop the thread through the buttonhole and back up through the material.
-
6Pass the needle through the loop formed and pull snug.
-
7Repeat at close intervals.
-
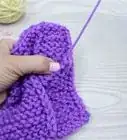
8Continue around the perimeter of the buttonhole slit until all raw edges are covered firmly and smoothly. You can roll the raw edge slightly as you stitch if you wish.
Community Q&A
-
QuestionWhy are buttonholes important in dress making?
 Community AnswerThey are only important if the dress you are making has buttons on it. Since most dresses have buttons, learning how to sew buttonholes is important.
 -
QuestionWhat factors determine the vertical or horizontal buttonhole?
 Community AnswerMost "store-bought" clothing will have vertical buttonholes because they are faster and easier to sew in the factory. Horizontal buttonholes do not slip open as easily so are most common in home-sewn and quality clothing. A buttonhole placed on the front of a woman's blouse directly in line with the largest point of her breasts will prevent gaping that occurs when the button is placed incorrectly (as is done most often in manufactured clothing).
 -
QuestionWhich side do the button holes go into on the back of a girl's dress?
 Community AnswerThe right side. Girls' and women's clothes are right over left. Men's and boys' are left over right.
Warnings
- Needles and scissors are sharp. Handle with appropriate care.⧼thumbs_response⧽
About This Article

To sew buttonholes by hand, start by measuring and marking your buttonhole carefully. Next, snip or cut the opening. Then, bring a threaded needle up from the back side of the material, loop the thread through the buttonhole and back up through the material. Pass the needle through the formed loop and pull it snug. Repeat this stitch at close intervals around the buttonhole slit until all of the raw edges are covered firmly and smoothly. To learn how to sew buttonholes with a sewing machine, keep reading!