This article was co-authored by wikiHow staff writer, Darlene Antonelli, MA. Darlene Antonelli is a Technology Writer and Editor for wikiHow. Darlene has experience teaching college courses, writing technology-related articles, and working hands-on in the technology field. She earned an MA in Writing from Rowan University in 2012 and wrote her thesis on online communities and the personalities curated in such communities.
This article has been viewed 25,834 times.
Learn more...
Since many laptops have built-in microphones, you might not need to set up an external microphone; however, if your built-in mic is faulty you might need to connect an external one. This wikiHow will show you how to use an external microphone on a laptop.
Steps
Connecting via Bluetooth Using Windows 8-10
-
1Turn on your Bluetooth microphone and make sure it's discoverable. Many microphones require you to hold a button down for about 3 seconds until you hear a beep. You can check the reference manual that came with the microphone for specifics.
-
2Advertisement
-
3
-
4Click Devices. This is usually the first option in the second column next to the icon of a keyboard and a speaker.
-
5
-
6Click the action center icon that looks like a speech bubble in the taskbar. It's usually on the side opposite of the Start Menu icon, and can either be an empty or filled speech bubble.
-
7Click Connect. This icon looks like a computer and speaker.
- You might have to click Expand if you don't see this option.
-
8Click your microphone in the list of available connections. If you don't see your microphone listed here, it might not be discoverable. It also might be off or not charged. Check your microphone's manual for more information.
-
9Follow the on-screen prompts to connect your microphone and laptop. Some manufacturers have a default code listed in the manual that you'll need to enter from your laptop to successfully connect the two.[1]
-
10
-
11Click System. This is usually the first option in the first column next to the icon of a laptop.
-
12Click Sound. This is the volume icon and is usually the second in the list.
-
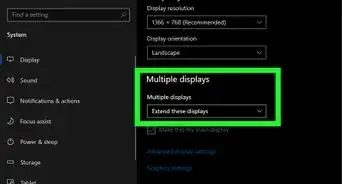
13Make sure your Bluetooth microphone is active under "Input." If it isn't listed, you didn't connect via Bluetooth successfully.
-
14Test your microphone. Say something and watch the meter on the settings page. It should fill with blue when it detects your voice. If not, your microphone is not configured correctly and you can follow the on-screen prompts to troubleshoot by clicking Troubleshoot.


Connecting via Bluetooth Using Mac
-
1Turn on your Bluetooth microphone and make sure it's discoverable. Many microphones require you to hold a button down for about 3 seconds until you hear a beep. You can check the reference manual that came with the microphone for specifics.
-
2Open System Preferences. This is in the Apple menu at the top of your screen.
-
3Click Bluetooth. This should be in the second or third grouping of menu icons with "Software Updates."
-
4Click to select Show Bluetooth in menu bar. You'll see this at the bottom of the window. If you see your microphone in this list, you can select it.
- If you don't see your microphone listed here, it might not be discoverable. It also might be off or not charged. Check your microphone's manual for more information.
-
5Follow the on-screen prompts to connect your microphone and laptop. Some manufacturers have a default code listed in the manual that you'll need to enter from your laptop to successfully connect the two.[2]
-
6Test your microphone in System Preferences. Open System Preferences or go back to the main menu by clicking the back arrow.
-
7Click Sound. This is usually in the second grouping of menu icons with "Displays."
-
8Click the Input tab. You'll find this to the right of "Sound Effects."
-
9Click to select your microphone. Once you select your microphone, you'll see the levels of audio it's picking up.
-
10Speak into your microphone. You'll see the input level change as you speak. If it does nothing, you might have set up the connection incorrectly and should try again.


Connecting via the 3.5mm Input Jack or USB Cable
-
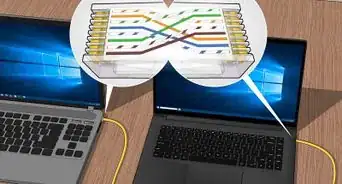
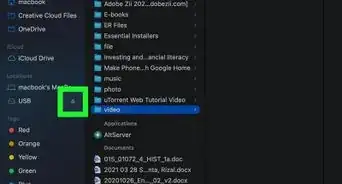
1Plug the microphone into the laptop. Use the appropriate USB port or 3.5mm input jack located at the sides of your laptop.
-
2Select the microphone to be the audio input. If the microphone you're using does not have its own audio interface (if it does, it'll pop-up as soon as you plug in the microphone), you'll need to select it from your computer's audio interface.
- For Windows, go to Control Panel > Sound > Recording or Settings > System > Sound.
- For Macs, go to System Preferences > Sound > Input.
- Use the volume meters here to test how well the microphone picks up your voice.
-
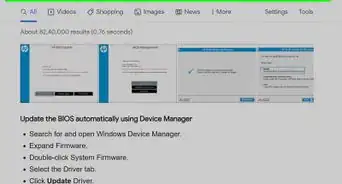
3Download the appropriate drivers (if prompted). You'll see a window pop-up on screen that you should download drivers to use your microphone. If a window does not pop-up, refer to the manual if there are drivers you need to download.
- Not all microphones will need you to download drivers.[3]


References
About This Article

1. Turn on your Bluetooth microphone and make sure it's discoverable.
2. Click Start.
3. Click Settings.
4. Click Devices.
5. Click to turn the switch on next to "Bluetooth".
6. Click the action center icon that looks like a speech bubble in the taskbar.
7. Click Connect.
8. Click your microphone in the list of available connections.
9. Follow the on-screen prompts to connect your microphone and laptop.
10. Test your microphone in Settings > System > Sound.