This article was co-authored by wikiHow staff writer, Nicole Levine, MFA. Nicole Levine is a Technology Writer and Editor for wikiHow. She has more than 20 years of experience creating technical documentation and leading support teams at major web hosting and software companies. Nicole also holds an MFA in Creative Writing from Portland State University and teaches composition, fiction-writing, and zine-making at various institutions.
This article has been viewed 54,820 times.
Learn more...
Now that wireless networks are just about everywhere, it's super easy to transfer files between your desktop and laptop computers. But if you can't connect one or both of computers to Wi-Fi, things get tricky. Having an ethernet cable on hand is one way to connect your computers, but you can also use your USB and/or Thunderbolt ports if you have the right cables. This wikiHow teaches you how to connect a PC laptop to a desktop using a bridging cable, and how to connect a MacBook to a Mac Desktop using a USB or Thunderbolt cable.
Steps
Windows
-
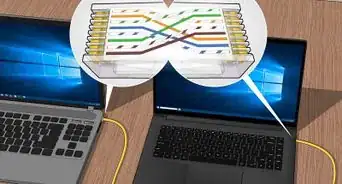
1Get a USB bridging cable. Connecting your PC laptop and desktop through USB ports requires a special bridging cable. These cables are also called USB networking cables, as they can "network" two computers through USB ports. Bridging cables look similar to male-to-male USB cables, but with chips in the middle of the cable (encased in hard plastic) that enable file transfers.[1]
- USB bridging cables come in many forms, including USB-A to USB-A (standard USB on both ends) and USB-A to USB-C. Check both the desktop and the laptop to see what types of USB ports they have, and make sure to get the right cable.
-
2Connect each end of the bridging cable to available USB ports. Bridging cables come with their own file transfer software built in to the cable. Simply plugging the cable in to both PCs will prompt you to install software on each.Advertisement
-
3Follow the on-screen instructions to install the bridging software. If you are not prompted to install software on your computers after connecting them with the bridging cable, go to the cable manufacturer's website and look for a Downloads section. You may need to download the software and run the installer manually.
-
4Open the software that came with your bridging cable. You'll usually find the application at the top of the Windows Start menu in your recently-added apps list. It doesn't matter which computer you open the app on, as either can now access files on both systems.
-
5Drag files between the local and remote computers. The "Local" or "This PC" area contains the files on the PC you're using now—so if you opened the software on the laptop, you'll see the files on the laptop here. The "Remote" area shows the files on the other computer. You can drag any file to or from the Remote PC to copy them as needed.
- File transfer can take a while over USB, so be patient.
-
6Disconnect the cable when finished. When you're no longer waiting for files to transfer between computers, close the bridging cable software and remove the cable—you can do this safely without ejecting through Windows.


Mac (Intel Models)
-
1Know when to use this method. If both the desktop and laptop have Thunderbolt ports and Intel processors, you can use a Thunderbolt cable to connect them for file sharing.[2] Not all USB-C cables support Thunderbolt, and a non-Thunderbolt USB-C cable will not work. To see if each Mac has an Intel processor, perform these steps on both computers:
- Click the Apple menu and select About This Mac.
- If you see "Processor" followed by the name of any Intel processor, you can use this method.
- If you see "Chip" followed by Apple M1 (or similar) on either the desktop or the laptop, see the method for connecting a silicon-based Mac.
-
2Connect a Thunderbolt cable to ports on both Macs. Thunderbolt cables are essentially USB-C cables with added features, so the ports are the same that you'd use for USB-C peripherals. Most Thunderbolt cables have lightning bolts printed on each end of the cable.[3]
-
3Open System Preferences on the Mac you want to share. You can share the hard drive from either the laptop or the desktop, it doesn't matter. You'll find System Preferences in the Apple menu.
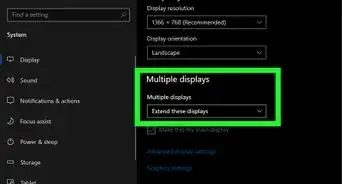
- No matter which computer you share, you'll be able to transfer files to and from each computer's hard drives.
-
4Click Startup Disk. It's the icon of a hard drive.
-
5Click Target Disk Mode. This will shut down your Mac and boot it into a special mode that allows you to share files over Thunderbolt.
-
6Double-click the new disk icon on the other computer. On the computer that you didn't just restart, you should now see a hard drive icon on your desktop. Double-clicking this icon will display the contents of the shared computer's hard drive.
-
7Transfer files between your desktop and laptop computers. You can drag files from the computer with the shared drive into any folder on the computer you're using now, or vice-versa.
-
8Eject the drive and reboot the shared computer. When you're finished, just drag that new hard drive icon from the desktop to the Trash to eject the shared disk. You can then shut down the shared computer by pressing its power button. When you restart it, it will come back up as normal.


Mac (Apple Silicon Models)
-
1Know when to use this method. If either the desktop or laptop computer has an Apple silicon processor, use this method to connect the two computers with a USB, USB-C, or Thunderbolt cable.[4] When you use this method, the Mac with an Apple silicon chip (if there's only one) will appear as an external hard disk to the other computer.[5] As of 2021, these models all have Apple silicon processors, and so will all newer models:
- iMac 24-inch (2021)
- MacBook Pro (13-inch, 2020)
- MacBook Air (2020)
- Mac Mini (2020)
-
2Connect the laptop to the desktop computer with a USB 3.0, USB-C, or Thunderbolt cable. Any of these cables will work, but for the best performance, use a Thunderbolt cable.
-
3Shut down the Mac with an Apple silicon chip. If both Macs have Apple silicon chips, shut down the one that has a hard drive you want to share with the other computer. To shut down the Mac, click the Apple menu and select Shut Down.
-
4Start the Mac up in Recovery Mode. Here's how:
- Press and hold the power button until "Loading Startup Options" appears. At that point, release the power button.
- Click Options.
- Click Continue.
- Log in with an administrator account and click Continue.
-
5Select the drive you want to share and click Start Sharing. The selected hard drive is now accessible from the other Mac.
-
6Open Finder on the other Mac and click Network. You'll see Network under "Locations" in the left panel of Finder.
-
7Double-click the Mac that's sharing a hard drive. A login screen will appear.
-
8Click Connect As and log in with the Guest account. There will be no need to enter a password—just choose the account called Guest and click Connect to log in.
-
9Transfer files between your desktop computer and laptop. You can drag files from the computer with the shared drive into any folder on the computer you're using now, or vice-versa.
-
10Eject the drive and reboot the shared computer. When you're finished, just click the Eject button (it's a triangle above a horizontal line) next to the shared drive in Finder to disconnect. At that point, you can restart the shared Mac to stop sharing.


References
- ↑ https://www.cablematters.com/blog/USB-C/usb-transfer-cable
- ↑ https://support.apple.com/guide/mac-help/transfer-files-mac-computers-target-disk-mode-mchlp1443/mac
- ↑ https://www.macworld.com/article/234713/how-to-tell-if-your-usb-c-cable-is-usb-only-or-supports-thunderbolt-3.html
- ↑ https://support.apple.com/en-us/HT211814
- ↑ https://support.apple.com/guide/mac-help/transfer-files-a-mac-apple-silicon-mchlb37e8ca7/11.0/mac/11.0
About This Article

1. Connect two Macs with a Thunderbolt, USB 3.0, or USB-C cable.
2. Shut down the Mac with an Apple silicon chip.
3. Start the Apple silicon Mac in Recovery Mode.
4. Select a drive to share and click Start Sharing.
5. Open Finder on the other computer and click Network.
6. Double-click the shared Mac in Finder.
7. Click Connect As to connect as a Guest.
8. Drag files between Macs.