This article was co-authored by Stan Kats and by wikiHow staff writer, Darlene Antonelli, MA. Stan Kats is a Professional Technologist and the COO and Chief Technologist for The STG IT Consulting Group in West Hollywood, California. Stan provides comprehensive technology solutions to businesses through managed IT services, and for individuals through his consumer service business, Stan's Tech Garage. Stan holds a BA in International Relations from The University of Southern California. He began his career working in the Fortune 500 IT world. Stan founded his companies to offer an enterprise-level of expertise for small businesses and individuals.
This article has been viewed 500,423 times.
Sharing wirelessly allows multiple users to access files without downloading them separately; e.g.: a shared music folder allowing more than one person to listen to the same files. This wikiHow will teach you how to share files wirelessly. To set up wireless sharing, find the file you'd like to share, right-click on it and select the proper permissions. If both the sending and receiving computers run Windows 10, they can use Nearby sharing to share files.
Steps
macOS
-
1Click the Apple Icon. The Apple logo is in the top-left corner of your screen. [1]
-
2Click System Preferences. You’ll see a new window with four categories, including “Internet & Wireless.” This section has a “Sharing” Folder.
- If you don’t see these categories, click the button with 12 dots located at the top of the window. This button will take you to the main “System Preferences” page on macOS.
Advertisement -
3Click Sharing. The icon looks like a blue folder with a person walking inside a yellow sign. You’ll see a new window with several options at the left, including “File Sharing.”
-
4Check the “File Sharing” box. You'll see this in the menu on the left side of the window.
-
5Click + under “Shared Folders:”. This will open Finder, allowing you to find a folder to share.
-
6Click the folder you’d like to share. Find it by navigating the “Places” option on the left, which includes a “Desktop” folder, “Documents” folder, etc.
- Public folders in each user will be shared automatically. If you don't want to share a folder, select it, then click -.
-
7


Windows 8 and 10
-
1
-
2Locate the file you want to share. Your folders are on the left side of File Explorer and your files display on the right side of the window.
- To find a file from your Desktop, click the “Desktop” folder on the left.
- You can also type the name of the file you’re looking for into the search box in the upper-right corner of the screen and click the magnifying glass for search results.
-
3Right-click on the file. You will see a pop-up menu with “Properties” at the bottom.
-
4Click Give access to. Another window will pop up to the right of the menu.
-
5Click Specific people…. You'll be able to add different users from your computer and network to this list.
-
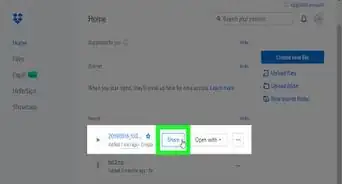
6Click Share. To stop sharing this folder or file, right-click the file again in File Explorer, then select Remove access.[3]


Using Nearby Sharing in Windows 10
-
1Enable Bluetooth and Nearby sharing on both computers. In the action center (which opens when you click the speech bubble icon in the taskbar), click the tiles to enable Bluetooth and Nearby sharing. Blue tiles are active and enabled, while grey tiles are disabled.
- Both the sharing computer and the computer getting the shared file must be using Windows 10 version 1803 or later, Bluetooth, and Nearby share. You can find the settings for Nearby sharing in Settings > System > Shared experiences and Bluetooth in Settings > Devices > Bluetooth & other devices.
- Even though this method explicitly uses files as examples when you're sharing, you can also share image files the same way.
-
2
-
3Locate the file you want to share. Your folders are on the left side of File Explorer and your files display on the right side of the window.
- To find a file from your Desktop, click the “Desktop” folder on the left.
- You can also type the name of the file you’re looking for into the search box in the upper-right corner of the screen and click the magnifying glass for search results.
-
4Single click the file you want to share. You'll see it highlight to indicate that it has been selected.
-
5Click the Share tab. It's at the top of your File Explorer window with Home and View.
-
6Click Share. The icon looks like a curved arrow pointing out of an open box.
-
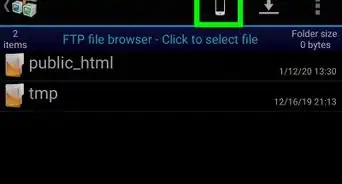
7Click to select the name of the computer you want to share with. Under "Nearby devices" you should see your other computer listed.
-
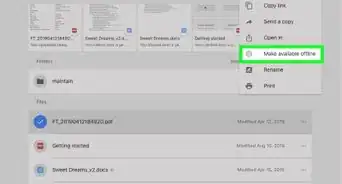
8Click Save & Open or Save on the computer you're sharing with. On the computer receiving the file, you have the option to save or view the file right away, but you have to save the file to continue.[4]
- If you have the Photos app open, you can also use Nearby sharing to share your photos.


Expert Q&A
-
QuestionHow do I share files between two Windows computers wirelessly?
 Stan KatsStan Kats is a Professional Technologist and the COO and Chief Technologist for The STG IT Consulting Group in West Hollywood, California. Stan provides comprehensive technology solutions to businesses through managed IT services, and for individuals through his consumer service business, Stan's Tech Garage. Stan holds a BA in International Relations from The University of Southern California. He began his career working in the Fortune 500 IT world. Stan founded his companies to offer an enterprise-level of expertise for small businesses and individuals.
Professional TechnologistCreate a shared folder on the first computer. Assign a user and password to access it. Then, on your second computer, open Explorer and find that computer in the list on the left. And from there, you simply pick the computer, enter the username and password, and then you can drag and drop files back and forth as you'd like. -
QuestionWhat's the fastest way to share a file on a Mac?Stan KatsStan Kats is a Professional Technologist and the COO and Chief Technologist for The STG IT Consulting Group in West Hollywood, California. Stan provides comprehensive technology solutions to businesses through managed IT services, and for individuals through his consumer service business, Stan's Tech Garage. Stan holds a BA in International Relations from The University of Southern California. He began his career working in the Fortune 500 IT world. Stan founded his companies to offer an enterprise-level of expertise for small businesses and individuals.
Professional TechnologistApple makes this process pretty easy. You just use the Airdrop to share individual fires back and forth. -
QuestionCan I share big files, like 14GB in size?
 David TudorCommunity AnswerThere is no actual limit, but for a file that big it might be better to use a USB stick (also known as a pen drive or memory stick). They are pretty cheap these days.


References
- ↑ http://blog.dlink.com/how-to-share-files-across-a-wireless-network/
- ↑ https://support.apple.com/guide/mac-help/set-up-file-sharing-on-mac-mh17131/mac
- ↑ https://support.microsoft.com/en-us/windows/file-sharing-over-a-network-in-windows-10-b58704b2-f53a-4b82-7bc1-80f9994725bf
- ↑ https://support.microsoft.com/en-us/windows/share-things-with-nearby-devices-in-windows-10-0efbfe40-e3e2-581b-13f4-1a0e9936c2d9
About This Article

1. Click the Apple menu.
2. Select System Preferences.
3. Check the "File Sharing" box.
4. Add the folder(s) you want to share.
5. Close the window.