This article was co-authored by wikiHow staff writer, Jack Lloyd. Jack Lloyd is a Technology Writer and Editor for wikiHow. He has over two years of experience writing and editing technology-related articles. He is technology enthusiast and an English teacher.
The wikiHow Tech Team also followed the article's instructions and verified that they work.
This article has been viewed 1,216,716 times.
Learn more...
When you're in school, you should be paying attention to your teacher and not browsing social media. However, if you really can't wait to check Facebook while at school, there are a few methods you can try to get around some types of school network restrictions. If your school's security is good enough, these methods won't work.
Steps
Using the Facebook Mobile Site
-
1Open a browser. You may need to sign into the browser with your student credentials before you can proceed.
-
2Type m.facebook.com into your browser's address bar. This is the address for the Facebook mobile site.Advertisement
-
3Press ↵ Enter. If your school's network only has "facebook.com" blocked, this takes you to the Facebook mobile site.
- The Facebook mobile site looks different than the regular desktop Facebook site, but it functions the same.


Using a Different Browser
-
1Open a browser. This will likely be your computer's default browser. If Facebook is blocked specifically in your current browser, using a different browser may solve the problem.
- If you can't download a browser on your current computer, you can download it at home and put it on a flash drive.
-
2Go to your preferred browser's download page. Some popular browsers include the following:
- Google Chrome - https://www.google.com/chrome/browser/desktop/index.html
- Firefox - https://www.mozilla.org/en-US/firefox/new/?f=118
- Opera - http://www.opera.com/
-
3Click the "Download" button. This is usually a button near the top or middle of the browser's web page. Doing so will cause the browser's setup file to begin downloading to your computer.
- Depending on your current browser, you may first have to click Save or confirm your choice, or select a download location (e.g., Desktop).
-
4Double-click the setup file. It will be in your computer's default download location (or your specified download location if you selected one).
-
5Install the browser. To do so:
- Windows - Follow the on-screen prompts. Make sure you opt out of any free programs included in the install (e.g., antivirus or search programs).
- Mac - Drag the browser's icon into the "Applications" folder shortcut.
-
6Open your new browser. Double-click the browser's icon to do so.
-
7Go to Facebook's website. Go to https://www.facebook.com/ in your new browser. If your computer's restrictions were only set up in the default browser, you should be able to access Facebook.


Using Facebook's IP Address
Windows
-
1
-
2Type command prompt into Start. This will search your computer for Command Prompt.
-
3
-
4Type ping facebook.com into Command Prompt and press ↵ Enter. You'll see a series of numbers and periods to the right of the "Pinging facebook.com" heading; this is Facebook's IP address.
-
5Open a browser.
-
6Type the IP address into the browser's address bar and press ↵ Enter. If the Facebook URL is blocked but the IP address isn't, this will take you to Facebook's page.


Mac
-
1
-
2Type terminal into Spotlight. This searches your computer for the Terminal app.
-
3
-
4Type
ping facebook.cominto Terminal and press ↵ Enter. -
5Look at the number to the right of "[Number] bytes from". This is Facebook's IP address.
-
6Open a browser.
-
7Type the IP address into the browser's address bar and press ⏎ Return. If the Facebook URL is blocked but the IP address isn't, this will take you to Facebook's page.


Using USB Tethering on Your Phone
iPhone
-
1Connect your iPhone to your computer. Use the USB charger cable that came with your iPhone.
- If using your phone's charger isn't an option, you can try using your iPhone's Wi-Fi hotspot instead.
-
2
-
3Tap Personal Hotspot. This option is near the top of the Settings page.
- Not all service providers include a Personal Hotspot. If you don't see this option, your phone doesn't have a hotspot available.
-
4
-
5Open a web browser. Do this on your computer.
-
6Type
facebook.cominto your browser's address bar, then press ↵ Enter. This should take you to Facebook's home page.- If Facebook is blocked on your computer specifically, even this method won't work for connecting to Facebook.


Android
-
1Connect your Android to your computer. You'll use your Android's charger cable to do so.
- If using your phone's charger isn't an option, you can try using your Android's Wi-Fi hotspot instead.
-
2
-
3Tap More. This option is beneath the "Wireless & networks" heading.
- On a Samsung device, tap Connections.
-
4Tap Tethering & portable hotspot. It's near the top of the page.
- On a Samsung, tap Tethering and Mobile HotSpot.
-
5
-
6Open a web browser. Do this on your computer.
-
7Type
facebook.cominto your browser's address bar, then press ↵ Enter. This should take you to Facebook's home page.- If Facebook is blocked on your computer specifically, even this method won't work for connecting to Facebook.


Using a Proxy Site
-
1Open a browser. You may have to enter your student credentials before continuing.
-
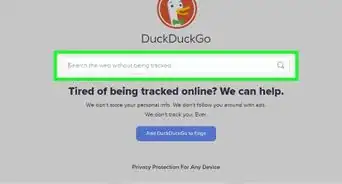
2Search for online proxies. Type free online proxies 2017 into your browser's search bar and press ↵ Enter. Some reputable proxy services include the following:[1]
- Anonymouse
- VPNBook
- FilterBypass
-
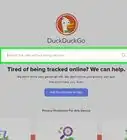
3Type
facebook.cominto the proxy site's search bar. There will usually be a search bar in the middle of the proxy site's page. -
4Click the "Search" button. This button will usually be below the search field. Doing so will run the Facebook search through the proxy, which will cause it to avoid your school's network.


Using a Virtual Private Network
Windows
-
1Make sure you're subscribed to a VPN service. Unlike using a proxy site, virtual private networks (VPNs) require you to set up an account in order to access a server's name and address. You will need the VPN's name and address, as well as login credentials, to connect to a VPN.
- If you want to use your VPN service for longer than a week or so, you'll usually have to pay for it.[2]
-
2
-
3
-
4
-
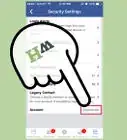
5Click VPN. It's a tab on the left side of the window.
-
6Click Add a VPN connection. This option is at the top of the VPN page.
-
7Select a VPN provider. Click the box below the "VPN provider" heading at the top of the page, then click Windows (built-in).
-
8Enter your VPN's information. This includes the following:
- Connection name - Type a name for your VPN connection into the Connection name field.
- Server name or address - This is where you'll enter your VPN's address.
- VPN type - Click the box below this heading to select your VPN's connection type. You should receive this information along with the VPN's address when signing up for the VPN.
- Sign-in info - Depending on your VPN, this section will vary. You'll usually enter your username and password here.
-
9Click Save. Doing so saves your VPN connection as a network on your PC.
-
10Click your VPN's name. It should now be on the VPN page of the Settings window.
-
11Click Connect. This option is at the bottom of the VPN's name card.
-
12Enter your username and password if prompted. If you didn't select the option to have your VPN save your login credentials while creating it, you'll need to log into your VPN service and click OK to finish connecting to the VPN.
-
13Go to Facebook's website in your preferred web browser. Go to https://www.facebook.com and log in. As long as you're connected to a VPN, you should be able to use Facebook.


Mac
-
1Make sure you're subscribed to a VPN service. Unlike using a proxy site, virtual private networks (VPNs) require you to set up an account in order to access a server's name and address. You will need the VPN's name and address, as well as login credentials, to connect to a VPN.
- If you want to use your VPN service for longer than a week or so, you'll usually have to pay for it.
-
2
-
3Click System Preferences. This option is near the top of the Apple drop-down menu.
-
4Click Network. It's a purple globe-shaped icon.
-
5Click +. This option is in the bottom-left corner of the Network page, just below the list of network names.
-
6Select the VPN option. Click the box to the right of "Interface:", then click VPN in the drop-down menu.
-
7Select a VPN connection type. Click the box to the right of "VPN Type", then select your VPN's connection type (e.g., L2TP over IPSec).
- The VPN's site should provide this information.
- MacOS Sierra does not support PPTP connections.
-
8Enter a name for your VPN. This can be whatever you want to name the network.
-
9Click Create. It's the blue button in the bottom-right corner of the window.
-
10Configure your VPN. Enter the following information:
- Configuration - Make sure this box says "Default".
- Server Address - Type in your VPN's address here.
- Account Name - Type in your subscription's account name here.
-
11Click Authentication Settings. It's below the Account Name text field.
-
12Type in your User Authentication information. Check the box to the left of your VPN's User Authentication option (e.g., Password) and then type the answer in.
-
13Type in your Machine Authentication information. This section is near the bottom of the window. Most VPNs use the "Shared Secret" option; check this box, then enter your VPN's shared secret phrase.
-
14Click OK. It's near the bottom of the Authentication Settings window.
-
15Click Advanced. It's near the bottom of the window.
-
16Check the "Send all traffic over VPN connection" box, then click OK. This ensures that all sites you visit will use the VPN connection.
-
17Click Apply. This saves your VPN settings and creates your network.
-
18Click Connect. It's below the Authentication Settings option. Doing so will prompt your Mac to connect to the VPN.
-
19Go to Facebook's website in your preferred web browser. Go to https://www.facebook.com and log in. As long as you're connected to a VPN, you should be able to use Facebook.


Community Q&A
-
QuestionWhat if my school uses the secURLy web blocker to block Facebook?
 Community AnswerYou can try an online web proxy, such as go2walk.com.
 -
QuestionHow do I convince my school to allow Facebook?
 Community AnswerThey don’t want you to be distracted, so it will likely be close to impossible to do so.
 -
QuestionI have tried everything on Google to unblock Facebook from the school laptops but can't figure it out. Any ideas?Community AnswerThey may have it locked up so tight that you need to be an administrator to unblock it. Maybe use the time you've spent trying to unblock Facebook and devote it to your school work instead.
Warnings
- Using your phone's data as a hotspot will result in additional fees on your bill if you exceed your monthly data limit.⧼thumbs_response⧽
- Your network may block any links that are related to proxy servers, regardless of the web address.⧼thumbs_response⧽
- Your network may be visually monitored by teachers, technicians, and/or administrators.⧼thumbs_response⧽