This article was co-authored by wikiHow staff writer, Jack Lloyd. Jack Lloyd is a Technology Writer and Editor for wikiHow. He has over two years of experience writing and editing technology-related articles. He is technology enthusiast and an English teacher.
The wikiHow Tech Team also followed the article's instructions and verified that they work.
This article has been viewed 467,044 times.
Learn more...
This wikiHow teaches you how to remove a key from a MacBook's keyboard, as well as how to put it back. MacBook keys are relatively easy to remove and replace, but you will need to be extremely gentle when doing so in order to minimize the risk of damaging your Mac's keyboard. Removing a MacBook key won't necessarily void your warranty with Apple, but if you have any doubts, it's always better to take your Mac into an Apple Store than it is to perform the repair yourself.
Steps
Removing the Key
-
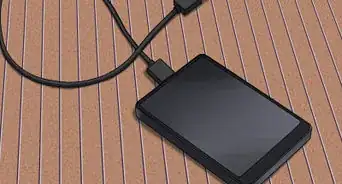
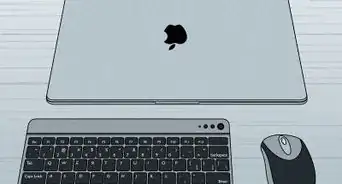
1Unplug your Mac's charger and turn off your Mac. Click the Apple menu , click Shut Down..., and click Shut Down when prompted. This will make sure that you cannot be shocked, and it also ensures that you don't accidentally harm your Mac while removing the key.[1]
-
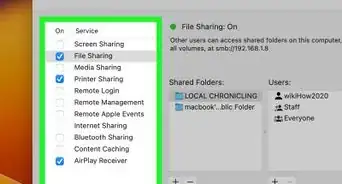
2Ground yourself. Even though you aren't likely going to be touching circuitry or equally sensitive components in your Mac, grounding only takes a few seconds and it eliminates the risk—however small—of harming the key's electrical components.Advertisement
-
3Find a tool with which to pry up the key. You need something relatively wide, very thin, and durable. Some examples include the following:
- Guitar pick
- Credit card
- Plastic spudger
- Plastic butter knife
-
4Gather your other tools. You'll need a Q-tip to clean the space between the keys, and a toothpick (or a similarly thin, pliable object) to remove any excess grit around the key.
-
5Remove any grit from under the key. Using the toothpick or similar object, scrape around the underside of the key. Any crumbs, dirt, or other foreign matter should come away from the key as you do this.
- Make sure you don't jam the toothpick into the key's underside; as always, be gentle.
- Only insert the toothpick around an eighth of an inch into the space below the key.
-
6Clean the area around the key. Dip your Q-tip in some warm, clean water, then squeeze the excess water out—you only need the Q-tip to be a bit damp for this step—and swab the area around the key.
- This is to remove any sticky or greasy build-up around the key, which will make removing the key easier.
- This step will also help clear away any residual grit left from your toothpick scraping.
- You can use isopropyl alcohol instead of water if the residue around your key is particularly stubborn.
-
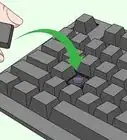
7Insert the prying tool into the space above the top of the key. This is where the key will be easiest to detach.
-
8Gently pry the key up. You will have to run the prying tool back and forth as you do so; as soon as you hear a couple of light snaps, the key is detached.
- It may help to press the bottom of the key down once the tool is inserted to help the tool gain more traction.
-
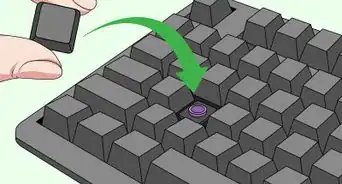
9Rotate the key up, then pull it straight up. The key should be facing you when you pull it up, since this will prevent the key's hooks from staying attached.
-
10Perform your repairs as needed. Once you're finished doing whatever it is you need to do with the key carriage, you can proceed with putting the key back.


Replacing the Key
-
1Reassemble and replace the key carriage if necessary. There is a white bracket and a smaller plastic piece that fits inside of it on which the Mac key rests; this assembly can easily pop out and fall apart when removing the Mac's key. To put it back in place, simply re-insert the smaller piece into the bracket, then place the carriage back in the key slot lengthwise with the small square hole on the right side of the key slot.
-
2Place the bottom of the key in the slot. Do this at a 45-degree angle. The goal here is to get the white hooks at the bottom of the slot to catch on the underside of the key.
- If the hooks don't catch, remove the key and try again.
-
3Gently lower the key into place. The key should be almost flush with the other keys.
-
4Press down on the top of the key. This will clip the key into place.
-
5Press all the way around the key. You should hear a couple of light snapping noises; this signifies that the key is back in place.
-
6Test the key. Press down on the key to ensure that it springs back up. If it does, your key should work normally.
- If the key doesn't spring back up, that means that the hooks didn't properly catch.
- The key failing to spring up can also be symptomatic of a faulty key assembly.


Our Most Loved Articles & Quizzes


Warnings
- Removing keys may, in certain circumstances, void your warranty with Apple.⧼thumbs_response⧽


About This Article
1. Turn off the Mac and unplug it.
2. Ground yourself.
3. Find a guitar pick, credit card, or plastic spudger.
4. Find a toothpick and Q-tip for cleaning.
5. Use the toothpick to clean around the key.
6. Dampen the Q-tip to clean around the key.
7. Insert the prying tool under the key.
8. Gently rotate and pry the key up.