This article was co-authored by Mobile Kangaroo and by wikiHow staff writer, Jack Lloyd. Mobile Kangaroo is a full service repair shop and Apple Authorized Service Provider headquartered in Mountain View, CA. Mobile Kangaroo has been repairing electronic devices such as computers, phones, and tablets, for over 19 years, with locations in over 20 cities.
This article has been viewed 376,441 times.
This wikiHow teaches you how to attempt to fix an unresponsive keyboard key. If cleaning the key's slot and re-seating the key doesn't fix your key's problems, you may need to replace the key altogether.
Steps
Preparing to Repair or Replace a Key
-
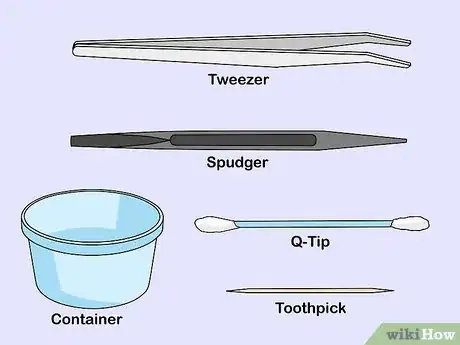
1Gather your repair equipment. In order to attempt to repair a key on your laptop's keyboard, you'll need the following items:
- Prying item - Something plastic, such as a credit card or a spudger, is best; you can use a butter knife or a flathead screwdriver in a pinch.
- Q-tip - Used to clean grit and dust from the area surrounding the key.
- Toothpick - Used to clean grooves around the key.
- Tweezers - Used to pull away pieces of the key carriage. Not necessary for all computers, but helpful.
- A container - Used to store the pieces of the key while you make the repairs. You can use a bowl, a plastic bag, or any similar such item here.
-
2Know the anatomy of a key. Most keyboard keys are comprised of three parts: the key cap (which is the key itself), the key carriage (a flat piece of plastic on which the key sits), and the key pad (a piece of rubber that sits between the key and the carriage).
- Most MacBook keys don't have the rubber key pad.
- Many computers' key carriages are comprised of two or more pieces of plastic that nest together.
Advertisement -
3Find a clean workspace. It's best to find a flat, clean, indoor area, such as a kitchen table or a counter, on which to perform your repairs.
-
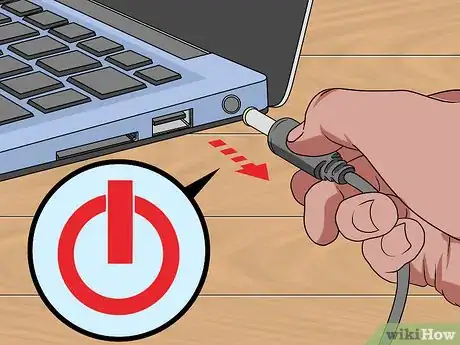
4Turn off and unplug your computer. Make sure that your computer is off and not plugged into a power source when your go to remove a key.
- You may want to remove the computer's battery as well, if possible.
-
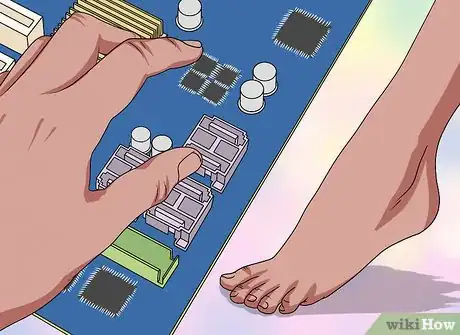
5Ground yourself before attempting any repairs. While the chances of you damaging your computer's internals with static electricity via a key repair are slim, grounding only takes a second and is good practice for dealing with electronics in general.
Repairing a Key
-
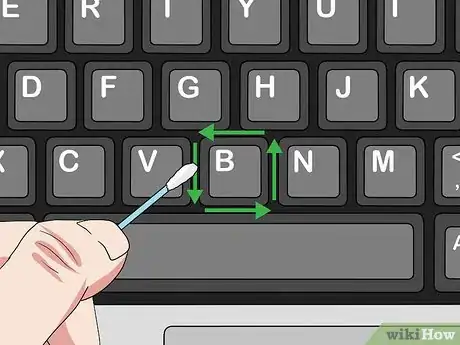
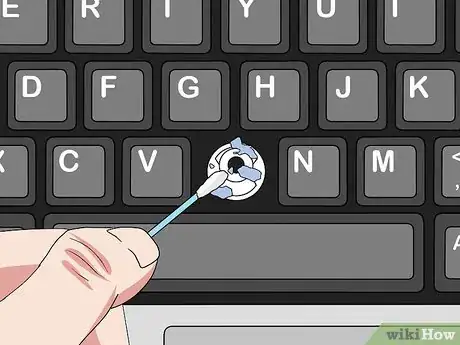
1Clean the area around the key. Using a damp q-tip, swab the area between the key that you want to replace and the surrounding keys. This will usually constitute moving the q-tip in a square around the key.
- If your keyboard is sticky or grimy, you can use a small amount of isopropyl alcohol on the q-tip to help remove the grime.
-
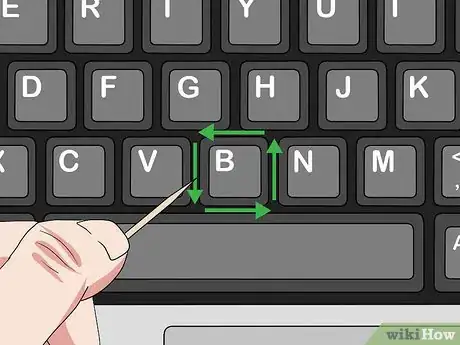
2Clean the grooves beneath the key. Use the toothpick to scrape gently the space below and around the key. This will help prevent any loose dust or grit from falling down into the key's slot.
-
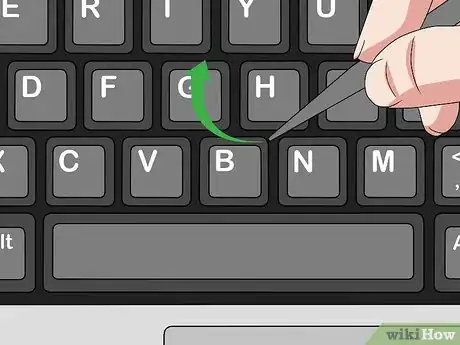
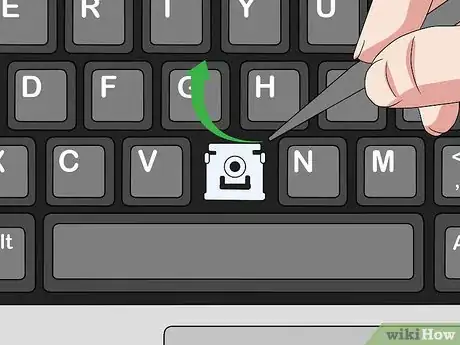
3Remove the key. Pry up the bottom of the key at a 45-degree angle, then pull it away from the keyboard and set it somewhere safe.EXPERT TIPMobile Kangaroo is a full service repair shop and Apple Authorized Service Provider headquartered in Mountain View, CA. Mobile Kangaroo has been repairing electronic devices such as computers, phones, and tablets, for over 19 years, with locations in over 20 cities.Computer & Phone Repair Specialists

 Mobile Kangaroo
Computer & Phone Repair SpecialistsYou can usually remove, clean, and restore unresponsive keys. A lot of the time, the key is just dirty and needs proper cleaning to work again. If that doesn't work, you might need a full keyboard replacement.
-
4Review the carriage for bent or out-of-place parts. If the carriage isn't laying flat or it appears to be warped, try gently pressing down on the bent part to see if it will snap back into place.[1]
- Likewise, if the key cap is tilted or loose, try pressing down on it to see if it snaps back into place.
-
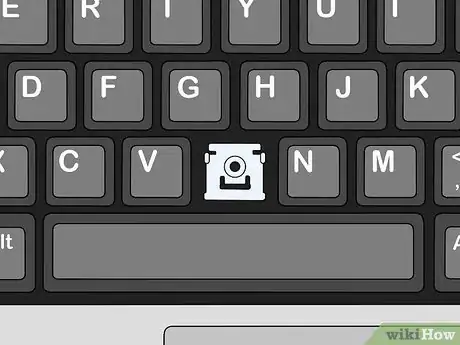
5Remove the key's internal parts. This includes the carriage and key pad.
- Be sure to note the position of the internal parts so that you can place them back later.
-
6Look for and remove any obstructions. One of the most common reasons for computer keys failing to work is foreign material in the area beneath the key. If you see any dust or residue, remove it and clean the area.
-
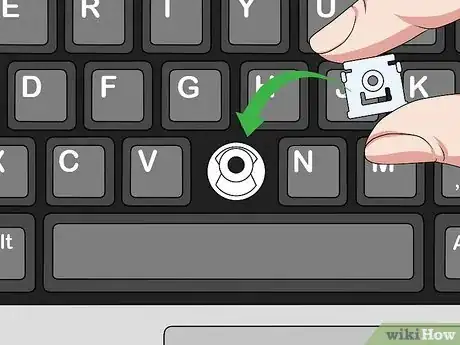
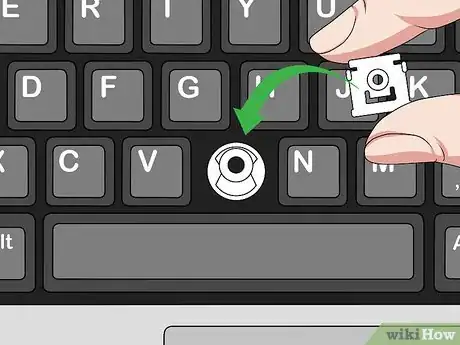
7Re-insert the key's carriage and pad. Place both the carriage and pad back in the key slot in the way in which they were initially set. You may have to press down on parts of the carriage to lock it into place.
-
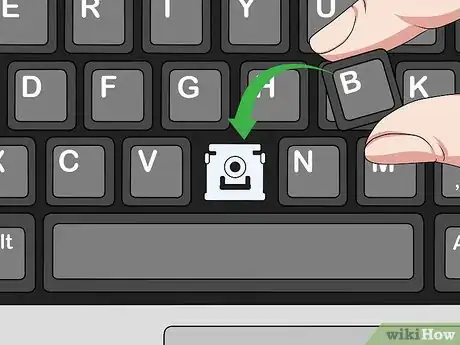
8Place the key back in its slot. Insert the top of the key into the slot at a 45-degree angle, then lower the rest of the key into the slot. This should allow the hooks that are typically at the top of the key to catch when placed.
- If there aren't hooks at the top of the key, this will still allow the key to come to a naturally horizontal resting position when you lay it down.
-
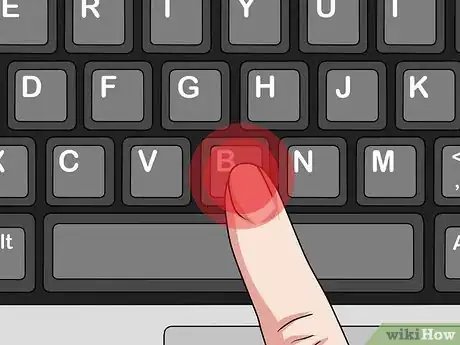
9Press down firmly on the key. This will snap the key back into place. It should spring back up immediately after you remove your finger.
- If the key is still broken (e.g., it won't spring back up, its letters don't type, etc.), you'll need to replace the key instead.
Replacing a Key
-
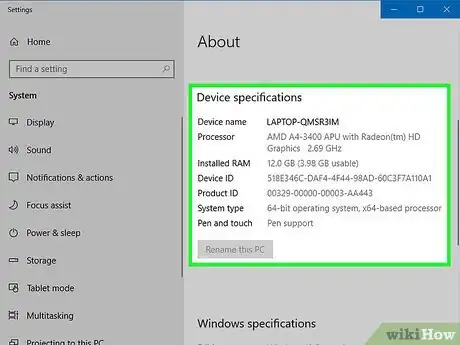
1Find your computer's model information. In order to find a replacement key for your computer, it's important to know your computer's model type:
- Windows - Open Start , type in this pc, click This PC, click the Computer tab in the upper-left corner, click System Properties, and look at the name below the "Device specifications" heading. Your laptop's brand should be listed on the lid.
- Mac - Open the Apple menu and click About This Mac, then look at the line of text below the "Version" text.
-
2Look up your computer's key replacement. Type your computer's manufacturer name and model number, followed by replacement key, into Google and review the results.
- For example, you might type asus q553ub replacement key into Google.
-
3Order replacement keys. Depending on your model of computer and your regional location, your options for ordering keys will vary.
- Places like eBay, Amazon, Best Buy, and many other online stores stock key replacements.
-
4Remove the key and its internal parts. As with repairing the key earlier, make sure that you are aware of the key's parts' location before removing them so that you have a reference.
- If you can take a reference picture before removing the key's internal parts, do so.
-
5Place the replacement key's carriage in the key slot. It should be positioned in exactly the same way in which the former carriage was positioned.
-
6Snap the key pad into place. Push the key pad into the center of the carriage, then press down until it clicks or snaps into the carriage.
- Skip this step on a MacBook or any other keyboard that doesn't use key pads.
-
7Lay the replacement key in the key slot. Insert the top of the key into the slot at a 45-degree angle, then lower the rest of the key into the slot.
-
8Press down firmly on the key. The key should snap into place, and it should spring up immediately after you remove your finger.
- Test your key before you throw away your receipt.
Community Q&A
-
QuestionI successfully reattached the key, but now it doesn't register on the screen when it's pressed, although it feels 'right' to the touch. What do l need to do?
 Community AnswerFirst, take the key - you should see a small white button underneath. Press it. If it doesn't respond, you need a new key. If it does work, make sure the key is perfectly aligned with the button.
 -
QuestionI put the key on and only half remains on; the other half just lifts. What do I do?
 Community AnswerCompletely remove the key. Put the lose side in the slot, then click the other side in.
 -
QuestionThe key isn't completely going in. Any reason why?
 Community AnswerYou need to completely remove the key and put the bottom on first. Next clip, the top on.
Warnings
- If your key still won't work after being replaced, your keyboard's circuit board is most likely the problem. Having a laptop circuit board replaced is generally a task best left to a tech department (e.g., the Apple Store or a place like Best Buy).⧼thumbs_response⧽
