This article was co-authored by wikiHow staff writer, Darlene Antonelli, MA. Darlene Antonelli is a Technology Writer and Editor for wikiHow. Darlene has experience teaching college courses, writing technology-related articles, and working hands-on in the technology field. She earned an MA in Writing from Rowan University in 2012 and wrote her thesis on online communities and the personalities curated in such communities.
This article has been viewed 104,587 times.
Learn more...
Normally, when you share a live stream, it disappears when you finish. You can, however, enable Twitch to save your past live streams and list them as "Video On Demand" or VOD. After you enable that setting, you can highlight your streams to save forever on your channel. This wikiHow will show you how to save your Twitch live streams as VODs as well as how to save your streams as Highlights.
Steps
Saving Your Live Streams
-
1Go to https://www.twitch.tv/ in a web browser. The apps are unable to access this feature, so you'll need to use the site.
- Log in if prompted.
-
2Click your profile icon. You'll see this in the upper right corner of the page.Advertisement
-
3Click Creator Dashboard. You'll find this in the first grouping of menu options, with Video Producer and Channel.
-
4Click the Channel tab. You'll see this at the bottom of the menu on the left of the page. It's under the header "Settings."
-
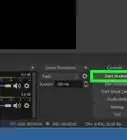
5Click the switch to the on position next to "Store past broadcasts." Any settings you change are automatically saved, so you can exit the settings dashboard.
- Your next stream will be saved for up to 14 days if you're a normal Twitch user. If you're an affiliate, partner, Prime, or Turbo user, your stream will be saved for up to 60 days.[1]


Saving Your Streams as Highlights
-
1Go to https://www.twitch.tv/ in a web browser. You'll have to enable Twitch to store past broadcasts before you can complete this step; if you haven't, you can follow the previous method to enable storing past broadcasts. When you highlight a past broadcast, it'll save to your Highlights section forever. You can highlight an entire video if you don't want it deleted from Twitch.
- Log in if prompted.
-
2Click your profile icon. You'll see this in the upper right corner of the page.
-
3Click Channel. Your Twitch channel will open.
-
4Click the Videos tab. You'll see this above the middle panel of your channel, with Clips and Events. A list of all your videos will load.
-
5Click the All Videos box. A menu will dropdown.
-
6Click Past Broadcasts. The box will close and the videos presented will filter to show only past broadcasts.
-
7Click on a video to highlight. The video will load in the page.
-
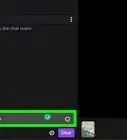
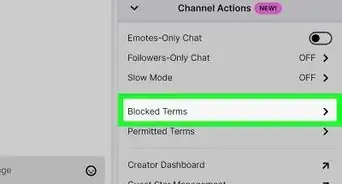
8Click ⋮. You'll find this below the video, on the right, next to Share.
-
9Click Highlight. Your video will load in the Highlight Interface.
-
10Drag and drop the ends of the yellow bar to create your highlight. You can preview your highlight in the video box above.
-
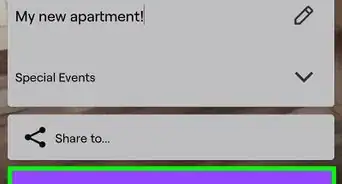
11Click Create Highlight. This is a purple button above the yellow bar and timeline. You'll be directed to a page while the video processes. You have the opportunity to change the highlight's name and description.
-
12Click Save Changes. You'll see this in the lower right corner of the processing window. The video may take a few moments to process, but it is now a highlight and will permanently stay on your Twitch profile.[2]


Downloading Twitch Videos
-
1Download and install the current version of Twitch Leecher from https://github.com/Franiac/TwitchLeecher/releases. Twitch Leecher is third-party software that is highly suggested and recommended for downloading Twitch videos, but it is only available for Windows computers.
- To download your own videos, you will see an option to Download under each video you have on Twitch in the Video Manager.
- Click the ".exe" file and click Run when prompted. Follow the on-screen prompts to finish the installation process.
-
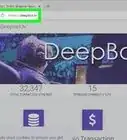
2Go to the Twitch video you want to download in a web browser. You can use any web browser for this step because you're only getting the video link.
-
3Right-click on the video. A menu will pop up.
-
4Click Copy Link, Copy Link Location, or Copy link address. Each browser uses different wording, but you want to copy the video's link.
-
5Open Twitch Leecher. You'll find this in your Start Menu.
-
6Click Search. You'll see this at the top of the application window. I
-
7Click the URLs tab. You'll see a large white text box appear.
-
8Paste the copied video link into the white text box. You can press Ctrl+V or right-click in the box and click Paste.
-
9Click Search. You'll see this under the white text box. The video will load as a search result.
-
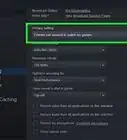
10Click Download. You'll see this under the video and to the right.
- You can change the default downloading options for the quality, download location, downloaded filename, and the start and end times of the video.[3]
-
11Click Download. You'll see this in the bottom left corner of the page. The video will download to the location specified in the previous step.


References
About This Article

1. Go to https://twitch.tv.
2. Click your profile icon.
3. Click Creator Dashboard.
4. Click the Channel tab under Settings.
5. Click the switch to the on position next to "Store past broadcasts".