This article was co-authored by wikiHow staff writer, Nicole Levine, MFA. Nicole Levine is a Technology Writer and Editor for wikiHow. She has more than 20 years of experience creating technical documentation and leading support teams at major web hosting and software companies. Nicole also holds an MFA in Creative Writing from Portland State University and teaches composition, fiction-writing, and zine-making at various institutions.
There are 13 references cited in this article, which can be found at the bottom of the page.
This article has been viewed 138,037 times.
Learn more...
Worms are rapidly-spreading viruses transmitted through insecure networks, e-mail attachments, software downloads, and social media links.[1] Worms primarily affect PCs, but Mac users can unknowingly spread them throughout the Internet. And while viruses don’t affect Android or iOS, they can fall prey to other malware. Learn how to remove a worm from your Windows PC with a virus-removal tool, remove malware from Macs and mobile devices, and how to best protect yourself from malware in the future.
Steps
Windows
-
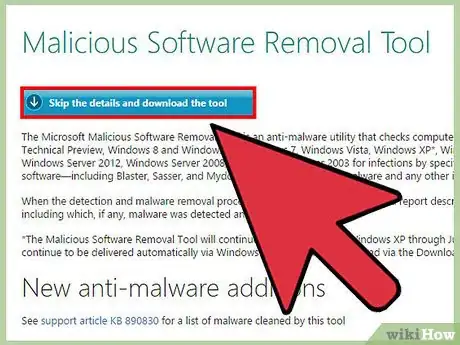
1Download a virus removal tool like Microsoft's Malicious Software Removal Tool.[2] If you think you have a worm virus, download a dedicated virus removal tool to scan for and remove viruses. Do this even if you already have antivirus software, as the software on your computer may be infected. Once you’ve chosen a virus removal tool, download it to your desktop.
- Most companies that sell antivirus software also offer free virus removal tools. Some options besides Microsoft’s own are Kaspersky Free Virus Scan and Sophos Virus Removal Tool.
- If you can’t use a web browser on the infected computer, use a different computer to download a virus removal tool, then burn it to a CD or DVD. Insert the burned disc into the infected machine, press ⊞ Win+E to launch File Explorer, then double-click your DVD-ROM drive to find the tool.
-
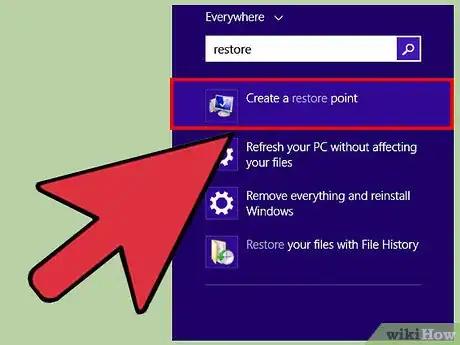
2Press ⊞ Win+S to open Search, type “restore”, then click “Create a restore point” in the search results.[3] Worms and other malware can hide in the System Restore files, which may hide them from virus removal tools. You should turn off System Restore before running the removal tool to prevent this from happening.
- Windows 7 and Vista users should type “protection” into the search box instead, then click “System protection.”
Advertisement -
3Click Configure on the dialog, then check “Disable System Protection.” This works on any Windows version.
-
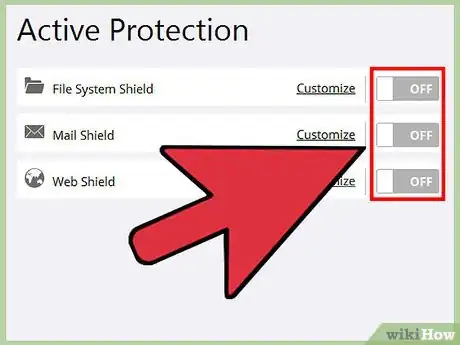
4Disable your third-party antivirus program if you have one. If you have a separate antivirus program like McAfee or Kaspersky, open it and find the “settings” or “options” area, then find an option for “disable” or “turn off.”
- Once the program is disabled, you’ll probably see a message that says your computer is at risk. You can ignore it for now as you’ll be restoring it soon.
-
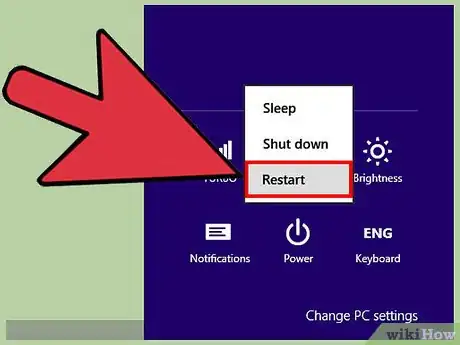
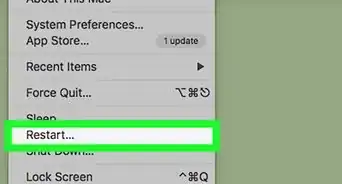
5Restart the computer to the login screen, then hold ⇧ Shift as you click “Power,” then “Restart”.[4] The computer will then reboot into the Chose an Option screen. This begins the process of booting into Safe Mode on a Windows 8 or 10 computer.
- To access Safe Mode on Windows 7 or Vista: Reboot the computer and tap the F8 key repeatedly as it restarts until you arrive at the Boot Options screen.
-
6If you are using Windows 10 or Windows 8, click “Troubleshoot,” then “Advanced Options.”
- In Windows 7, use the arrow keys to select “Safe Mode with Networking,” then press ↵ Enter to boot into that mode. You are now in safe mode and can skip the next few steps intended for Windows 10/8 users.
-
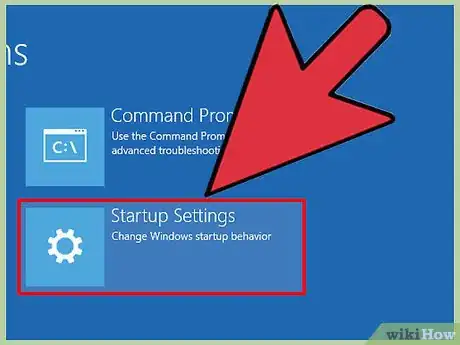
7If you are using Windows 10 or Windows 8, click “Startup settings,” then “Restart.” The computer will reboot a second time.
-
8If you are using Windows 10 or Windows 8, press F5 or 5 at the Boot Options screen to enter Safe Mode with Networking.
-
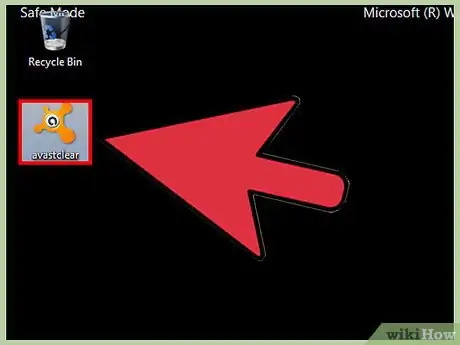
9Now that you are in Safe Mode, double-click the virus removal tool on your desktop. Or, if you inserted a CD/DVD that contains the tool, double-click the tool to open it.
-
10Click “Start scan”(or something similar). The scan will take at least several minutes to complete. Depending on the computer, software, and infection level, this may take over an hour.
-
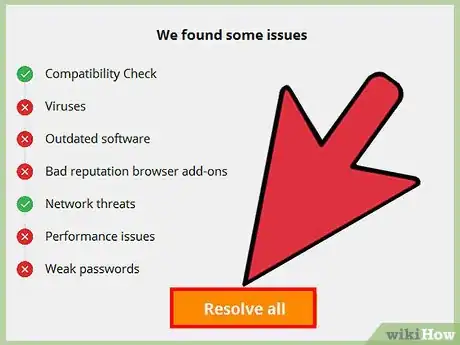
11Quarantine worms and other malware. Once the virus scan is complete, the antivirus tool will report its results. If you see prompts to “quarantine” (another term for safely removing the malware from your PC), follow them so that the files are properly destroyed.
- Some programs, such as Microsoft’s Malicious Software Removal Tool, will remove the malware/worms without your intervention.[5]
- If nothing is found, it’s very likely that you don't have a worm virus. If you still think you may be infected, try one of the other virus-removal tools.
-
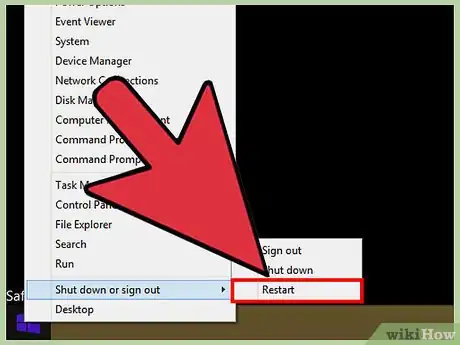
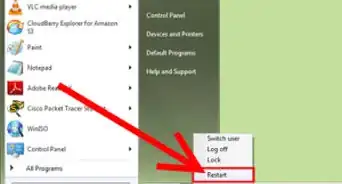
12Click “Power” in the Start menu, then select “Restart.” The computer will reboot normally, without a worm infection.
-
13Re-enable System Restore. Don't skip this step! To allow Windows to create automatic restore points for emergency use, return to the System Restore (called "System Protection" in Windows Vista and 7) dialog and check “Turn on system protection”.
-
14Set your antivirus program to monitor your PC in real-time. If you previously disabled your antivirus software, turn it back on now.
-
15Enable Windows Defender if you don’t presently have other antivirus protection. Windows Defender is an antivirus/anti-malware suite built into Windows. Most PC manufacturers install free trial versions of antivirus software suites, which disable Defender by default. Enabling Defender is a great (and free!) way to keep your computer safe from worms.
- Open the start menu, () then type “defender”. Click “Windows Defender” in the search results, then (in Windows 8, 10) click “Settings,” and flip the following switches to the “On” position: Real-time protection, Cloud-based protection, and Automatic sample submission.
- In Windows Vista and 7, click “Tools,” then “Options,” and then “Administrator.” Select “Use this program,” then click “Save”.
Mac
-
1Make sure your Mac is up-to-date.[6] All modern Macs come equipped with their own built-in malware protection. If your system is not configured to receive regular updates, malware can slip through the cracks. Click “System Preferences” in the Apple menu, then click “App Store,” and make sure the following two options are checked:
- Automatically check for updates
- Install system data files and security updates
-
2Uninstall MacKeeper. If you’ve installed MacKeeper and are receiving pop-up messages claiming you have a worm virus, do not follow their links or enter your credit card information.[7] MacKeeper is known malware and should be removed from your system.
-
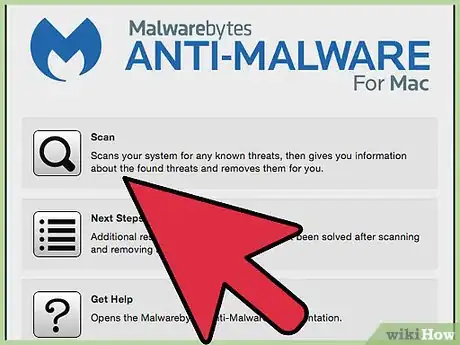
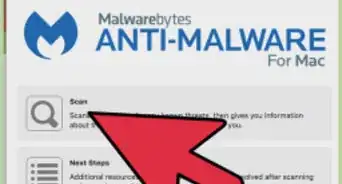
3Download and install an anti-malware program. Because there are no Mac “viruses,” it’s likely that a suspected worm virus is actually a different form of malware, like adware (excessive and tricky advertisements) or ransomware (software that holds your files hostage until your credit card information is provided).[8] Regardless of its type, you’ll want to remove it from your Mac.
- Malwarebytes Anti-Malware for Mac and Sophos Antivirus for Mac will both scan for and remove all adware at no cost.
- There are many paid options to scan and remove malware from Macs, but they are not typically recommended by experts.[9]
-
4Update your anti-malware software to the latest definition files. Start your anti-malware program and find the link that says “Update” (or something similar). Before running a scan, you’ll want the program to have up-to-date malware information.
-
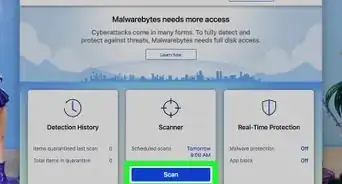
5Click the “Start Scan” or “Scan Now”. The actual name of the button will vary depending on your anti-malware program. The scan will take several moments to complete.
-
6Quarantine your malware. If the program finds malware, follow any prompts to “quarantine” the rogue files. This will remove them from your system without sending them to the Trash.
-
7Avoid malware in the future. To keep your computer free of malware (including worms), Apple recommends taking certain precautions when using the Internet.
- Never open e-mail attachments unless they were sent from a legitimate source.
- Limit downloads to the Mac App Store and identified developers. Mac checks all apps on its App Store for viruses and trusts other developers registered with Apple. To configure this feature on your Mac, select “System Preferences” from the Apple menu, click “Security & Privacy,” then “General.” There, select “Mac App Store and identified developers.”
Android
-
1Open Chrome and tap the ⋮ menu .[10] Android keeps the viruses at bay, but other malware (like adware) can slip through the cracks. If you’re suddenly being pummeled by pop-ups and browser redirects, you likely have malware which came from downloading an app that claimed to speed up your phone, protect it from viruses, or give you added customization options (like themes). First we’ll get rid of the bad stuff that may have crept into Chrome.
-
2Tap “Privacy, then “Clear Browsing Data”. Malware may be hiding in the temporary Internet files stored on your phone.
- This action won’t delete your personal data, but you’ll be logged out from the websites you had open.
-
3Place checkmarks in “Cache,” and “Cookies, site data,” then tap “Clear”.
-
4Tap the app drawer icon to view all installed apps. Scroll through your apps to look for anything that you don’t remember installing or do not trust.
- Pay close attention to lesser-known games, battery savers, “cleaners,” and apps that claim to protect you from various threats.
-
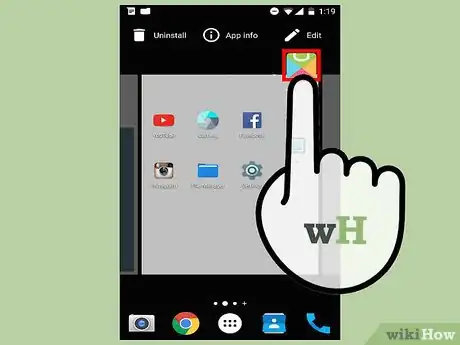
5Tap and hold an app icon until “Uninstall” appears.
-
6Drag the icon to the word “Uninstall,” then tap “OK.”
-
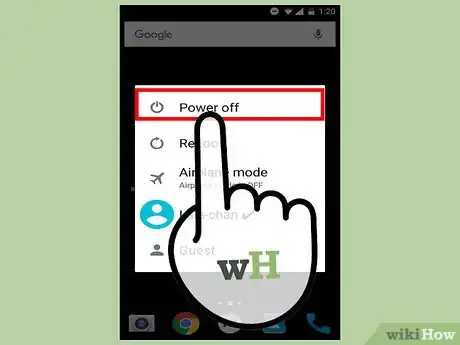
7Hold the power button down on your phone, then select “Turn Off.”
-
8Press the power button to turn the phone back on, then try browsing the web. If you still see pop-ups or redirects, you should back up and reset your Android.
-
9Stay safe in the future. There’s no need to install antivirus protection your iPhone. You just need to know what to look for.
- Don’t click on any pop-ups that claim you have malware.[11] These messages will never come from your Android—they are always ads, even when they look just like a legitimate message.
- Before downloading an app, read through its reviews and ratings in the Play Store.
iPhone
-
1Uninstall apps you don’t trust or recognize. Your iPhone protects you from viruses, but you may still encounter other malware, like adware.[12] Usually malware comes from installing an untrustworthy app—often the kind that claims to speed up or protect your iPhone. Scroll through your apps and look for apps you don’t recognize or use, then remove them from your phone.
- Pay close attention to lesser-known games, battery savers, “cleaners,” and apps that claim to protect you from various threats.
-
2Launch the Settings app and select “Safari”. If you’re experiencing pop-up ads or Safari keeps redirecting you to the wrong site, there might be something strange in your browsing data.
-
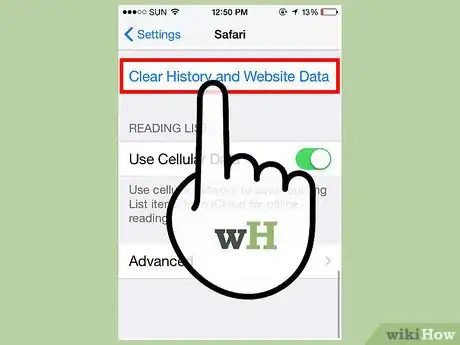
3Tap “Clear history and website data”.[13] In earlier versions of iOS, tap “Clear cookies and data.”
-
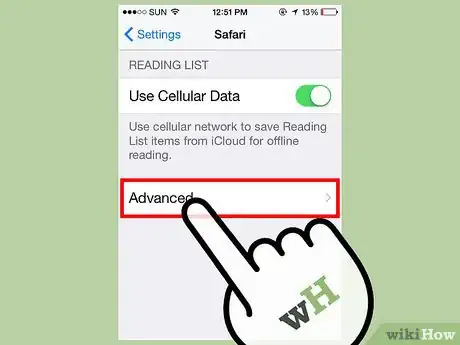
4Return to the Safari settings in the Settings app, then select “Advanced”.
-
5Tap “Website data,” then “Remove all website data”.
-
6Hold the power and sleep/wake button down to hard reboot your iPhone. When the phone returns to the home screen, try using your web browser normally. As long as you’ve removed the bad app and cleared all web data, your phone should be clear of malware.
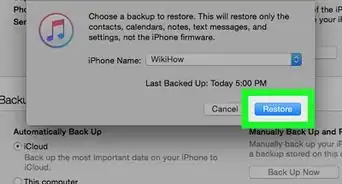
- If you’re still experiencing symptoms, back up and restore your iPhone.[14]
-
7Stay safe in the future. There’s no need to install antivirus or antimalware protection your iPhone. You just need to know what to look for.
- Don’t click on any pop-ups that claim you have malware. These messages will never come the iPhone itself—they are always ads, even when they look very convincing.
- Before downloading an app, read through its reviews and ratings in the App Store.
Community Q&A
-
QuestionCan I use Avast, CCleaner or Smadav to remove the worms?
 R2_d2000Top AnswererAvast would be the best one of the ones that you listed. CCleaner is not a virus removal tool, and Smadav, while it can remove some viruses, is not 100% effective.
 -
QuestionWe have an HP updated to Windows 10 with a worm. Will this work for that computer?
 Community AnswerYes, the steps will work for a Windows 10 upgraded PC.
 -
QuestionWill it work with a Toshiba laptop?
 Community AnswerThe brand name of the PC shouldn't matter. As long as you know the operating system, you can follow the steps here.
References
- ↑ http://www.kaspersky.com/internet-security-center/threats/computer-viruses-vs-worms
- ↑ http://www.tech-pro.net/howto_002.html
- ↑ https://www.tekrevue.com/how-to-enable-system-restore-windows-10/
- ↑ http://windows.microsoft.com/en-us/windows-10/start-your-pc-in-safe-mode
- ↑ https://www.microsoft.com/en-us/safety/pc-security/malware-removal.aspx
- ↑ http://www.macworld.com/article/2923022/checking-your-mac-for-viruses-wait-what.html
- ↑ https://sites.google.com/site/appleclubfhs/support/advice-and-articles/mac-viruses
- ↑ https://discussions.apple.com/docs/DOC-2435
- ↑ https://discussions.apple.com/docs/DOC-2435
