This article was co-authored by wikiHow staff writer, Jack Lloyd. Jack Lloyd is a Technology Writer and Editor for wikiHow. He has over two years of experience writing and editing technology-related articles. He is technology enthusiast and an English teacher.
The wikiHow Tech Team also followed the article's instructions and verified that they work.
This article has been viewed 1,713,979 times.
Learn more...
This wikiHow teaches you how to record your computer screen on Windows 7. You can use either the free OBS ("Open Broadcaster Software") Studio program or the free ScreenRecorder program to do so.
Steps
Using OBS Studio
-
1Open the OBS Studio site. Go to https://obsproject.com/ in your computer's web browser. OBS Studio is a free program that allows you to record your screen in high-definition and then save the recordings as playable video files on your computer.
-
2Click Windows. It's a green button near the top of the page. This will prompt the OBS Studio setup file to begin downloading onto your computer.Advertisement
-
3Find the downloaded setup file. You'll usually find downloaded files in the "Downloads" folder, which you can open by pressing ⊞ Win+E and then clicking Downloads on the left side of the resulting window.
-
4Double-click the OBS Studio setup file. This will prompt the installation window to open.
-
5Install OBS Studio. To do so:
- Click Yes if prompted.
- Click Next
- Click I Agree
- Click Next
- Click Install
- Wait for the program to finish installing.
-
6Launch OBS Studio. Make sure that the "Launch OBS Studio" box in the middle of the page is checked, then click Finish. OBS Studio will open.
- You can also start OBS Studio by double-clicking its app icon on your desktop.
-
7Navigate through the on-screen prompts. The first time you run OBS Studio, you'll usually be asked if you want to run the Auto-Configuration Wizard. Click on Yes and follow the prompts.
-
8Click +. It's in the lower-left side of the "Sources" window, which is in the lower-left section of the OBS Studio window. Clicking it prompts a pop-up menu to appear.
-
9Click Display Capture. This option is near the top of the pop-up menu. A new window will open.
-
10Check the "Create new" box. You'll find it near the top of the window.
-
11Enter a name for your capture. Type the name under which you want to save your capture in the text field at the top of the window.
-
12Click OK. It's at the bottom of the window.
-
13Click OK again. This will complete the recording setup. You're now ready to begin recording.
- If you want to keep your mouse out of your screen recording, first uncheck the "Capture Cursor" box.
- If you use multiple displays, first click the "Display" drop-down box, then click the name of the display that you want to capture.
-
14Click Start Recording. It's in the lower-right section of the OBS Studio window. Your recording will begin.
-
15Click Stop Recording when you're finished. It's in the same place as the Start Recording button. The video will be saved to your computer.
- To view your screen recording, click File in the menu bar, then click Show Recordings in the resulting drop-down menu.


Using ScreenRecorder
-
1Open the ScreenRecorder page. Go to https://technet.microsoft.com/en-us/library/2009.03.utilityspotlight2.aspx in a web browser.
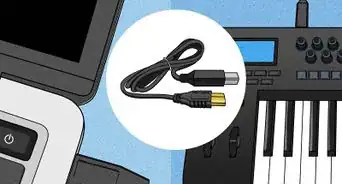
- ScreenRecorder is a free utility developed by Microsoft.[1]
-
2Click UtilityOnlineMarch092009_03.exe. It's at the top of the window. Doing so will cause the ScreenRecorder file to download onto your computer.
-
3Locate the downloaded file. You'll usually find downloaded files in the "Downloads" folder, which you can open by pressing ⊞ Win+E and then clicking Downloads on the left side of the resulting window.
-
4Double-click the setup file. Doing so will launch the installation window.
-
5Install ScreenRecorder. To do so:
- Click Yes when prompted.
- Select an installation location by clicking ⋯, clicking a folder, and clicking OK
- Click Ok
- Click Ok when prompted.
-
6Open the installation folder. Go to the location in which you installed ScreenRecorder, then double-click the UtilityOnlineMarch09 folder there.
-
7Double-click the "64-bit" folder. It's at the top of the installation folder.
- If your computer uses a 32-bit processor, you'll double-click the "32-bit" folder instead.
- You can check your computer's bit number if you don't know whether your computer is 64-bit or 32-bit.
-
8Double-click the "ScreenRecorder" icon. It resembles a computer monitor.
-
9Install the Windows Media Encoder 9. Follow the on-screen prompts to do so.
-
10Finish installing ScreenRecorder. Double-click the "ScreenRecorder" icon again, then follow the prompts to install ScreenRecorder in its default location.
-
11Open ScreenRecorder. Double-click the ScreenRecorder shortcut on your desktop to open it.
-
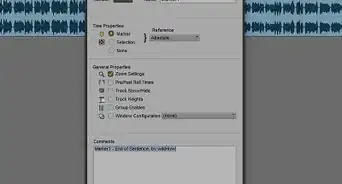
12Select the element you want to record. Click the drop-down box on the left side of the ScreenRecorder bar, then select either FULL SCREEN or a specific window to record.
-
13Check the Audio box to enable audio recording. If you have a microphone plugged in, you can check the Audio box to enable audio recording along with the video capture. This will allow you to narrate what you are doing in the video.
- ScreenRecorder uses your default Windows settings for audio input.
- You can adjust audio levels through the Volume settings in the System Tray.
-
14Decide if you want the border of your window to flash. This tool causes the border of the window that is being recorded to flash. It will not appear in the recorded video.
- If you don't want to border to flash, check the "No Border Flashing" box before proceeding.
-
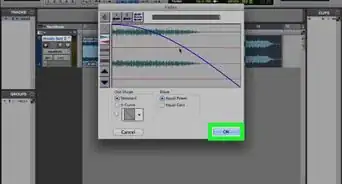
15Click OK. It's in the middle of the ScreenRecorder window. This will open the recording tool.
-
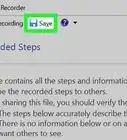
16Specify a name and file location. Click the button at the top of the recording tool to do so.
- ScreenRecorder records in WMV format.
-
17Click the Start button. ScreenRecorder will begin recording your specified area.
- You can click the yellow Pause button to pause recording.
-
18Finish recording when ready. Click the red Stop button to do so. This will complete the recording and output it to the file that you specified.[2]


Community Q&A
-
QuestionAre there any other screen recorders?
 Community AnswerYes, there are many. Just be aware that some of the less well known free ones may contain viruses, This screen recorder is virus free.
 -
QuestionDo I need administrator rights to download this?
 Community AnswerTo download it, no. To install it, yes. If you don't have administrator privileges, you can use a portable version.
 -
QuestionWill the screen record record everything on screen?
 Community AnswerYes, it will record everything.
Warnings
- Prolonged screen recordings can take up a large amount of hard drive space.⧼thumbs_response⧽
- OBS Studio isn't ideal for recording video games or other programs that use large amounts of memory and processing power.⧼thumbs_response⧽


References
About This Article
1. Install OBS Studio.
2. Open OBS Studio.
3. Follow the on-screen setup instructions.
4. Click the plus sign.
5. Click Display Capture.
6. Click Create New.
7. Enter a name and click OK.
8. Click OK again.
9. Click Start Recording to record.
10. Click Stop Recording when finished.