This article was co-authored by wikiHow Staff. Our trained team of editors and researchers validate articles for accuracy and comprehensiveness. wikiHow's Content Management Team carefully monitors the work from our editorial staff to ensure that each article is backed by trusted research and meets our high quality standards.
This article has been viewed 217,906 times.
Learn more...
Windows Photo Gallery is an application for Windows that allows you to easily view, organize and edit your pictures with a simple interface. Windows Photo Gallery ships with Windows Vista, but is also supported by Windows 7, 8, and 10 if you wish to download it from Microsoft. These instructions will cover the basic functionality of downloading the software and importing/editing your photos.
Steps
Importing Photos
-
1Acquire Windows Photo Gallery. You will need to download the Windows Essentials software pack from Microsoft. Navigate to http://windows.microsoft.com/en-us/windows/essentials in your web browser and press Download. Once the download is complete, run the installer.
- For Windows 7 or 8 users, the software pack is labeled Windows Essentials 2012.
- Windows Vista users have Windows Photo Gallery built in and do not need to download anything.
-
2Open Windows Photo Gallery. The gallery can be accessed by clicking on “Start > All Programs > Windows Photo Gallery”.Advertisement
-
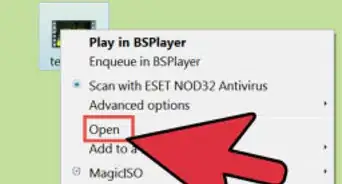
3Add photos that are already on your computer. If there are photos already on your computer you wish to add, you can simply drag and drop them into the Windows Photo Gallery window.
-
4Import photos from a camera or other external device. To import, connect your device, then press “Home > Import”. Select the device from which you wish to import photos or videos and confirm.
-
5Select the destination for your imported photos (optional). Press “More Options” and a dialog box will appear. Here you can choose a destination folder, then select a naming scheme for the sub-folder and imported pictures (i.e. name + date, etc.). Press “OK” to confirm your settings
- The default destination for imported pictures is “My Pictures” folder (“My Computer > My Pictures” or “C:\Users\[username]\My Pictures”).
-
6Complete the Import. When you are satisfied with your settings, press “Import”. From here there are two options: “Import All New Items” or “Review, Organize, and Group Items to Import”.
- ”Import All New Items” will import anything from the source that does not already exist in the destination folder.
- ”Review, Organize and Group Items to Import” allows the user to select and arrange specific targets to import.


Organizing and Sharing Your Photos
-
1Organize items with tags and captions. You can apply tags to help you find and categorize your photos, while captions can add a little extra information and flavor to your library. To apply a tag, click the picture and click Add Tags in the Details pane, type a tag name and press enter. Tags can be applied to multiple images by selecting a group before pressing “Add Tags”. Adding a caption is done similarly, by selecting the “Caption” field in either the Details pane and entering text.
- If the Details pane does not appear, click “Organize > Layout > Details pane” to bring it into view.
- Multiple items can be selected with either click and drag or holding Ctrl and clicking individual items.
-
2Use the bottom pane to navigate, make simple modifications, and showcase your photos. The buttons in the bottom pane allow you to zoom, rotate, navigate, or delete photos. You can also view selected items in a slideshow using the center button on the pane.
- You can exit a slideshow at any time with Esc.
- Slideshow filters can be applied in “Home > Slideshow”.
-
3Edit pictures and fix common flaws. Some photo editing features can be performed on multiple photos at once. Windows Photo Gallery can automatically adjust picture brightness and contrast by selecting the target photos and navigating to “Edit > Adjustments> Auto Adjust”. Other automatic options include red eye removal and photo straightening.
- Manual editing can be done to single photos by selecting the photo and pressing “Edit > Adjustments > Fine Tune”. This will allow you to take control of the same editing tools to adjust photos to your personal specifications.
- You can undo any unwanted changes by pressing “Revert to Original” in the “Edit” tab.
-
4Share and print photos. Windows Photo Gallery can integrate with your hardware and email client to share your photos directly from the programs. You should make sure that your email client is configured and printer connected with up-to-date drivers prior to using them with Windows Photo Gallery.
- To email: Select any items you with to send, go to “Home > Share > Email”. Select the desired size of the photos and press “Attach”. Your default email client will automatically launch and open an email with the photos attached.
- To print: Select any items you wish to print, then “right-click > Print” any selected item (alternately, press Ctrl + P). The print dialog box will appear. Here you can select size, layout, and number of copies of your selected photos. Press “Print” to proceed with your selection.
-
5Export your photos to external storage. Connect your external storage device to the computer. Then, simply drag and drop your desired photos from the gallery or folder location, into the desired destination on your external device.


Community Q&A
-
QuestionPhotos won't print from Gallery
 Community AnswerCheck that your printer is connected to the computer and powered on. You may also want to update your printer's drivers which can be obtained from the manufacturer's website. When printing from Windows Photo Gallery, make sure that the correct printer is selected, or the print command may be sent somewhere else.
 -
QuestionHow do you convert RAW photos to JPEG in photo gallery?
 Community AnswerSelect the RAW files and go to File > Make a Copy > Save. You can select JPEG as the target file format.
 -
QuestionWill Windows Photo Gallery work in windows 10? I recently updated my new computer to Windows 10 and cannot locate photos from previous version.
 Community AnswerWindows Photo Gallery can be used in Windows 10. The photos will be located in the same file path that you used in your older version of Windows. If you used the default path, then "My Pictures" will have been renamed to "Pictures"


References
About This Article