X
wikiHow is a “wiki,” similar to Wikipedia, which means that many of our articles are co-written by multiple authors. To create this article, volunteer authors worked to edit and improve it over time.
This article has been viewed 131,161 times.
Learn more...
This tutorial will show you an easy way to make a cube in Adobe Illustrator.
Steps
Method 1
Method 1 of 2:
The manual way
-
1Create a new square by using the Rectangle Tool.
-
2Duplicate it to get two similar squares.Advertisement
-
3Click at the left square and go to the Shear Tool.
-
4Select the top right point and move it down the vertical axis. Repeat with another square.
-
5Create a new square and rotate it by 45 degrees.
-
6Expand it until the width is equal to the adjacent squares. Add an anchor point to the top corner of your new square and click free transform tool. Click the top corner and move it down the vertical axis until it rests in the angle that the two adjacent squares make.
-
7To make it look more like a cube, colored it while thinking of the direction of light. In the picture, light is coming from the left side. Number 1 should be the lightest, followed by number 2 and number 3 is the darker side.
-
8Finished.


Advertisement
Method 2
Method 2 of 2:
The hexagon way
-
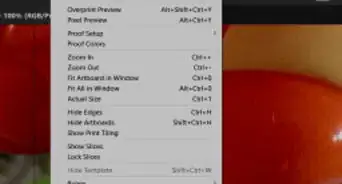
1To make the work easier, make sure to have smart guides ticked. This is found under the view tab.
-
2Draw a hexagon using the polygon tool. Hold shift while drawing it to make sure it is regular.
-
3Rotate the hexagon by 90 Degrees. Select it, then go to Object > Transform > Rotate.
-
4Duplicate the hexagon and place it on the top angle of the older copy. The smart guides will help you to give you a perfect result. Your hexagons should be arranged as in the image.
-
5By the direct selection tool, select both hexagons after arranging them and hit the divide option on the pathfinder panel (windows > pathfinder)
-
6Your hexagons are now made into three parts. Select the upper one and delete it.
-
7Since the other two parts are perfectly aligned, draw a line with the same thickness of your hexagons from the lower angle of the hexagon (the lower part) and go vertically upwards just above the middle angle (It should be longer than the part)
-
8Select the lower part and the line, and hit divide again on the pathfinder. Make sure to do so by the direct selection tool.
-
9Choose each part and fill it with the preferred color or a gradient.
-
10When done, select all the three parts and group them (object > group)


Advertisement


About This Article
Advertisement