This article was co-authored by wikiHow Staff. Our trained team of editors and researchers validate articles for accuracy and comprehensiveness. wikiHow's Content Management Team carefully monitors the work from our editorial staff to ensure that each article is backed by trusted research and meets our high quality standards.
There are 7 references cited in this article, which can be found at the bottom of the page.
This article has been viewed 29,960 times.
Learn more...
A crocheted pillow cover is an awesome project for crocheters of any level! You can use a basic crochet stitch to create a simple pillow cover or use a more advanced decorative stitch to make something more intricate. Choose your yarn color and type to customize your project, and measure your pillow to make sure the cover will fit!
Steps
Designing the Pillow Cover
-
1Browse through patterns for guidance and inspiration. Crocheting a pillow cover is a simple project, but there are many different ways to go about it. You may find it helpful to use a pattern to create a specific design. Or, you can use a pattern as inspiration and follow it loosely to create your own unique throw pillow. Search online for free patterns or visit a local craft store to find pattern books.[1]
- For example, you might want to follow a pattern to the letter if you are trying to create a specific shape or design in your pillow cover. Or, you may identify a pattern you like, but select different yarn colors to create it.
-
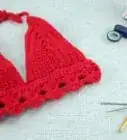
2Choose your yarn. You can use any type of yarn to create a throw pillow cover. Choose a yarn in the texture, weight, and color that you like best. Consider where you will place the throw pillow as well if you want it to match your other décor.
- For example, you could go with a red yarn if you have a lot of red in your living room. Or you can opt for a neutral color or a black or white yarn, which will go well with lots of décor types.
- You can find yarns that are fluffy, smooth, rough, and sparkly.
- Yarns come in weights ranging from very light (lace) to jumbo (extra thick).[2]
Advertisement -
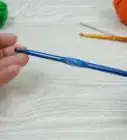
3Select an appropriately sized crochet hook. Crochet hooks come in many different sizes and you will get the best results if you pair your yarn with the recommended hook size. Check the yarn label or the pattern for a hook size recommendation.[3]
- For example, if you are using a medium worsted weight yarn to make your throw pillow cover, then the recommended size is between US size I-9 and K 10.5 (5.5-6.5 mm in metric).[4]
-
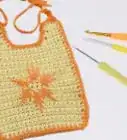
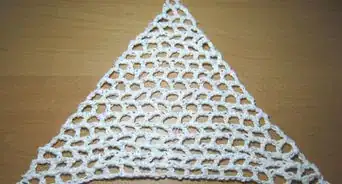
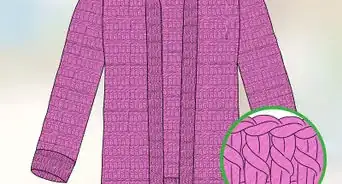
4Decide on a stitch type. You can create a simple throw pillow cover using single or double crochet stitches, or you can opt for a decorative stitch for something more intricate. Some good options include:
- Crunch stitch for a bumpy textured pillow cover
- Loop stitch for a shaggy pillow cover
- Abstract cat stitch for a cat design on your pillow cover
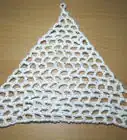
- Shell stitch for a shell design pillow cover


Creating the Foundation Row
-
1Make a slipknot. Loop the yarn around your index and middle finger 2 times. Then, pull the first loop over the second loop. Slide the remaining loop onto your crochet hook and pull on the tail to tighten the knot.[5]
- Keep in mind that the slipknot does not count as a stitch. It is just the starting loop to make your chain.
- Leave a tale that is 24 inches (61 cm) or longer so that you can use it to sew up the end of the pillow cover later.
-
2Crochet a chain long enough to wrap tightly around the width of the pillow. Yarn over the crochet hook 1 time. Then, pull this new loop through the slipknot. This will create your first chain. Repeat this sequence to create more chains.[6]
- If you are using a pattern, then follow the pattern’s recommendations for how many stitches to chain.
- Keep in mind that the weight of yarn you are using will also affect how many stitches you need to chain. Check the gauge of your yarn to be sure.
-
3Attach the ends of the chain with a slipstitch. You will be crocheting your throw pillow in the round, so start with a slipstitch to connect the ends of your chain. Insert the hook into the first and last chains and be careful not to twist the chain. Then, yarn over the hook and pull it through both loops.[7]
- You will only need to slipstitch to connect the ends of your chain and not for any of the other rounds. Work the other rounds in a spiral.[8]
-
4Work the chain in single crochet. Insert your crochet hook into your chain in the second stitch from the hook. Then, loop the yarn over the hook and pull through the stitch. Yarn over again, and pull through both stitches.[9]
- A row of single crochet creates a good foundation for the rest of your pillow. Even if you plan to use a decorative stitch, it is usually recommended to start with a single crochet row.


Finishing the Pillow Cover
-
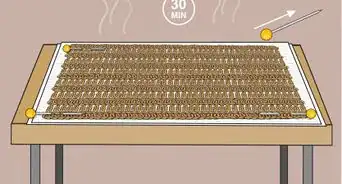
1Crochet the rounds in your desired stitch. After you finish the foundation, continue working the other rows in the stitch you have decided to use.[10] For example, if you want to crochet your throw pillow in single crochet stitch, then continue to single crochet rounds. If you want to use a decorative stitch like the crunch stitch, then work the crunch stitch. Keep going until your pillow cover is the desired size.
- You can use the pillow that you will be covering to measure your cover and figure out when it is finished, or you can measure with a tape measure or ruler if you know the dimensions that the cover will need to be. You may want to make the pillow cover about 1 inch (2.5 cm) larger than the pillow to ensure that the pillow will fit inside the cover.
-
2Secure the last stitch. When you have achieved the desired size, cut the yarn about 24 inches (61 cm) from the base of the last stitch. This should be enough yarn to sew up the end of most pillow covers, but you can make the tail shorter or longer if desired. Then, pull the end of this yarn strand all the way through the stitch to secure it in a knot.[11]
- You may tie a second knot through the stitch if desired. Just thread the end of the yarn through the last stitch and loop the end through the base of the strand as well. Pull until it goes all the way through to secure the knot.
-
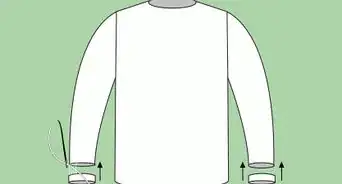
3Thread a yarn needle and sew up 1 end of the pillow cover. Insert the end of the yarn tail you have left at the end of the project through the eye of a yarn needle. Then, use a simple stitch, such as the mattress stitch, to sew up 1 open end of the pillow cover. Sew all the way across the open area. When you reach the end of the cover, tie the yarn in a knot through the last stitch to secure it.[12]
- Weave in any excess yarn with the yarn or tapestry needle after you sew up the end, or tie off the last stitch and cut off the excess yarn.
-
4Insert the pillow into the cover. Next, place the pillow inside of the cover to ensure that it fits. Push the pillow into the cover all the way so that it is completely covered except for the remaining open end.
- If you do not have a pillow to cover, you can use nylon filling material to stuff the pillow cover as long as the stitches are close together. If the stitches have gaps in between them, then the filling may poke through and this is not a good option. Nylon filling is available at most craft supply stores.
-
5Sew the other end of the pillow cover closed. Thread the other strand through the eye of your needle and work a mattress stitch along the other open edge to close it up. Keep going until you have reached the end and then tie the end of the knot through the last stitch.
- If there is not enough yarn left to sew up the end, tie some yarn to the end of your tail and use this to sew up the end.
- If desired, you could also sew a zipper into the end of the pillow cover. This would allow you to remove the cover and wash it as needed.[13]
- You can use the needle to weave in any excess yarn after you sew up the end or just cut the excess yarn.


Things You’ll Need
- Yarn
- Crochet hook
- Pattern (optional)
- Scissors
- Yarn or tapestry needle
References
- ↑ https://www.allfreecrochet.com/Pillows
- ↑ https://www.craftyarncouncil.com/standards/yarn-weight-system
- ↑ https://www.createforless.com/buying-guides/crochet-knitting-and-other-needlework/crochet-hooks.aspx
- ↑ https://www.craftyarncouncil.com/standards/yarn-weight-system
- ↑ https://www.craftyarncouncil.com/instructions_cr.php3
- ↑ https://www.craftyarncouncil.com/instructions_cr.php3
- ↑ http://newstitchaday.com/how-crochet-slip-stitch/
- ↑ https://hearthookhome.com/throw-pillow-cover-free-crochet-pattern/
- ↑ https://www.craftyarncouncil.com/instructions_cr.php3/
About This Article