This article was co-authored by Sarah Stearns. Sarah Stearns is a DIY Specialist, Artist, Maker, Blogger, and the Founder of SarahMaker.com. With over ten years of experience, she specializes in fun, approachable crafts like crocheting, making polymer clay jewelry, quilting, and creating Cricut projects. Her work has been featured in several publications, such as Scientific American, Good Housekeeping, Vox, and Apartment Therapy. Sarah holds a BA in Psychology from Vanderbilt University.
wikiHow marks an article as reader-approved once it receives enough positive feedback. In this case, 80% of readers who voted found the article helpful, earning it our reader-approved status.
This article has been viewed 609,405 times.
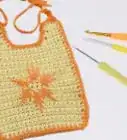
Are you just learning how to crochet but already bored with making basic square shapes? Then it is time to try crocheting in the round. Crocheting in the round allows you to easily crochet circular objects such as coasters, hats, ornaments, table place mats, and even cups, adding greatly to your crocheting possibilities. Once you've learned the basics, try your hand at a few round crochet projects.
Steps
Beginning Your Crocheting
-
1Attach your yarn to your crochet hook with a slip knot. Loop the yarn around the pointer and middle fingers of your left hand. Stick your hook through the circle, hooking the working end of your yarn with the hook and then pulling it back through the center of the circle. This will give you one loop on your crochet hook.
-
2Crochet a chain of four stitches. This will form the very center of the circle you are crocheting.
- If you are following a pattern you may need to make a different number of chains to start. This will change the number of stitches you make in further steps but will not change the general technique.
Advertisement -
3Make a slip stitch in the first chain you made, forming the four chains you made into a ring. Insert the hook into the loop of the first chain you made. Once through, hook the working end of the yarn onto the hook and then pull it back through the loop and also through the loop that was on your hook. Now the piece is formed into a circle and you have one loop on your hook.

Crocheting Through the Center of Your Ring
-
1Insert your hook into the center of the ring. Be sure that you are going through the very center and not one of the stitches you made.
-
2
-
3Pull the loop back through the center of the ring. Two loops should be on the hook after you complete this step.
-
4Yarn over once again, and this time, without going through the center of your project, pull the loop you just looped onto your hook, back through both of the strands that are already on your hook. This is the finishing step of the basic stitch called a "Single Crochet".
-
5Continue making "Single Crochet" stitches through the center of the ring. In all you will make eight single crochet stitches around forming a tiny circle for the beginning of your project.
Crocheting the First Regular Round
-
1Insert your hook through both strands of the first stitch you made in the last round. This will be the first step in creating a connection between the end of the last round to the beginning of it and setting the stage to start another.[2]
-
2Yarn over your hook and pull the loop through to the front. Two loops should now be on the hook.
-
3Yarn over your hook again, then pull the working end of the yarn through both loops you had on your hook. This the finishing step of the single crochet stitch which joins everything into a circle. This stitch is also the first single crochet of the next round. (Stitch 1 of 16 total.)
-
4Make another Single Crochet stitch in the same stitch where you just made the first single crochet of this round. Now continue around the circle by making two single crochet stitches in each single crochet stitch of the first ring. Doing this is called an "increase". This means that there will be 16 stitches when you complete the round. Please count them.
- Doing two stitches in each one stitch from the previous round is how we "increase" the size of the circle we are making.
Crocheting Successive Rounds
-
1Complete the second regular round in much the same way as you completed the first regular round. However, this time you will put only one single crochet in the first stitch but then put two single crochet stitches in the next stitch. Do this "increase" in every other stitch of the previous round.[3] Repeat this to the end of the round.
-
2Continue increasing the number of stitches for each round until the project reaches your desired diameter. Make one single crochet in the first stitch, then make two single crochets in the next stitch. On the next round do two stitches in every third stitch, then two stitches in every fourth stitch and so on.
- See a pattern developing? To keep increasing, put two stitches in the n-th stitch where n is the number of the round you're currently working on. For instance, if you are working on the fourth round, put two stitches in every fourth stitch as you work your way around. You may loop a shot piece of contrasting colored yarn through each round if you wish, to help know which row you are on.
-
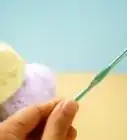
3End off your project by cutting the yarn at least 6 inches away from your last stitch, then use the hook to pull this "tail" or "end" all the way through the very last loop of the very last stitch. This is called "Tie-ing off the end". Once the yarn is tied off, sew or "weave" in the ends. Some patterns use the word "weave". To sew or weave in the ends, use a Yarn Needle. Fold the yarn end over the Yarn Needle forming a small tight loop. Slide the yarn needle out of the loop, then insert this tight loop into the eye of the Yarn Needle. Push it through far enough that you can grasp the loop and pull the yarn all the way through the eye. Gently weave the needle tip under and over stitches on the back of your work where it will not show. Do this for a distance of 7 to 8 stitches. Now turn around and alternate. Go over the stitches you previously went under and visa-versa. Now turn it around and do it a third time, this will make the "tail" or "yarn-end" stay put for many years. Remember to sew in both "tails" on the outside edge and in the very center.
Community Q&A
-
QuestionMy round is becoming wavy. What am I doing wrong?
 Community AnswerYou may be putting two stitches in every stitch. Instead, you should do the first round with two in each, the second with two in every other, the third with two in every third, and so on. It should fix itself.
 -
QuestionHow do I make the yarn look straight when I join it every round?Community AnswerKeep it at the same tightness at all times, so that you can't crochet loosely in some places and tightly in others.
-
QuestionGreat but how do I know which round I am on?
 Community AnswerUse a stitch marker -- you can buy one or you can use a safety pin or a piece of scrap yarn. Put the marker in the last stitch of the round, and when you get to the marker, take it out. Work the last stitch and put it in the new last stitch. For counting the actual rounds, put a mark on a paper, get a row counter or be very good at counting the rounds.
Things You'll Need
- Crochet hook
- Yarn
- Sharp Scissors (optional)
References
About This Article

To crochet in the round, attach your yarn to your crochet hook with a slip knot, then crochet a chain of four stitches to form the center of the circle. Next, make a slip stitch in this first chain to form the four chains into a ring. Now, insert your hook into the center of the ring, yarn over your hook, and pull the loop back through the center. Yarn over again, pull the loop back through both of the strands on your hook, and you have a single crochet. Make 8 single crochet stitches through the center of the ring to form a tiny circle to begin your project. If you want to learn how to keep adding circles to your crochet stitches, keep reading the article!