This article was co-authored by Sarah Stearns. Sarah Stearns is a DIY Specialist, Artist, Maker, Blogger, and the Founder of SarahMaker.com. With over ten years of experience, she specializes in fun, approachable crafts like crocheting, making polymer clay jewelry, quilting, and creating Cricut projects. Her work has been featured in several publications, such as Scientific American, Good Housekeeping, Vox, and Apartment Therapy. Sarah holds a BA in Psychology from Vanderbilt University.
wikiHow marks an article as reader-approved once it receives enough positive feedback. In this case, several readers have written to tell us that this article was helpful to them, earning it our reader-approved status.
This article has been viewed 1,701,237 times.
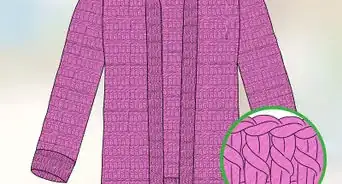
While a stick with a hook and a pile of yarn might not seem like it has much potential, the possibilities are actually endless when you give crocheting a go. Follow these simple steps to learn how to crochet and you will be making sweaters, scarves, and tea towels like a pro in no time.
Steps
Learning about Hooks and Yarn
-
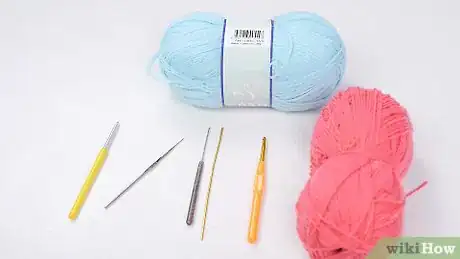
1Know about the different kinds of yarn. There are many different kinds of yarn that you can crochet with. The type of yarn you pick will depend on the type of project you are doing. If this is your first time trying to crochet, it is best to stick with a simple, plain yarn made of cotton or soft acrylic yarn. Choose a solid color for the yarn so that as you're learning, you can see how the stitches are made--patterned yarn would make this more difficult.
- Soft acrylic yarn: This type of yarn is less expensive than other yarns, which makes it good for beginners who are just learning new patterns. Try to avoid the absolute cheapest yarn when you do begin making projects to give away, as many cheap yarns can be scratchy (and who wants a scratchy scarf?)
- 100% Cotton yarn: Cotton yarn is good for making things that you think will get washed a lot (such as dish towels.) Cotton yarn is absorbent and easy to wash.
- Novelty yarn: This yarn is the most varied and generally the most expensive. Novelty yarn can be made of very soft, fine wool that results in deliciously soft sweaters and scarves. Keep in mind that this kind of yarn can’t be washed as often as cotton yarn.
-
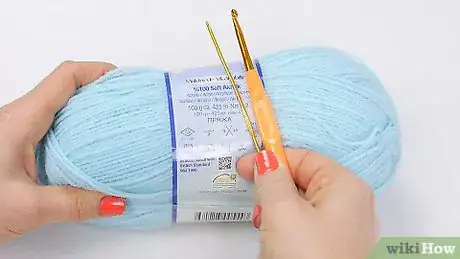
2Look at the yarn’s label to determine your hook size. These days, almost every yarn has label on it that will tell you which size hook to use. If you do not own any hooks and this is your first time crocheting, purchase the size hook that the yarn you would like to work with recommends. Hook sizes are measured in millimetres or fractions of an inch.
- As a general rule, the thicker the hook, the thicker the yarn will need to be.
Advertisement -
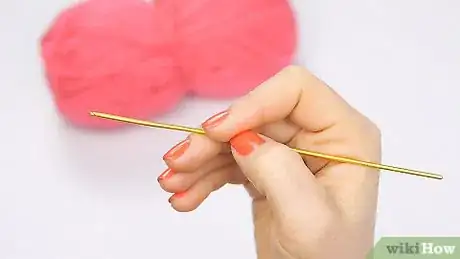
3Hold the crochet hook in a way that feels comfortable for you. While there is no right way to hold a crochet hook, there are two basic styles which can be reversed, depending on which is your dominant hand. Holding the hook incorrectly can lead to your hand cramping.[1]
- Using the Over-the-Hook position: Hold the hook so that the handle rests against your palm, like a pencil. Your hand should go over the hook with your thumb and index finger placed so that they are grasping the thumb rest (an indentation in the handle.)
- Using the Under-the-Hook position: Hold the hook like you are holding a spatula. Your hand should be under the hook with your thumb and forefinger placed on the thumb rest.
Learning Basic Crochet Patterns
-
1Make a test swatch. As you're learning, your tension may vary. Before you begin a pattern, make a test swatch. A test swatch is when you practice a specific stitch without trying to make anything--you are simply practicing how to do the stitch while also figuring out your preference on how tight or loose you would like your stitch to be.
-
2Crochet a chain. Every crochet project begins with a chain stitch, usually abbreviated as ch in instruction pamphlets. Practice crocheting a chain for about 10 to 15 minutes a day until you are able to hold the yarn so that it is not too loose or too tight.
- Form a slip knot around the hook, and wrap the yarn around the hook. To make a slipknot, make a loop with your yarn so that the tail of the yarns hangs down behind the loop. Guide the hook through the loop under the tail and then back out of the loop. Pull the tail, which will tighten the yarn around the hook, making a slipknot.[2]
- Use your thumb and middle finger of your left hand (if you’re right-handed) to hold the end of the slipknot. Use your left index finger to guide the yarn from the back to the front around the handle of the hook. Use the hook to pull the yarn through the loop on the hook--one chain link will form. Repeat this process to make a chain stitch.
-
3Make a slip stitch (abbreviated sl st.) This stitch is used to join work, bind off stitches, reinforce edges or carry yarn to a different working position without adding extra height.
- Make a chain stitch that is six chain links long. Slide the hook through the first chain link you made--doing this should form a ring. (The first chain link is the one furthest away from the hook, since you made it first.)[3]
- With the hand you use to move the yarn (not your dominant hand) wrap the yarn around the hook from back to the front. At the same time, rotate the hook so that it’s throat (so the tip of the hook is facing you.)
- Pull the yarn and hook back through the stitch and then through the loop on the hook. This completes one slip stitch.
-
4Make a single crochet (sc). Draw a new loop through the chain stitch (but not through the loop that is already on the hook). You should now have two loops on the hook. Pull a new loop of yarn through both, remaining with a single loop. Repeat.
- Single crochet is a relatively tight stitch and will result in a more closely stitched material.
-
5Double crochet. Double crochet stitches are great for making sweaters and scarves because they are a bit looser than other stitches (so your sweaters will be more comfy.)
- Make a chain with 15 chain links in it. Yarn over the hook from front to back. Slide your hook between the first two front loops and under the fourth chain link from the hook. Yarn over the hook again.
- Pull the wrapped yarn through the chain stitch by gently guiding the wrapped hook through the chain. This should result in having three loops on your hook.
- Pull your hook through the first two loops on the hook. Yarn over the hook again and then pull the hook through the last two loops on the hook. Your double crochet is complete. Repeat.
Ideas for More Advanced Projects
-
1Learn how to make a turning chain. Turning chains are helpful when you want to change direction with your stitch.
-
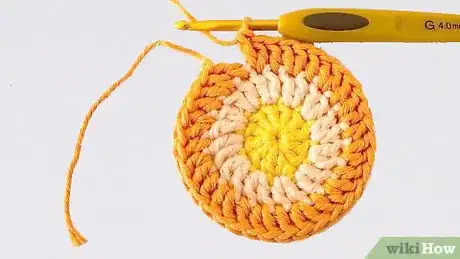
2Crochet in the round. Crocheting in the round allows you to create circular things like hats and coasters.[4]
- If you don't feel quite ready to start crocheting in the round yet, try working in flat rows first.[5]
-
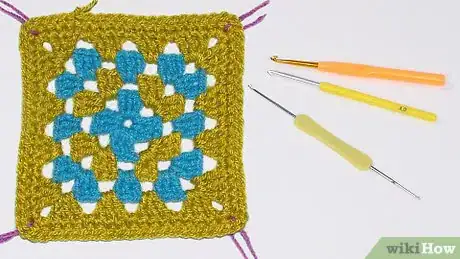
3Crochet a granny square. Granny squares are what allowed your grandma to whip together a crocheted blanket in the blink of an eye.[6]
-
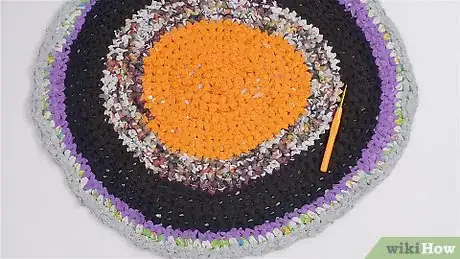
4Crochet a rag rug. Have a lot of clothing and old blankets that are dear to you but pretty worn down? Preserve their memory by making them into a rug!
-
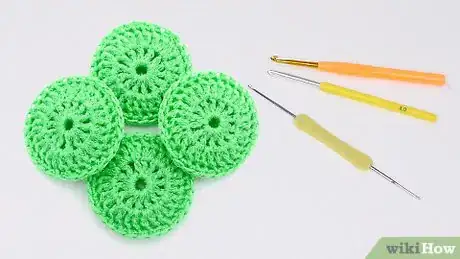
5Go green by crocheting your own pot scrubber. Making a scrubber that can be used endlessly will lend your kitchen a bit of eco-friendliness that we should all strive for.
-
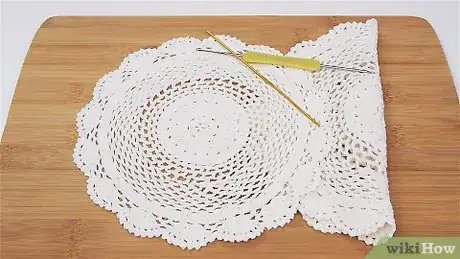
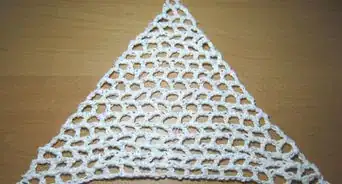
6How to Crochet a Vintage Rose Doily. Doilies add elegance to anything they get placed on, even the most scratched of tables. Add a touch of the refined to your home by crocheting doilies.
-
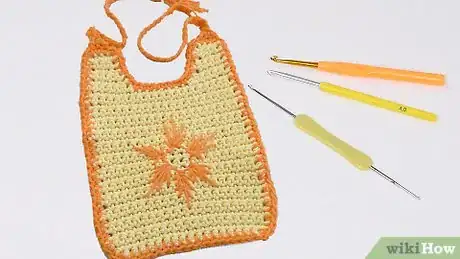
7What could be cuter than a baby wearing a homemade baby bib? A baby that is wearing a bib you crocheted yourself.
Expert Q&A
-
QuestionWhat is the first thing a beginner should crochet?
 Sarah StearnsSarah Stearns is a DIY Specialist, Artist, Maker, Blogger, and the Founder of SarahMaker.com. With over ten years of experience, she specializes in fun, approachable crafts like crocheting, making polymer clay jewelry, quilting, and creating Cricut projects. Her work has been featured in several publications, such as Scientific American, Good Housekeeping, Vox, and Apartment Therapy. Sarah holds a BA in Psychology from Vanderbilt University.
DIY Specialist Try working on small projects that are worked in flat rows, like potholders or scarves.
 -
QuestionHow do I start crocheting?
 Community AnswerYou should start by making a slip knot, practice how to do it. Then you should practice the chain stitch. It is really easy once you get the hang of it.
 -
QuestionHow can I turn a circle into a square?
 Community AnswerPlace four equally spaced increases in the round. Do a double increase (3 stitches in the stitch). Keep increasing in the middle stitch of your previous double increase every round, and your circle will eventually become square.
References
- ↑ http://www.dummies.com/how-to/content/how-to-hold-a-crochet-hook.html
- ↑ https://www.youtube.com/watch?v=oj21JDDSrgM
- ↑ http://www.dummies.com/how-to/content/how-to-crochet-the-slip-stitch.html
- ↑ Sarah Stearns. DIY Specialist. Expert Interview. 4 October 2021.
- ↑ Sarah Stearns. DIY Specialist. Expert Interview. 4 October 2021.
- ↑ Sarah Stearns. DIY Specialist. Expert Interview. 4 October 2021.
- Videos provided by ExpressionFiberArts
About This Article
To crochet, start by choosing the yarn you want to use. Check the yarn's label for tips on which hook size you should use. Most crochet projects start with a chain stich. First, make a loop with your yarn. Next, guide your hook through the loop under the tail of the yarn, and pull it back out. From there, pull the tail to tighten the yarn around your hook to make a slip knot. Once you’ve made a slip knot, hold the end of it between your thumb and middle finger. Use your index finger to guide the yarn from the back to the front around the handle of the hook. Finally, pull the yarn through the loop using the hook. Repeat the process to make more chain stitches. If you make a mistake, remember that you can always tug on the end of your work to unravel it a bit. Go back to a spot you know you did correctly, then try again! Once you're comfortable chain stitching, you'll be ready to follow beginner crochet patterns. For more tips, including how to make a slip stitch, read on!
