This article was co-authored by Sarah Stearns. Sarah Stearns is a DIY Specialist, Artist, Maker, Blogger, and the Founder of SarahMaker.com. With over ten years of experience, she specializes in fun, approachable crafts like crocheting, making polymer clay jewelry, quilting, and creating Cricut projects. Her work has been featured in several publications, such as Scientific American, Good Housekeeping, Vox, and Apartment Therapy. Sarah holds a BA in Psychology from Vanderbilt University.
This article has been viewed 264,721 times.
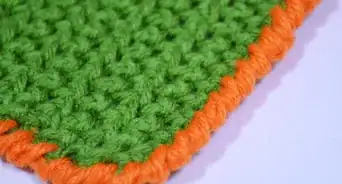
Working on a new crochet project but aren't sure how to turn your work? No worries! We're here to walk you through exactly what to do for a variety of different patterns. Keep reading to learn how to turn at the end of a row. We've also got info on how to create the first row of your project, in case you need a refresher.
Steps
Turning at the End of a Row
-
1Create a turning chain. The turning chain is simply extra chains that will move you up to the next row of your crocheting. Depending on what type of pattern you’re using, you will create turning chains of different lengths.[1]
- Single crochet: one chain
- Half double crochet: two chains
- Double crochet: three chains
- Triple crochet: four chains
-
2Flip your work. At this point, your crochet hook should be at the far left of the piece you’re working. Simply rotate your piece of crochet so that your hook is to the right of the fabric instead of the left. Think of it as turning the page in a book.Advertisement
-
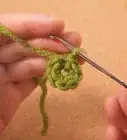
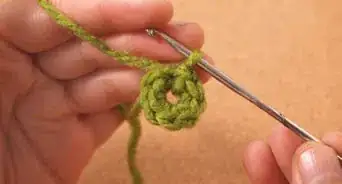
3Crochet into the first stitch of the previous row. Look at the base of the turning chain you made. The space directly next to it is where you insert the hook to begin your next row.
-
4Continue working your pattern. Work the next row in whatever stitch you’re using. When you reach the end of that row, simply repeat these instructions.

Creating a Row
-
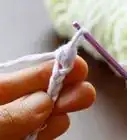
1Make a slip knot. For the very first crochet stitch, you need to create a slip knot on your finger.[2]
- Lay the yarn over your left index finger.
- Holding the yarn from the free end, wrap it around your finger — going under then over — making sure to cross over the original yarn.
- When you’ve finished, the original yarn should be on the right, and the free end should be on the left.
- Both the free end and the end attached to the skein should be pulled down.
- Pull the “original yarn” loop on the right up slightly.
- Cross it over the “free end” loop so they switch positions.
- Pull the “free end” loop, which is now on the right, up as you remove your index finger from the knot.
- Pull to tighten the knot.
-
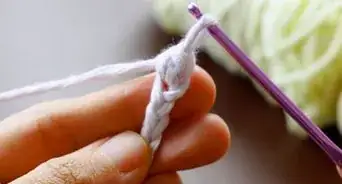
2Insert the crochet hook into the loop. Make sure the loop is big enough to fit the hook through. When the hook is in, pull on both ends of the yarn to tighten the slip knot around the crochet hook.
-
3Hold the yarn and hook properly.[3] When crocheting, you will always be working toward the left, so you will hold the yarn in your left hand and the crochet hook in your right hand. Make sure to work with the yarn that is attached to the skein, not the free end.
- The crochet hook should have a flattened section, where you should place the thumb and index finger of your right hand.
- Wrap the rest of your fingers comfortably around the lower half of the crochet hook, away from the actual hook/head.
- Lay the yarn across the fingers of your left hand.
- Raise your index finger and wrap your pinkie and ring fingers around the yarn. You will use the raising of the index finger and the grip of the pinkie and ring fingers on the yarn to create the necessary yarn tension.
- Let there be enough tension on the yarn. But let it be loose enough to slide through your fingers while crocheting.[4]
- Grip the bottom of the loop with your thumb and middle finger.
-
4Crochet a stitch. There are many different types of stitches and patterns, but this article will stick to the simplest: the single crochet, abbreviated sc.[5]
- Make sure the yarn being held up by your index finger is behind the crochet hook.
- Move the head of the hook under and behind the yarn.
- From that position, move the head over the yarn and back to the front, catching the yarn in the hook as you do so.
- Pull the yarn through the loop being stabilized by your middle finger and thumb.
-
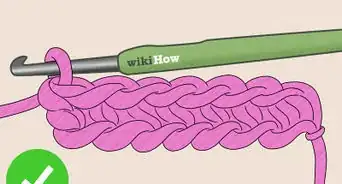
5Repeat. Create a row of chains by repeating this exact process until you've reached the end of the row.
- Follow the instructions in the pattern you're following.
- If you're not following a pattern, make sure you keep track of (count and write down) how many chains you're creating per row, so your end product has an even edge.

Community Q&A
-
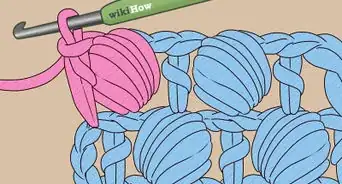
QuestionHow do I make a shell pattern?
 Community AnswerIn one stitch, you want to make a single crochet, a double, a triple, a double and a single, a single in the next crochet, and then repeat the process.
 -
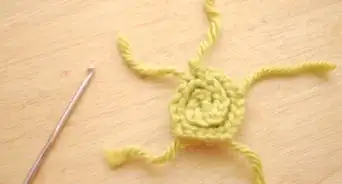
QuestionWhen crocheting in the round, is it necessary to "turn" my work, or do I continue going in the same direction?
 LibraryMouseCommunity AnswerJust keep going in the same direction.
 -
QuestionDo I turn first and then chain, or chain and then turn?LibraryMouseCommunity AnswerChain, then turn.
Warnings
- An English pattern may be written in American or British crochet terms. Make sure which. The differences are usually referred to as UK/US or British/American. Examples of this ...UK double crochet (dc) = US single crochet (sc)⧼thumbs_response⧽
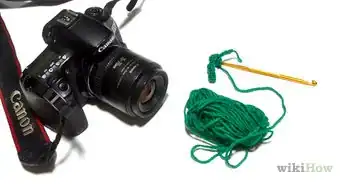
Things You'll Need
- Crochet hook
- Yarn
- Working knowledge of the basic stitches — ch, sc, hdc, dc, tr or any other stitch that the pattern is using.
References
- ↑ https://www.anniescatalog.com/crochet/content.html
- ↑ https://sarahmaker.com/crochet-slip-knot/
- ↑ http://www.crochetguru.com/hold-a-crochet-hook.html
- ↑ https://www.sigonimacaroni.com/best-way-to-hold-yarn-when-crocheting-how-to-control-yarn-tension/
- ↑ https://www.anniescatalog.com/crochet/content.html
About This Article

Before you can turn in crochet, you need to chain a row of stitches according to the pattern you're working with. When you reach the end, determine the type of stitch you will be using and add the correct number of extra chains to take you up to your next row, such as 1 chain for single crochet or 3 for double crochet. To move to the next row, turn your work so that your hook is on the right-hand side rather than on the left. Then, proceed with your next row by following the stitches in your chosen pattern. To learn how many turning chains you need for half double crochet or triple crochet stitches, read on!