This article was co-authored by Sarah Stearns. Sarah Stearns is a DIY Specialist, Artist, Maker, Blogger, and the Founder of SarahMaker.com. With over ten years of experience, she specializes in fun, approachable crafts like crocheting, making polymer clay jewelry, quilting, and creating Cricut projects. Her work has been featured in several publications, such as Scientific American, Good Housekeeping, Vox, and Apartment Therapy. Sarah holds a BA in Psychology from Vanderbilt University.
This article has been viewed 272,624 times.
There you are, happily reading a crochet pattern and so proud of the work you've done so far and then you reach the end and all they say is, "finish off" or "tie off". What? What does that mean?! For a beginner, how to end a crochet chain isn't very obvious. The first method is the most basic and can be used for most projects. The second method is an improvement on the standard for any item crocheted in the round.
Steps
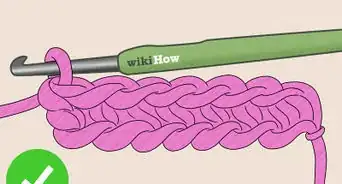
Basic Row Method
-
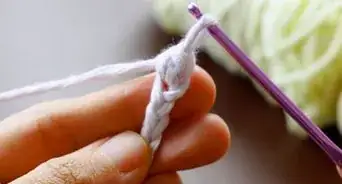
1Make your last stitch. Make the final stitch in your row, just as you normally would before starting extra chain stitches to turn around and move on to the next.
- Hold the yarn tight enough to keep tension on the yarn but loose enough so that it can slide through your fingers while you crochet.[1]
-
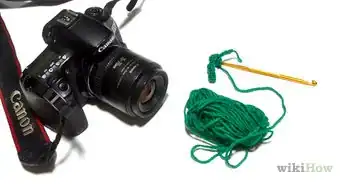
2Cut some extra thread. Cut the yarn about 4-6" from where it comes off the piece you are working on. This extra thread is called the tail.Advertisement
-
3Start as if making a single crochet chain. You should have one loop on your hook at this point. Now, catch the yarn on your hook and pull it towards the loop as if you were going to make another chain.
-
4Pull the thread all the way through. Now, instead of creating a loop with the yarn, pull the thread all the way through the loop.[2]
-
5Tug to secure the knot. Give the tail a firm pull. You should see the loops behind and around it tighten up until it looks like your piece ends in a knot. Technically you are done, though you should not generally stop here as this connection can come undone.
-
6Weave in the ends. Take your tail and weave it back through the stitches that you have made. This will hide the tail and keep it from unraveling the knot you just made.
- Now, there are LOTS of different theories on the best way to weave the yarn through the piece. Some people use a yarn needle, others use the crochet hook, some people weave the thread back and forth through the first and/or second rows, some people pull it in a single line through the middle of the first row. Experiment and find a way that you like but most methods likely work equally well.

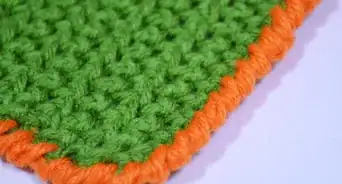
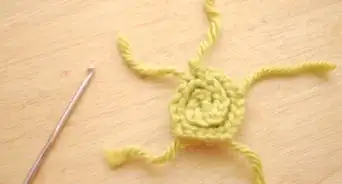
Continuous Round Chain Method
-
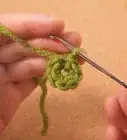
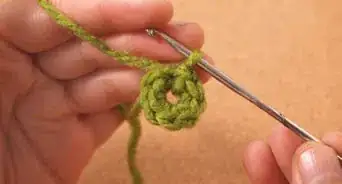
1Do your last stitch in a round. Do the last stitch as you normally would while working in the round. Stop just short of chaining extra to start a new row.
-
2Cut off the excess. Cut the yarn about 4-6" from where it comes off the piece you are working on. This extra thread is called the tail.
-
3Pull the thread through and out. Now pull on the loop that you have started until all of the thread comes through and you have a loose tail.[3]
-
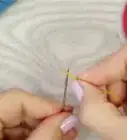
4Thread a yarn needle with the tail. Get a yarn needle and thread the tail through the needle.[4]
-
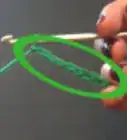
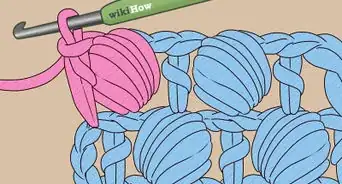
5Thread through the other side of the gap. Now, you'll have the two sides of your row on the circle, separated by a V shaped gap. Your needle and thread should be on one side: you're going to bring them over to the other. Put the needle just under the first stitch, just past the beginning chain, and pull the tail under both loops.
-
6Pull the gap closed. Pull the tail to bring the two sides of the V together and close the gap.
-
7Finish the fake chain. Go back to the last stitch that you made, on the first side. Put the thread through the back loop of that first stitch, from the facing side, and then pull it through. It should now look like a normal chain in the outside row, completely invisible.
-
8Weave in the remainder of the tail. Weave the tail down towards the center a bit and then back up. Weaving in two directions will be necessary to keep the tail from coming loose.
Community Q&A
-
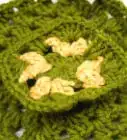
QuestionHow do I finish my baby blanket with a shell all-around border?
 Jenny MarieCommunity AnswerUsing any color you choose, attach the yarn to your hook with the standard slip-knot. At any point on the blanket make a slip-stitch to attach the yarn to the blanket. Make one round of single-crochet all the way around first, joining the last stitch to the first stitch with a slip-stitch. Doing this is useful as you can count the number of stitches on each side and end, making sure you have the same number on each side and end. Now make the shell stitch pattern you have chosen.
 -
QuestionHow can I fasten the end of a magic ring so that it doesn't pull partially open?
 Community AnswerYou have to join both sides together with a very loose slip stitch. Then, if you like how it looks, very carefully and slowly pull the working yarn or string slowly.
 -
QuestionI am crocheting a dark brown bomber jacket. The stitching is cream colored. How do I finish the light ends off so people can't see them on the brown?
 Community AnswerYou have to sew and then work the loose ends back and forth through your finished jacket seam. You have to do this on the wrong side, or inside, of the jacket.
Warnings
- Make sure you pulled the yarn end ALL the way through. If you didn't, it will unravel.⧼thumbs_response⧽
References
- ↑ https://www.sigonimacaroni.com/best-way-to-hold-yarn-when-crocheting-how-to-control-yarn-tension/
- ↑ https://kindofknit.com/how-to-fasten-off-and-finish-off-in-crochet/
- ↑ https://www.youtube.com/watch
- ↑ https://kindofknit.com/how-to-fasten-off-and-finish-off-in-crochet/
- ↑ https://sarahmaker.com/crochet-potholder/
- ↑ https://sarahmaker.com/easy-crochet-beanie/
About This Article

To finish off crochet using the basic row method, make your final stitch in the row as normal before cutting extra thread about 4 inches long. Next, start as if you are going to make a chain, but pull the thread all the way through the loop on your hook instead of making another loop as you would when chaining. To finish, tug the thread to tighten up the knot and weave the tail into the stitches you just created with the hook or a yarn needle so the knot doesn't come loose. For tips on how to finish with the continuous round chain method, keep reading!