This article was co-authored by wikiHow Staff. Our trained team of editors and researchers validate articles for accuracy and comprehensiveness. wikiHow's Content Management Team carefully monitors the work from our editorial staff to ensure that each article is backed by trusted research and meets our high quality standards.
wikiHow marks an article as reader-approved once it receives enough positive feedback. This article received 13 testimonials and 95% of readers who voted found it helpful, earning it our reader-approved status.
This article has been viewed 91,463 times.
Learn more...
Novice crocheters are often surprised to find that their finished items aren't the size that the project instructions said they would be. Often, the difference is great enough that the items aren't usable. To prevent this from happening, project instructions always include a gauge, which specifies the number of stitches per inch or centimeter. By checking the crochet gauge and making adjustments, you can ensure that your finished item is the right size.
Steps
Getting Started
-
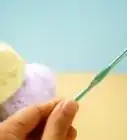
1Read the project instructions and select the correct yarn weight and hook size. Some instructions will specify a brand name and material for the yarn, but you can choose something else as long as it's the same weight. The weights are typically listed as bulky, worsted, sport, etc. Most yarns will have this written on the label, but sometimes they might have a number that correlates to the weight instead. For example:[1]
- 0: Lace
- 1: Superfine or Fingering
- 2: Fine or Sport
- 3: Light or DK
-
2Find the gauge information on the pattern. You can find this near the top of the pattern, often just below the yarn and hook recommendations. It will tell you how many rows and stitches there should be within a set of inches/centimeters. It will typically be written as:
- Gauge: # stitches and # rows = 4 inches ( 10.16 centimeters)
- # stitches and # rows in single crochet = 4 inches ( 10.16 centimeters)
Advertisement -
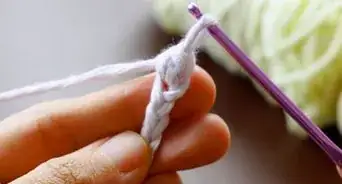
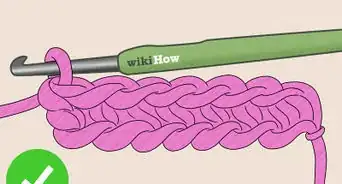
3Make a foundation chain about an inch or so longer than the recommended gauge swatch. Making your square larger will help make measuring more accurate later on.[2] For example, if the pattern calls for a 4 by 4-inch ( 10.16 centimeters) gauge swatch, your starter chain should be 5 to 6 inches (12.7 to 15.24 centimeters).
-
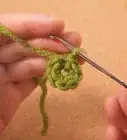
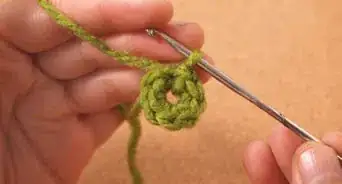
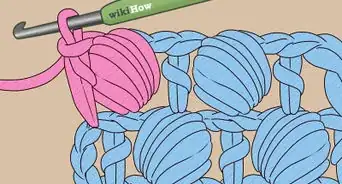
4Crochet a square using the pattern's recommended stitch.[3] The pattern will tell you what stitch to use for the gauge. In most cases, this will be the single crochet stitch, often written as "scs." If the pattern calls for something different, such as double crochet, then you should use that instead.
- Again, make sure that your square is a little bit larger than what the pattern recommends.
-
5Block the square, if necessary. Some crochet patterns recommend that you steam or block the finished piece. You should treat the gauge piece the same way as you would the finished work. If the pattern says to steam of block the finished project, then you should do the same to the gauge piece.
- A simple way to block is to place a towel over your swatch, and then iron it using lots of steam. Remove the towel and let the piece cool before moving on.[4]


Checking the Gauge
-
1Lay your swatch down on a flat surface in a well lit area. Make sure that you can see your stitches and rows clearly. Also, make sure that the swatch lays smoothly; there should be no bumps or ripples.
-
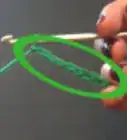
2Mark out a square on your swatch using sewing pins and a tape measure. Make sure that the square inside your swatch is the same size as the gauge. For example, if the gauge is 4 by 4 inches ( 10.16 centimeters), then your square should be 4 by 4 inches (10.16 centimeters). You will count your stitches within this square.
-
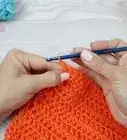
3Count the number of stitches and rows in your swatch. If your stitches are very small, you might find it easier to count them with a pencil or knitting needle. This way, you won't accidentally count two small stitches as one stitch.
- Consider writing down the number of stitches and rows on a scrap of paper.
-
4Compare them to the pattern. In order for the gauge to be correct, the number of stitches and rows within that square must match up to the pattern's gauge.[5] If you have too many or too few stitches/rows, then you will need to make some adjustments, and make another square.


Making Adjustments
-
1Change the hook size if the gauge is off. Sometimes, the gauge will be off, even with the correct hook size. This is usually due to working too tightly or too loosely. A quick fix is to simply use a different sized hook. Keep making swatches and changing hook sizes until your gauge matches up with the pattern's.
- If your swatch has too many stitches and rows, you are crocheting too tightly. Go up a hook size.
- If your swatch has not enough stitches and rows, you are crocheting too loosely. Go down a hook size.
-
2Try making your stitches a little looser if you can't get another hook. If you are crocheting too tightly, then avoid tugging as much. This will help loosen your stitches. If you are crocheting too loosely, then work tighter by giving the yarn a slight tug after each stitch.
-
3Try a different yarn. Some yarns are just thinner than others, despite being the same weight. Other yarns are easier to work with, or "stretch" better. Try to use a yarn that is similar to the one in the pattern.
-
4Create another square and measure again. Keep making adjustments and squares until your gauge matches the pattern's gauge.


Community Q&A
-
QuestionIn my pattern, it says the gauge is (3dc, ch 1) 4 times = 4 1/4" and 7 rows = 4." What do I do?
 LibraryMouseCommunity AnswerThe gauge listed is the gauge needed for the project to come out the correct size. Take your crochet hook and yarn and work (3dc, ch 1) 4 times. Repeat this for 7 rows. Your piece should measure 4 1/4 inches by 4 inches. If it does not, try again with a smaller sized hook if the swatch is too big and a bigger sized hook if the swatch is too small.
 -
QuestionMine says Rounds 1-3 = 4." What does this mean?
 Community AnswerAfter you have crocheted rounds 1, 2 and 3, your work should measure 4 inches across.
 -
QuestionWhat does it mean when my pattern says: Main CH divisible by 2+3?
 Community AnswerMake a chain that is divisible by 2, for instance 40 chains. Then add 3 more, so you'd have 43 chains.
Warnings
- Hook sizes can vary depending on where you live. If you are using an international pattern, make sure that you get the right hook size.⧼thumbs_response⧽
Things You'll Need
- Yarn
- Crochet hook
- Project instructions
- Measuring tape or clear ruler
- Sewing pins
- Iron and towel (optional)
References
About This Article

Before you check your crochet gauge, locate the gauge recommendation on your project, which you'll usually find below the hook and yarn recommendations. Then, make a foundation chain about an inch longer than the suggested gauge swatch , as this will make measuring your gauge easier. Crochet a square using the recommended stitch, then lay your square down and mark out a square with safety pins that's the same size as the gauge swatch. Finish by counting the stitches in the square and comparing them with the pattern's gauge. For tips on what to do if your gauge is off, read on!