A step-by-step guide on replacing a battery for older Macbooks
X
wikiHow is a “wiki,” similar to Wikipedia, which means that many of our articles are co-written by multiple authors. To create this article, volunteer authors worked to edit and improve it over time.
This article has been viewed 88,645 times.
Learn more...
Over time as we charge and discharge our computers, our laptop batteries lose their ability to hold a proper charge and stay as active without the constant use of an AC adaptor. If your macbook warranty is expired or you're an advent DIY do-er, follow this guide to change your macbook battery yourself in minutes.
Steps
-
1Completely shutdown the laptop. Be sure there are no lights on once the lid is closed and if the laptop is opened the screen does not turn on.
-
2Remove the ten (10) screws from the bottom of the laptop using the Phillips screwdriver. There will be three (3) longer screws that will only fit along the back side of the mac near the vent. Remember which holes they go in.Advertisement
-
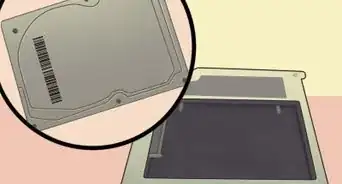
3Wedge your fingers or the plastic opening tool between the lower case and the vent and lift upward to release the clips holding the lower case to the upper case. Set lower case aside. It may be set the screws from step 1 on top of the low case once it is off so we may use them later.
-
4Carefully disconnect the battery from the logic board to avoid short-circuiting the board. Grab the plastic tab attached to the battery and pull it towards the front of the laptop.
-
5Remove the three (3) 6.5 mm tri wing screws securing the battery to the upper case using the Y1 screwdriver. Set these aside with the other screws from step one so we do not lose them.
-
6Use the plastic opening tool to carefully lift up a corner of the “Warning: Do not remove the battery” sticker off the right speaker enclosure. You do not have to completely remove the label but if you want you put it on the new battery you may.
-
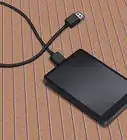
7Lift the battery by the clear attached pull-tab and remove it from the upper case carefully. It is best to put aside in an anti static bag but not completely necessary.
-
8Place new battery where the old battery was located. Take the three (3) 6.5 mm tri wing screws and fasten the new battery to the upper case. If you are placing the warning label back onto the battery, it is best to do so now.
-
9Carefully re-connect the battery to the logic board in the same area you removed it from.
-
10Inspect the logic board to ensure no screws are missing and the battery is properly connected back to the logic board. Place the laptop back onto the lower case and secure lower case to the upper case using the ten (10) screws removed from step 1.


Advertisement
Warnings
- This method may void the warranty if one exist for the macbook.⧼thumbs_response⧽
Advertisement
Things You'll Need
- New macbook battery, be sure to order the exact battery for the specific macbook you have. Buying a different battery will yield in insufficient results.
- Phillips #00 screwdriver
- Plastic opening tool
- Y1 tri-sing screwdriver


About This Article
Advertisement