This article was co-authored by wikiHow staff writer, Travis Boylls. Travis Boylls is a Technology Writer and Editor for wikiHow. Travis has experience writing technology-related articles, providing software customer service, and in graphic design. He specializes in Windows, macOS, Android, iOS, and Linux platforms. He studied graphic design at Pikes Peak Community College.
This article has been viewed 91,919 times.
Learn more...
More and more consumers are going online to find businesses and services in their local area. Claiming your business listing with the Bing Business Portal creates an opportunity for you to increase your visibility and influence consumers to visit your business. This wikiHow teaches you how to add or claim your business on Bing Maps.
Steps
Claiming or Adding a Small Business
-
1Navigate to https://www.bingplaces.com/ in a web browser. This is the website you use to add and claim your business on Bing Maps.
-
2Sign in to your account. You can sign in using a Google account, Facebook account, Microsoft account, or work account. Use the following steps to sign in:
- Click Sign In in the upper-right corner.
- Click which method you want to use to sign in (Google, Facebook, Microsoft, work) in the menu to the right.
- Select your account, or enter the email address and password associated with your account and sign in.
Advertisement -
3Click Claim or add your business manually. It's the green button in the box on the right. This displays a form that you need to fill out to add or claim your business.
- Alternatively, if you have a Google My Business account, click the button that says Import from Google My Business now in the box on the left. Then sign in with the Google account associated with your My Business account. This will take less time and you will get instant verification.
-
4Select "Small or medium business (1-10 locations)" in the drop-down menu at the top. It's the first option in the drop-down menu at the top. This is the option you select if your business has between 1 - 10 locations.
- If you have a chain business (more than 10 locations) or are an agency that manages business listings, you will need to contact Microsoft to verify your account. Then you will need to verify your business and upload all your locations using a spreadsheet.
- You cannot claim or add a business unless your business has a physical location. If you are an online business without a physical location, use the Bing webmaster tool instead.
-
5Search for your business listing. You need to search for your business listing to claim it or create a new listing. Use the following steps to search for your business listing.
- Use the second drop-down menu at the top to select the country or region your business resides in.
- Enter your business phone number or you business name and address.
- Click Search.
-
6Click Create new business or Claim and edit details. If your business is listed on Bing, you can claim the business and edit the details. If your business is not listed on Bing, you can create a new business.
-
7Enter the basic business information and click Next. The first form you need to fill out is your basic business information. If the business is already listed on Bing, verify that the information is correct. Fill out or verify the following information and click Next at the bottom:
- Enter your business or professional name in the bar at the top.
- Enter your primary business phone number in the bar labeled ""Main phone."
- Enter your business address in the bars below "Address."
- Enter your business website in the bar at the bottom.
- Click Next.
-
8Select your business category information. The second form is your business category. Use the following steps to enter your business category information or verify the information that is already listed:
- Click Browse next to "Segment of business."
- Click one of the options in the menu and click Done.
- Type a business category or click Browse next to "Business Category" and click the checkbox next to the options available.
- Select your primary category from the drop-down menu.
- Enter a brief description of your business in the box at the bottom.
- Click Next.
-
9Select if you want your address to be shown in Bing or be hidden. If customers are expected to visit your address, click the radio option next to "Yes, this is a business address. Show full address in search results." If you wish to hide your address, click the radio option next to "No, hide this address in search results." Your city and zip code will be the only thing that appears in search results.
-
10Enter a unique store code. If you have a unique store code, enter it in the box labeled "Store code."
-
11Select if you are a business or a professional and click Next. If you are business (store, restaurant, etc) click the radio option next to "Business." If you are a professional (i.g, a freelancer, service provider), click the radio option next to "Professional." Click Next when you are done.
-
12Enter your contact details and click Next. Enter a contact email address in the bar at the top. Then you can add optional contact information such as a Facebook page, Twitter, Yelp, or TripAdvisor link in the spaces provided. Click Next when you are done.
-
13Add photos of your business listing and click Next. You can add up to 100 photos. The first photo you upload will be the primary photo that is displayed in search results. The first photo you upload should be a logo or a good image of your store front.[1] Use the following steps to upload a photo:
- Click Browse.
- Click an image file you want to upload.
- Click Open
- Click Next when you have uploaded all the photos you want to add.
-
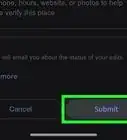
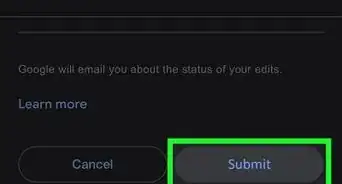
14Select your working hours and click Submit. Use the drop-down menu to select your working hours. Then click Submit when you are finished.
-
15Click Verify Now. You need to verify your business before it appears on Bing. If you are using the website on a desktop computer, the only option is to have a PIN mailed to you on a post card. You will use that PIN to verify your business. This will take about 5-6 business days to receive the card by mail. You can also verify your business using the mobile app. This takes about 2-3 business days.
-
16Verify your business by post card. This takes about 5-6 business days. If you choose this option, you will not be able to verify your business using the mobile app. Use the following steps to verify your business by a post card in the mail:
- Click Continue with verification by post.
- Wait for the post card to arrive in the mail.
- Go to https://www.bingplaces.com/DashBoard/Home/ in a web browser.
- Enter the PIN next to where it says "Enter postal PIN here."
- Click Verify.
-
17Verify your buisness using the mobile app. The Bing Places for Businesses app is available for free from the Google Play Store on Android phones and tablets or the App Store on iPhone and iPad. This options takes 1-3 business days to verify your business. Use the following steps to verify your business using the mobile app:[2]
- Download the Bing Places for Business app from the Google Play Store or App Store.
- Click I will verify on app in your web browser.
- Open the Bing Places for Business app on your smartphone or tablet.
- Click Verify your business below "Complete Verification."
- Click Get PIN Instantly below "Phone verification" or "SMS/Text verification."
- Retrieve the PIN from the phone call or text messages.
- Enter the PIN and click Submit.


Adding a Chain Business or Agency
-
1Visit https://www.bingplaces.com/ in a web browser. This is the website you use to add and claim your business on Bing Maps.
-
2Sign in to your account. You can sign in using a Google account, Facebook account, Microsoft account, or work account. Use the following steps to sign in:
- Click Sign In in the upper-right corner.
- Click which method you want to use to sign in (Google, Facebook, Microsoft, work) in the menu to the right.
- Select your account, or enter the email address and password associated with your account and sign in.
-
3Click Claim or add your business manually. It's the green button in the box on the right. This displays a form that you need to fill out to add or claim your business.
- Alternatively, if you have a Google My Business account, click the button that says Import from Google My Business now in the box on the left. Then sign in with the Google account associated with your My Business account. This will take less time and you will get instant verification.
-
4Select "Chain Business (More than 10 locations)" in the drop-down menu at the top. It's the second option in the drop-down menu below "What is your business type." This opens a form for you to fill out.
- If you are an agency that manages listings on behalf of clients, select "I manage listings on my cient's behalf" in drop-down below "What is your business type."
-
5Enter your chain name, website, and number of locations and click Next. Enter the name of your business chain in the first box. Then enter your business website in the second bar. Enter the number of locations your chain has in the third box. Click Next at the bottom when you are ready to continue.
- If you are an agency that manages business listings on behalf of your clients, fill out the form. You will need to enter your agency name and website. Then enter your contact details, and the address of your head office. Click Next when you are ready to continue.
-
6Enter your corporate address and phone number and click Next. You will need to enter the address of your corporate office. Use the last bar to enter a valid contact number. Click Next when you are ready continue.
-
7Click Submit. This sends your information off to Microsoft. Microsoft will contact you to confirm your business information. Once they contact you and verify your business information, they will provide you with a spreadsheet template you can use to fill out your business location details. They will give you instructions on how to fill out the spreadsheet and upload it to Bing Places.


References
About This Article