This article was co-authored by wikiHow staff writer, Nicole Levine, MFA. Nicole Levine is a Technology Writer and Editor for wikiHow. She has more than 20 years of experience creating technical documentation and leading support teams at major web hosting and software companies. Nicole also holds an MFA in Creative Writing from Portland State University and teaches composition, fiction-writing, and zine-making at various institutions.
This article has been viewed 27,844 times.
Learn more...
This wikiHow teaches you how to add your PC or Mac's webcam as a source in OBS Studio.
Steps
-
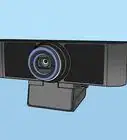
1Connect the webcam to your PC or Mac. If you haven’t yet set up your webcam, see Set up a Webcam now.
-
2Open OBS Studio. It’s in the All Apps area of the Start menu in Windows, and the Applications folder in macOS.Advertisement
-
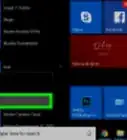
3Click + under “Sources.” It’s the first icon at the bottom of the “Sources” box. A menu will appear.
-
4Click Video Capture Device. It’s near the bottom of the menu. This opens the “Create/Select Source” window.
-
5Type a name for the webcam. It goes into the “Create New” box at the top of the window.
-
6Click OK. The Properties menu will appear.
-
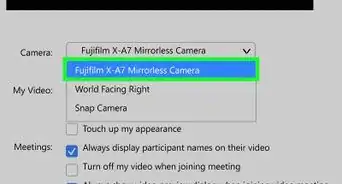
7Select your webcam from the “Device” drop-down menu. It’s the first menu in the window.
-
8Click OK. It’s at the bottom of the window. Your webcam is now added to OBS Studio.


Community Q&A
-
QuestionCan I add a phone camera too?
 \Community AnswerNo, you can't. Unless you have a a way of connecting your phone's camera to your computer.


About This Article

1. Connect your webcam to the computer.
2. Open OBS Studio.
3. Click + under “Sources.”
4. Click Video Capture Device.
5. Type a name for the webcam.
6. Click OK.
7. Select your webcam.
8. Click OK.