This article was co-authored by wikiHow staff writer, Nicole Levine, MFA. Nicole Levine is a Technology Writer and Editor for wikiHow. She has more than 20 years of experience creating technical documentation and leading support teams at major web hosting and software companies. Nicole also holds an MFA in Creative Writing from Portland State University and teaches composition, fiction-writing, and zine-making at various institutions.
This article has been viewed 604,757 times.
Learn more...
Most modern digital cameras can be used as webcams if you have the right software and hardware. If your webcam supports USB, you can usually use the manufacturer's software to stream or video chat through your computer at HD quality. If USB isn't supported or you have a DSLR camera that feels choppy over USB, you'll need an HDMI capture card/adapter. This wikiHow teaches you how to use a digital camera as a webcam for chatting and broadcasting live in most popular apps.
Steps
Using an HDMI Adapter
-
1Get an HDMI adapter if you need one. If your digital camera has an HDMI output and you want to stream at a high quality, you can use an HDMI-to-USB adapter or capture card, such as the Elgato Cam Link 4K, MiraBox Capture Card, or Up Stream Video Capture Adapter.
- This is probably the easiest way to use your digital camera as a webcam, but if you don't have an HDMI-to-USB adapter or HDMI capture card already, it's definitely more expensive than using USB. Check out Using a USB Cable for an alternative to HDMI.
- If the HDMI output isn't "clean," your streaming software will display everything on the camera's screen, including menus, timers, and battery notifications.[1] Check the manufacturer's website or your owner's manual to make sure you have a clean output.
- Most HDMI adapters/capture cards work on modern versions of Windows and macOS, but double-check the model before buying.
-
2Install any software required by your camera. This varies wildly by manufacturer, but some cameras require software/drivers to connect to Windows or macOS. Visit your camera manufacturer's website and search for your camera to see what's necessary to install.Advertisement
-
3Connect the HDMI adapter to the camera. You'll usually need a micro-HDMI to HDMI cable, but that varies by manufacturer. The smaller end goes into the camera, while the larger end plugs into the HDMI adapter.
- Most cameras have a built-in setting that lets you adjust the resolution delivered through HDMI. You might need to check the settings and adjust them to something that is compatible with the HDMI card.
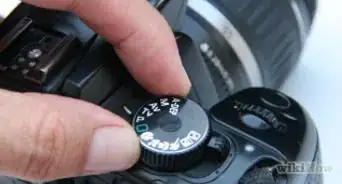
- Depending on the model, you may also need to switch the camera's mode to Movie or Video mode, which is usually done by flipping a switch or turning a wheel on the camera.
- It's also a good idea to plug your camera into a power source—you wouldn't want to run out of batteries while streaming.
-
4Connect the HDMI adapter to your computer. This time, you'll connect the USB cable coming from the HDMI adapter to one of your computer's USB ports. Your HDMI adapter should be recognized by your computer automatically. If not, check the adapter manufacturer's website for any required software.
-
5Turn your digital camera on. First, if your camera's built-in setup screens have an option for enabling "HDMI" mode, turn that on. If you're using software from your manufacturer, open it, and follow any on-screen instructions for connecting to the camera.
-
6Open the app you want to use for streaming or video chat. For example, if you want to chat on Zoom, open Zoom now.
-
7Change your camera in the streaming or video chat app. If your computer has a built-in webcam, most apps will use that by default. For example, if you're using the Zoom app on Windows or macOS, you'll need to click your profile photo, navigate to Settings > Video, and then select your camera from the "Camera" menu. Once you've selected the camera, you're good to go!
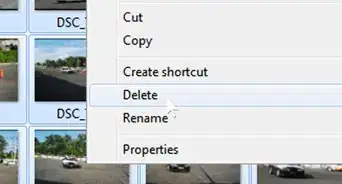
- If you are not able to select your digital camera in the app and there's no streaming software available from your manufacturer, you may need to use a streaming app like OBS (Open Broadcaster Software) to receive the signal first.


Using a USB Cable
-
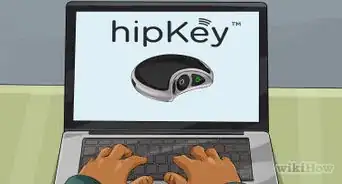
1Find out if your camera will work as a webcam without webcam software. Some new digital cameras, such as the FujiFilm X-47 and X-T200, are webcam-ready and USB-capable out of the box, meaning that you don't need to install the manufacturer's software or use an HDMI adapter to video chat or broadcast.[2] Check your camera's manual to see if there's a section about using it as a webcam (it may say "streaming" or "video chat"), and follow any included instructions.
- Some digital cameras require firmware updates to be used as webcams. Check your manufacturer's support site for instructions on updating your camera's firmware.
- Even if the manual doesn't mention anything about streaming or broadcasting, you'll usually be able to stream with it through HDMI or USB.
-
2Download webcam software for your camera. Many camera manufacturers now offer free software that lets you video chat or broadcast over a USB connection. First, if you don't find your camera on the below list and it has an HDMI output (or you simply prefer a higher quality), see the Using an HDMI adapter method. As for USB compatible software:
- Canon: Canon's EOS Webcam Utility Beta app lets you connect to your PC or Mac with USB if you have any of the following models: Canon EOS-ID C/1D X/1D X MARK II/1D X MARK III, EOS 5D MARK III/5D MARK IV, EOS 5DS/5DS R, EOS 6D/6D MARK II, EOS 60D, EOS 7D/7D MARK II, EOS 70D, EOS 77D, EOS 80D, EOS 90D, EOS M200, EOS M50, EOS M6 MARK II, EOS R, EOS R5, EOS R6, EOS Ra, EOS Rebel SL1/SL2/SL3/T3/T3i/T5/T5i/T6/T6i/T7/T7i/T8i/T100, EOS RP, Canon PowerShot G5 Mark II, PowerShot G7X Mark III, PowerShot SX70 HS.[3] Download from https://www.usa.canon.com/internet/portal/us/home/support/self-help-center/eos-webcam-utility.
- FUJIFIlM: FUJIFILM X Webcam software supports both Windows and macOS for the following models: GFX100, GFX50s, GFX50r, X-t4, X-t3, X-t2, X-h1, X-Pro3, and X-Pro2. Get it from https://fujifilm-x.com/en-us/webcam-support.
- GoPro: GoPro Webcam software supports USB for the GoPro Hero8 Black and Hero9 Black, and it's available at https://community.gopro.com/t5/en/How-to-Use-Your-GoPro-as-a-Webcam/ta-p/665493.
- Nikon: Nikon Webcam Utility runs on Windows (macOS coming soon) and supports the Z7, Z6, Z5, Z50, D6, D850, D780, D500, D7500, D5600 models over USB. It's available from https://downloadcenter.nikonimglib.com/en/products/548/Webcam_Utility.html
- Olympus: Olympus OM-D Webcam Beta supports USB streaming on Windows and macOS for the Olympus E-M1X, E-M1, E-M1 Mark II/Mark III, and E-M5 Mark II. Download it from https://dl-support.olympus-imaging.com/webcambeta/index.html.
- Panasonic: Lumix Tether for Streaming (Beta) is available on Windows and macOS for USB streaming on these Lumix models: DC-GH5, DC-G9, DC-GH5S, DC-S1, DC-S1R, DC-S1H. Get it from https://www.panasonic.com/global/consumer/lumix/lumixtether.html.
- Sony: Sony Imaging Edge Webcam software lets you stream over USB on Windows 10, and soon macOS (starting in late 2020). Supported models are E-mount ILCE-7M2, ILCE-7M3, ILCE-7C, ILCE-7RM2, ILCE-7RM3, ILCE-7RM4, ILCE-7S, ILCE-7SM2/7SM3, ILCE-9, ILCE-9M2, ILCE-5100, ILCE-6100, ILCE-6300, ILCE-6400, ILCE-6500, ILCE-6600, Sony A-mount ILCA-77M2, ILCA-99M2, ILCA-68, Sony Digital Still Camera DCS-HX95/HX99, DCS-RX0/RX0M2, DSC-RX100M4/RX100M5/RX100M5A/RX100M6/RX100M7, DSC-RX10M2/RX10M3/RX10M4, DSC-RX1RM2, DSC-WX700/WX800, DSC-ZV-1. Download it from https://support.d-imaging.sony.co.jp/app/webcam/en/download.
- If your manufacturer isn't on this list, check their website to see if there's a webcam/streaming app available for download. If your manufacturer is on this list but your model isn't, you might be able to use a paid third-party option like Ecamm Live (Mac), vMix (PC), and Sparko Cam (PC). All of these work with Zoom, Twitch, Facebook Live, WebEx, OBS Studio, and other software.[4] Just check the software's website to make sure it works with your model, operating system, and streaming or video chat software before buying.
-
3Install the webcam software on your PC or Mac. You'll need to run the installer so you can open it from the Start menu (Windows) or the Applications folder (Mac). This usually looks like double-clicking the downloaded file and following some simple on-screen instructions.
- If the software came in a compressed file format ending in .ZIP, see How to Unzip a File to learn how to unpack it, and then double-click the setup or installer file inside the unpacked folder.
-
4Connect the camera to your computer with a USB cable and turn it on. Most (but not all) cameras come with USB cables by default. If you don't have the original cable, check the manufacturer's website to see what kind you need. Plug the smaller end of the cable into the camera, and the larger end into an available USB port on your computer.
- For best results, plug the USB port directly into the computer and not through an external USB hub.
- Make sure your camera is fully charged before you start streaming.
- If your camera isn't charging while connected via USB, you'll probably want to connect it to a power source before you get started. You wouldn't want to run out of batteries while streaming!
-
5Open the webcam software. If your camera is detected automatically, you should see some details about it. You might have to click through some setup options before you can stream. You also may have to put your camera into USB mode so the software can recognize it—the software should tell you what to do. For example, you may have to select a USB setting on the camera's screen before the software can see it.[5]
- Depending on the model, you may also need to switch the camera's mode to Movie or Video mode, which is usually done by flipping a switch or turning a wheel on the camera.
- Once your camera is detected and in the proper mode, you should see a preview of your video.
-
6Open the app you want to use for streaming or video chat. For example, if you want to chat on Zoom, open Zoom now.
-
7Change your camera in the streaming or video chat app. If your computer has a built-in webcam, most apps will use that by default. For example, if you're using the Zoom app on Windows or macOS, you'll need to click your profile photo, navigate to Settings > Video, and then select your camera from the "Camera" menu.[6] Once you've selected the camera, you're good to go!
- Audio cannot be transmitted over USB, so you'll be using your computer's microphone to record or stream your voice.


Community Q&A
-
QuestionWhat USB cable is that?
 DenneiskTop AnswererThat is a standard USB 2.0 to microUSB cable. It comes packaged with digital cameras (and it should have came with yours, too).
 -
QuestionWhich is the best budget camcorder available in India?
 Community AnswerTry using Google Shopping to see what's available in your area; I would recommend a GoPro as they are quite cheap and have good quality, but you may be able to find something better or cheaper if you search around a bit.
 -
QuestionWhat if the manufacturer does not have any drivers for that old of a camera?
 Community AnswerThen the camera should simply work once you plug it in, although most cameras have built-in drivers when you plug it in.


References
- ↑ https://www.usa.canon.com/internet/portal/us/home/support/self-help-center/eos-webcam-utility
- ↑ https://fujifilm-x.com/global/stories/fuji-guys-how-to-series-fujifilm-x-webcam-x-a7-x-t200/
- ↑ https://www.usa.canon.com/internet/portal/us/home/support/self-help-center/eos-webcam-utility
- ↑ https://www.nikonusa.com/en/learn-and-explore/live-streaming-with-nikon-cameras.page
- ↑ https://dl-support.olympus-imaging.com/webcambeta/index.html
- ↑ https://support.zoom.us/hc/en-us/articles/201362313-How-do-I-test-my-video-
About This Article

1. Get an HDMI-to-USB adapter.
2. Install any required software for your camera.
3. Connect the camera to the adapter.
4. Connect the adapter to the computer.
5. Open your streaming software or video chat app.
6. Select your digital camera from the camera menu.