X
This article was co-authored by wikiHow staff writer, Jack Lloyd. Jack Lloyd is a Technology Writer and Editor for wikiHow. He has over two years of experience writing and editing technology-related articles. He is technology enthusiast and an English teacher.
The wikiHow Tech Team also followed the article's instructions and verified that they work.
This article has been viewed 762,954 times.
Learn more...
This wikiHow teaches you how to stream live video from your computer's webcam to the Internet. You can use OBS Studio to encode a stream to use with any streaming service, although you can also stream your webcam directly to YouTube or Facebook without having to use an encoder.
Steps
Method 1
Method 1 of 3:
Using OBS Studio Encoding
-
1Understand what encoding means. Encoding a stream allows you to send stream content from a third-party application (in this case, OBS Studio) to a streaming service (e.g., YouTube or Twitch). Since many streaming services don't support direct webcam streaming, this is the only way to stream on some platforms.
- Streaming from an encoder often results in much higher-quality live streaming than does using a website's built-in streaming with your webcam.
- When encoding a stream, you'll have to retrieve a key and an address from your selected streaming service and then plug both piece of information into OBS Studio (or any other streaming application).
-
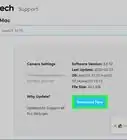
2Install your webcam if necessary. If your computer doesn't already have a built-in webcam, you'll need to attach and set up an external USB webcam before you'll be able to stream.
- You can buy webcams in virtually any tech store or large online marketplace (e.g., Amazon). They tend to range in price depending on their quality.
Advertisement -
3Open your service's "Live Stream" section and retrieve your stream key. In order to link your webcam's stream to your preferred service, you'll need to retrieve a link that allows you to do so from your service. This process varies from service to service:
- Twitch - Go to https://www.twitch.tv/ and log in if necessary, click your username in the upper-right corner, click Dashboard, click the Channel tab below "Settings" on the left side of the page, click Stream Key, click Show Key, click I understand, and copy your key.
- Facebook - Go to https://www.facebook.com/ and log in if necessary, click Live Video, click the Connect tab, and copy the "Stream Key" text box's contents.
- YouTube - Go to https://www.youtube.com/live_dashboard_splash and log in if necessary, click Stream now on the left side of the page, click Reveal next to the "Stream name/key" box, and copy the stream key.
-
4Open OBS Studio. Its app icon resembles a three-bladed fan on a black background.
- If you haven't yet installed OBS Studio, go to https://obsproject.com/download in your browser, select your operating system, click Download Installer, and install it before proceeding.
-
5Click File. This option is in the upper-left side of the window.
- On a Mac, click OBS Studio in the upper-left corner of the screen.
-
6Click Settings. It's in the File drop-down menu. Doing so opens the Settings window.
- On a Mac, click Preferences... in the drop-down menu.
-
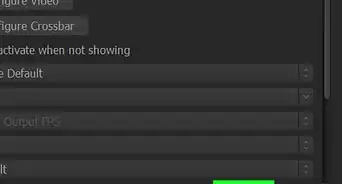
7Click the Stream tab. You'll find this on the left side of the window.
-
8Select a streaming service. Click the "Service" drop-down box, then click your service's name (e.g., Twitch) in the drop-down menu.
-
9Enter your stream key. Click the "Stream key" text box, then paste in your stream key by pressing Ctrl+V (Windows) or ⌘ Command+V (Mac).
-
10Click Apply, then click OK. Both options are at the bottom of the page. This will save your settings and close the window.
- If you don't see Apply and OK on a Mac, just close the Preferences window.
-
11Add your webcam to the stream. By default, OBS Studio will record your desktop. You'll need to add your webcam by doing the following:
- Click + below the "Sources" box at the bottom of the page.
- Click Video Capture Device
- Check the "Create new" box and enter a title.
- Click OK
- Select your webcam.
- Click OK
-
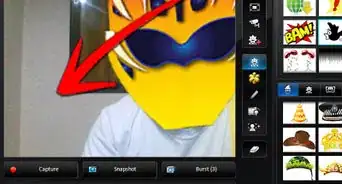
12Adjust your webcam's view. You can click and drag the bottom-right corner of the red box that's surrounding your webcam in order to enlarge the amount of screen space that your webcam covers.
- Skip this step if you're happy with the current webcam settings.
-
13Click Start Streaming. It's a button in the lower-right side of the OBS Studio window. Your stream will begin.
-
14Add your OBS stream to your preferred platform. Depending on your selected service, this process will vary:
- Twitch - You'll go live automatically. Open your Channel page to view the stream.
- Facebook - Click Go Live in the lower-right side of the Connect tab from which you retrieved your stream key earlier.
- YouTube - Click GO LIVE on the Stream now tab from which you retrieved your stream key earlier.


Advertisement
Method 2
Method 2 of 3:
Using YouTube's Go Live
-
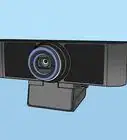
1Install your webcam if necessary. If your computer doesn't already have a built-in webcam, you'll need to attach and set up an external USB webcam before you'll be able to stream.
- You can buy webcams in virtually any tech store or large online marketplace (e.g., Amazon). They tend to range in price depending on their quality.
-
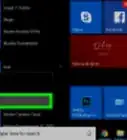
2Make sure that you're using Google Chrome. As of April 2018, streaming to YouTube directly from your computer's webcam is only available on Google Chrome.
-
3Open YouTube. Go to https://www.youtube.com/ in your computer's web browser. This will open your YouTube home page if you're logged into your Google Account.
- If you aren't logged in, click SIGN IN in the upper-right side of the page, then enter your email address and password when prompted.
-
4
-
5Click Go live. This option is in the drop-down menu. Doing so opens the live-streaming section of YouTube.
-
6Click Get started. It's a blue button in the middle of the page. This will prompt YouTube to begin validating your account, which will unlock the ability to live-stream in 24 hours.[2]
- If you've already activated your account for streaming on YouTube, skip to the "Click Camera" step.
-
7Re-open the live-streaming page after 24 hours. Once your account is able to stream, go back to YouTube, click the "Upload" button appropriate to your browser, and select the Go live option.
-
8Click Camera. It's a tab on the left side of the page. This option allows you to stream directly from your webcam without having to download an encoder.
-
9Click Allow when prompted. This notification will appear in the upper-left corner of the window. Doing so allows Chrome to use your webcam and microphone.
-
10Enter your stream's information. Type the title and description for your stream into the "Title" and "Description" text boxes, then select a thumbnail if desired.[3]
-
11Click GO LIVE. It's a blue button. Doing so will prompt YouTube to begin streaming from your webcam.


Advertisement
Method 3
Method 3 of 3:
Using Facebook Live Stream
-
1Install your webcam if necessary. If your computer doesn't already have a built-in webcam, you'll need to attach and set up an external USB webcam before you'll be able to stream.
- You can buy webcams in virtually any tech store or large online marketplace (e.g., Amazon). They tend to range in price depending on their quality.
-
2Open Facebook. Go to https://www.facebook.com/ in your computer's web browser. This will open your Facebook News Feed if you're logged in.
- If you aren't logged into Facebook, enter your email address (or phone number) and password in the upper-right side of the page, then click Log In.
-
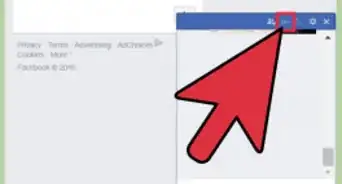
3Click Live Video. It's near the top of the News Feed page, just above the text box where you would usually post a status. Doing so opens the "Create a Live Stream" pop-out menu.
-
4Allow Facebook to access your webcam and microphone. Click Allow (or similar) when prompted to allow Facebook to use your webcam, then do the same if asked to allow access to your microphone.
-
5Add a description to the video. In the "Say something about this live video..." text box, type in a description for your stream.
- This is optional, but recommended.
-
6Add a title. If you want to place a title on your stream, type your title into the "Title" heading near the bottom of the pop-out menu.
-
7Click Go Live. It's in the bottom-right corner of the page. Doing so causes your webcam to begin streaming to Facebook.
- You can close the live stream at any time by clicking End Live Video and then clicking End when prompted.


Advertisement
Community Q&A
-
QuestionI used Yahoo IM video to chat with my girlfriend but that is no longer available. Is there an alternative that is very easy to setup for her to use?
 DenneiskTop AnswererSkype is a first choice for many people. If you don't want to install an application, you could try to use Google Hangouts.
Advertisement
Warnings
- Don't hesitate to kick users who are disrupting your stream. It's your stream and you can choose who watches it.⧼thumbs_response⧽
- Be careful about what you choose to share in your live stream. Anybody can be watching, so don't divulge any personal information or act in a way that you don't want to be seen by the general public. Assume your employer or family are watching, and don't do anything you wouldn't want them to see.⧼thumbs_response⧽
Advertisement


References
About This Article
Jack Lloyd
wikiHow Technology Writer
This article was co-authored by wikiHow staff writer, Jack Lloyd. Jack Lloyd is a Technology Writer and Editor for wikiHow. He has over two years of experience writing and editing technology-related articles. He is technology enthusiast and an English teacher. This article has been viewed 762,954 times.
How helpful is this?
Co-authors: 27
Updated: September 1, 2022
Views: 762,954
Categories: Webcams
Advertisement