X
wikiHow is a “wiki,” similar to Wikipedia, which means that many of our articles are co-written by multiple authors. To create this article, 9 people, some anonymous, worked to edit and improve it over time.
This article has been viewed 121,557 times.
Learn more...
You unpacked and assembled your brand new Creality Ender 3/Ender 3 Pro and now don’t know what to do with it? 3D printing is an educational and rewarding pastime anyone can enjoy. With the 3D printing program CURA and a Creality Ender 3/Ender 3 Pro, you will be able to make things beyond your wildest dreams.
Steps
Part 1
Part 1 of 7:
Downloading
-
1Download and install CURA from https://ultimaker.com/software/ultimaker-cura
-
2Download or create an .stl file.Advertisement
-
3Download the bed level file, CHEP_Ender_3_bed_level.gcode, from http://www.thingiverse.com/thing:3235018. Transfer to a microSD card.
Advertisement
Part 2
Part 2 of 7:
Setting Up CURA


Part 3
Part 3 of 7:
Using CURA
-
1
-
2Adjust the 3D model by selecting the model then adjustment icons, if needed.
- Move - Click, hold, and drag the desired axis to move object.
- Scale - Change the size of the object by percentages.
- Rotate- Press, hold and rotate on the desired circle axis to rotate object. Pressing the Lay Flat icon to position object flat on surface may reorient object.
-
3Adjust the 3D print settings. Go to "Print Setup" area with "Recommended" selected to adjust the Layer Height, Infill, Support, and Build Plate Adhesion.
- Layer height - Select your desired layer height. The lower the layer height, the higher quality the print, but the longer it takes to print.[1]
- Infill - Select desired infill percentage. The higher the infill percentage, the stronger the print, the longer the print time. [2]
- Generate Support - Used for overhangs greater than 45 degrees.[3]
- Build Plate Adhesion - Brims or rafts may be used to help plate adhesion and to reduce warping.[4]
-
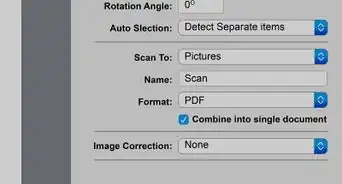
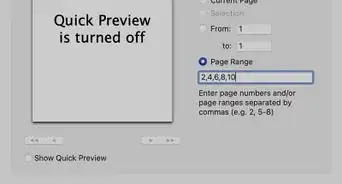
4Adjust the print temperatures. Click Custom and go to Material to adjust printing temperatures based on the material's manufacturer recommendation.
-
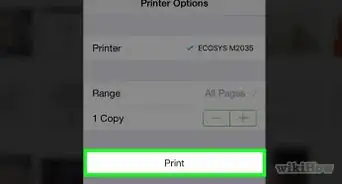
5Click Prepare to estimate the print time, material use, and to slice the .stl file.
-
6Save the .gcode file to a microSD card using a microSD USB adapter. Then press Save to Removable Drive.


Advertisement
Part 4
Part 4 of 7:
Loading the Filament
-
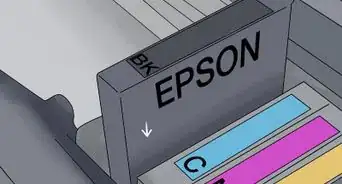
1Place the material onto the spool holder.
-
2Cut the end of filament at ~45 degrees using the snippers.
-
3Turn on the printer by pressing the red power switch into the On position represented with the "|" symbol.
-
4Press the control knob to access the menu options. Rotate the control knob to highlight desired selection, and press it to confirm selection.
-
5
-
6
-
7Load the filament into the printer. Squeeze the extruder lever and feed the filament through the extruder hole.[5]
- Continue feeding the material until it comes out of the print nozzle.
-
8Turn off the printer or proceed to "Leveling the Print Bed."


Advertisement
Part 5
Part 5 of 7:
Leveling the Print Bed
-
1Insert the microSD card into the microSD card slot.
-
2Turn the printer on.
-
3Level the print bed using the CHEP_ENDER_3_bed_level.gcode, paper, and adjustment screws.[6]
- Press and rotate the control knob to highlight and select Print from SD.
- Highlight and select the CHEP_Ender_3_bed_level.gcode.
- Wait until nozzles comes to a stop before proceeding.
- Continually slide a piece of paper back and forth underneath the nozzle. The nozzle will "scratch" the paper if it's at the correct level.
- Using the adjustment screw of each corner below the heat bed, raise the bed by turning clockwise/lower the bed by turning counter-clockwise, while continually sliding the piece paper.
- Press the control knob to level other corners of the bed. The center point used to check if the bed is calibrated correctly.
- Repeat this until you no longer need to turn adjustment knobs.
-
4Turn off the printer or proceed to "Printing the Object."


Advertisement
Part 6
Part 6 of 7:
Printing the Object
-
1Insert the microSD card if not already inserted, and then turn the power on.
-
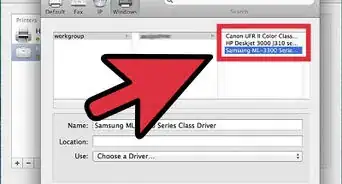
2Select Print from SD then highlight and select the desired .gcode file.
-
3Wait for print bed and print nozzle to heat up.
- The circled numbers on the bottoms will match the ones on top.
- Caution: Do not touch print bed or print nozzle at this point. It may cause burns!
-
4Examine the first print layer for adhesion quality.
- The material will stick to the bed in an even layer if properly leveled. If little to no material is extruding, then lower the print bed. If the material is not sticking, then raise the print bed.
-
5Wait for the file to print while checking back periodically until the print is finished.
- Check to see if the object is printing properly. If not, press on the control knob, select Stop Print.
-
6Turn off the 3D Printer by switching the power button into the on position.
-
7Remove the 3D printed object with the scraper tool once the print bed, print nozzle, and object have cooled.
-
8Remove rafts, skirts, and/or supports from the object if necessary.
- Use sandpaper to smooth out object if needed.
- If printing an object with multiple parts that need to join, sand the adhesion area and use superglue.


Advertisement
Part 7
Part 7 of 7:
Cleaning the Build Plate
Warnings
- Do not touch material when melted; it may cause burns.⧼thumbs_response⧽
- Do not touch print bed when heating/heated; it may cause burns.⧼thumbs_response⧽
- Remove object only when print bed and object has cooled down.⧼thumbs_response⧽
- Do not touch print nozzle when heating/heated; it may cause burns.⧼thumbs_response⧽
Advertisement
Things You'll Need
- Creality Ender 3/Creality Ender 3 Pro
- microSD card (comes with 3D printer)
- microSD card adapter (comes with 3D printer)
- Snippers
- Scraper
- PLA
- Dish soap
- Printer paper
- Sandpaper (Optional)
- Superglue (Optional)
-
Computer with:
-
Operating System (one of the following):
- Vista or higher (64-bit)
- Mac OS X 10.11 or higher (64-bit)
- Ubuntu 14.04 or higher (64-bit)
-
System requirements:
- 4 GB of RAM
- 205 MB of Hard Drive Space
- Intel Core 2 or AMD Athlon 64 or newer
- Open GL 2 Compatible Graphics Chip
- Open GL 4.1 for 3D Layer view
-
Operating System (one of the following):


References
- ↑ https://www.3dhubs.com/knowledge-base/impact-layer-height-3d-print
- ↑ https://www.3dhubs.com/knowledge-base/selecting-optimal-shell-and-infill-parameters-fdm-3d-printing
- ↑ https://all3dp.com/1/3d-printing-support-structures/
- ↑ https://ultimaker.com/en/resources/20423-platform-adhesion-cura
- ↑ https://s3-us-west-2.amazonaws.com/3dprintersbay/ender-3-deliverables/Ender+3+quick+start+guide.pdf
- ↑ https://www.youtube.com/watch?v=_EfWVUJjBdA
About This Article
Advertisement