This article was co-authored by wikiHow staff writer, Jack Lloyd. Jack Lloyd is a Technology Writer and Editor for wikiHow. He has over two years of experience writing and editing technology-related articles. He is technology enthusiast and an English teacher.
The wikiHow Tech Team also followed the article's instructions and verified that they work.
This article has been viewed 708,118 times.
Learn more...
This wikiHow teaches you how to enable, create, run, and save macros in Microsoft Excel. Macros are miniature programs which allow you to perform complex tasks, such as calculating formulas or creating charts, within Excel. Macros can save significant amounts of time when applied to repetitive tasks, and thanks to Excel's "Record Macro" feature, you don't have to know anything about programming in order to create a macro.
Things You Should Know
- Macros make it easy to automatic tasks in Microsoft Excel.
- To create macros yourself, you'll need to enable macros in the Developer menu of Excel.
- Saving a macro-enabled spreadsheet is a little different than saving a spreadsheet without macros.
Steps
Enabling Macros
-
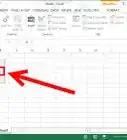
1Open Excel. Double-click the Excel app icon, which resembles a white "X" on a green box, then click Blank workbook.
- If you have a specific file which you want to open in Excel, double-click that file to open it instead.
-
2Click File. It's in the upper-left side of the Excel window.
- On a Mac, click Excel in the upper-left corner of the screen to prompt a drop-down menu.
Advertisement -
3Click Options. You'll find this on the left side of the Excel window.
- On a Mac, you'll click Preferences... in the drop-down menu.
-
4Click Customize Ribbon. It's on the left side of the Excel Options window.[1]
- On a Mac, click instead Ribbon & Toolbar in the Preferences window.
-
5Check the "Developer" box. This box is near the bottom of the "Main Tabs" list of options.
-
6Click OK. It's at the bottom of the window. You can now use macros in Excel.
- On a Mac, you'll click Save here instead.


Recording a Macro
-
1Enter any necessary data. If you opened a blank workbook, enter any data which you want to use before proceeding.
- You can also close Excel and open a specific Excel file by double-clicking it.
-
2Click the Developer tab. It's at the top of the Excel window. Doing so opens a toolbar here.
-
3Click Record Macro. It's in the toolbar. A pop-up window will appear.
-
4Enter a name for the macro. In the "Macro name" text box, type in the name for your macro. This will help you identify the macro later.
-
5Create a shortcut key combination if you like. Press the ⇧ Shift key along with another letter key (e.g., the E key) to create the keyboard shortcut. You can use this keyboard shortcut to run the macro later.
- On a Mac, the shortcut key combination will end up being ⌥ Option+⌘ Command and your key (e.g., ⌥ Option+⌘ Command+T).
-
6Click the "Store macro in" drop-down box. It's in the middle of the window. Doing so prompts a drop-down menu.
-
7Click This Workbook. This option is in the drop-down menu. Your macro will be stored inside your spreadsheet, making it possible for anyone who has the spreadsheet to access the macro.
-
8Click OK. It's at the bottom of the window. Doing this saves your macro settings and begins recording.
-
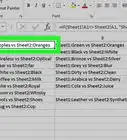
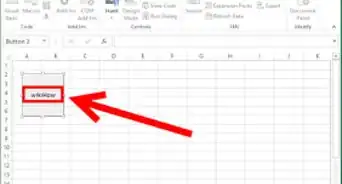
9Perform the macro's steps. Any step you perform between clicking OK and clicking Stop Recording while be added to the macro. For example, if you wanted to create a macro which turns two columns' worth of data into a chart, you would do the following:
- Click and drag your mouse across the data to select it.
- Click Insert
- Select a chart shape.
- Click the chart that you want to use.
-
10Click Stop Recording. It's in the Developer toolbar. This will save your macro.


Saving a Macro-Enabled Spreadsheet
-
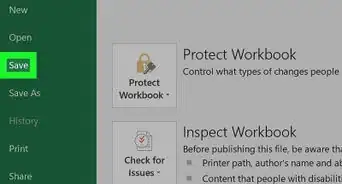
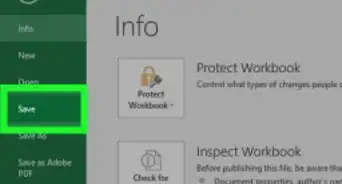
1Understand why you have to save the spreadsheet with macros enabled. If you don't save your spreadsheet as a macro-enabled spreadsheet (XLSM format), the macro won't be saved as part of the spreadsheet, meaning that other people on different computers won't be able to use your macro if you send the workbook to them.
-
2Click File. It's in the upper-left corner of the Excel window (Windows) or the screen (Mac). Doing so will prompt a drop-down menu.
-
3Click Save As. This option is on the left side of the window (Windows) or in the drop-down menu (Mac).
-
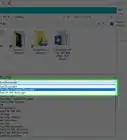
4Double-click This PC. It's in the column of save locations near the left side of the window. A "Save As" window will open.
- Skip this step on a Mac.
-
5Enter a name for your Excel file. In the "Name" text box, type in the name for your Excel spreadsheet.
-
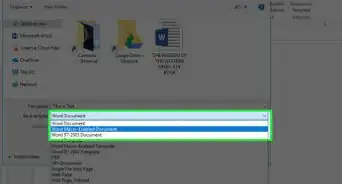
6Change the file format to XLSM. Click the "Save as type" drop-down box, then click Excel Macro-Enabled Workbook in the resulting drop-down menu.[2]
- On a Mac, you'll replace the "xlsx" at the end of the file's name with xlsm.
-
7Select a save location. Click a folder in which you want to save the Excel file (e.g., Desktop).
- On a Mac, you must first click the "Where" drop-down box.
-
8Click Save. It's at the bottom of the window. Doing so will save your Excel spreadsheet to your selected location, and your macro will be saved along with it.


Running a Macro
-
1Open the macro-enabled spreadsheet. Double-click the spreadsheet that has the macro in it to open the spreadsheet in Excel.
-
2Click Enable Content. It's in a yellow bar at the top of the Excel window. This will unlock the spreadsheet and allow you to use the macro.
- If you don't see this option, skip this step.
-
3Click the Developer tab. This option is at the top of the Excel window.
- You can also just press the key combination you set for the macro. If you do so, the macro will run, and you can skip the rest of this method.
-
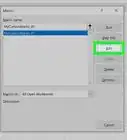
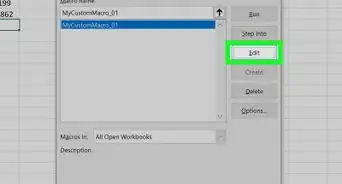
4Click Macros. You'll find it in the Developer tab's toolbar. A pop-up window will open.
-
5Select your macro. Click the name of the macro which you want to run.
-
6Click Run. It's on the right side of the window. Your macro will begin running.
-
7Wait for the macro to finish running. Depending on how large your macro is, this can take several seconds.


Community Q&A
-
QuestionCan I use a macro that I create in other spreadsheets and future spreadsheets on the same pc?
 Community AnswerYes, you can use a macro that you crate in other spreadsheets and future spreadsheets on the same pc.
 -
QuestionHow can I write macros that will change a spreadsheet as soon as I create it?Community AnswerYou will first need a basic understanding of VBA. There are many tutorials on this.
Warnings
- Although most macros are benign, some macros can maliciously change or delete information on your computer. Never open a macro from a source which you don't trust.⧼thumbs_response⧽


References
About This Article
1. Enable Developer options in Excel.
2. Click the Developer tab.
3. Click Record Macro.
4. Enter the macro name and details.
5. Click OK.
6. Perform the macro's steps.
7. Click Stop Recording.