This article was co-authored by James Hornof. James Hornof is a Master Electrician and the Owner and President of B & W Electric based in Denver, Colorado. With over two decades of experience in the electrical construction industry, James specializes in field installation, management, estimating, and design. He graduated top of his class in electrical trade school and studied Business Management at The Community College of Denver. James holds a Master Electrician license in Colorado, Wyoming, and Texas.
wikiHow marks an article as reader-approved once it receives enough positive feedback. In this case, several readers have written to tell us that this article was helpful to them, earning it our reader-approved status.
This article has been viewed 279,216 times.
Coaxial cable can be used to transmit a variety of signals, including cable television, internet and low quality audio. If you’re working on a project that falls in any of these categories, you can make your own cables and save money by learning how to terminate coaxial cable yourself.
Steps
-
1Gather your materials. In order to terminate a coaxial cable, you will need the following tools and materials:
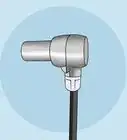
- Coax compression connector - There are several types of connectors available. Compression connectors provide the best connection and finish to your cable. The second-best type of connectors are "crimp" connectors. Avoid push-on or twist connectors.
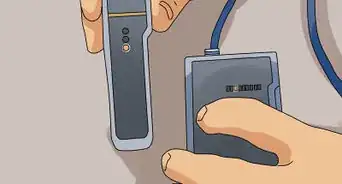
- Compression/crimping tool - Make sure it is compatible with the compression/crimping connector.
- Coax cable stripper tool
- Cable cutters
- Connector installation tool - This tool is used for pushing the connector firmly onto the stripped cable.
-
2Make a straight cut at the end of the cable. Use your cutting tool to make a straight cut at the end of the cable. After cutting, use your fingers to form the end of a cable back into a circle.Advertisement
-
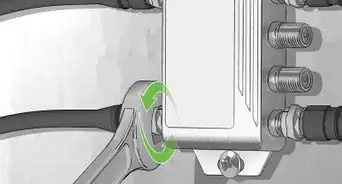
3Adjust your stripper to work with your cable. Most coaxial strippers can be adjusted to strip dual-shielded or quad-shielded coaxial cables. Use the included Allen wrench to adjust the stripper. If you don't adjust the stripper properly, you may strip the ground wire, damaging the cable.
- The most common cable is RG-6, either quad- or dual-shielded. Make sure that the stripper is configured for RG-6 coaxial cable, and not another cable size such as Ethernet cable.
- If your stripper is set to dual-shielding, but you try to strip a quad-shielded cable, not all of the shielding will be removed.
-
4Strip the end of the coax cable. Place the end of the coax cable into the stripper so that the end of the cable is flush with the far end of the stripper. Clamp the stripper down on the cable and spin it around the cable two to three times.
- You can tell when the stripper is finished when you don't feel resistance anymore when spinning.
- Don't pull the stripper off when finished. Unlatch it and open it to remove the cable.
-
5Pull off the outer shield. After stripping the cable, you should see two segment cuts. Pull the outermost segment off of the cable. This should reveal the center conductor wire.
-
6Pull off the second segment. This will reveal the foil that insulates the cable. Find the edge of the foil and peel it off the cable. This should leave a single layer of foil around the white insulation.
-
7Fold back the braid. When you pull off the cable jacket, you will see a lot of loose ground wires. Fold these back against the cable so that the connector will be touching all of the wires when installed. None of the wires should be blocking the white insulation.
-
8Cut the conductor wire (if necessary). Most cable stripper tools will leave the correct length of conductor wire exposed, but it doesn't hurt to double check before proceeding. The exposed connector cable should be 3.9 mm (.156 inches) in length.
-
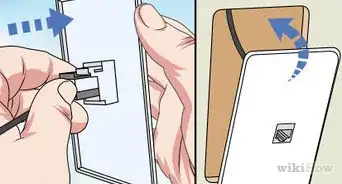
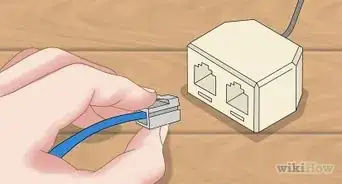
9Put the connector onto the stripped end of the cable. Use a pusher tool to firmly push the connector onto the cable until the white insulation is flush with the connector.
- Make sure you avoid bending the bare conductor wire when installing the connector.
- You may need to twist the cable while pushing with the tool to get it firmly connected.
-
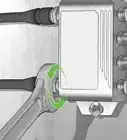
10Compress or crimp the connector. The process for compressing or crimping the connector varies depending on the type of connector you are using. Some require you to press down on the cable-end of the connector piece, while others require you to push the front and end of the connector piece into each other.
- Squeeze the compression or crimping tool firmly. Most tools won't allow you to over-compress, but some can cause damage to the cable and connector if compressed too much.
-
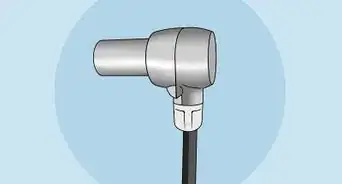
11Inspect the connection for imperfections. After you have finished compressing the connector, inspect it for any stray wires or loose connections. These can lead to a bad signal or nonfunctional cable.


Community Q&A
-
QuestionCan you tell me how to remove these compression connectors, and can it be done without a special crimping tool?
 Community AnswerGet regular pliers and place the jaws on the "humps" on the crimped connector and squeeze slightly. There are usually four "humps," so you would do this once on each pair. If this does not work, simply cut off the end. Then you would strip the end again to attach a new connector. These connectors cannot be reused, but can be replaced by "twist-on" connectors which do not need a tool.


About This Article