This article was co-authored by wikiHow staff writer, Darlene Antonelli, MA. Darlene Antonelli is a Technology Writer and Editor for wikiHow. Darlene has experience teaching college courses, writing technology-related articles, and working hands-on in the technology field. She earned an MA in Writing from Rowan University in 2012 and wrote her thesis on online communities and the personalities curated in such communities.
This article has been viewed 99,724 times.
Learn more...
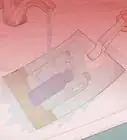
If the image you have is not large enough, you can use free software and programs to enlarge it. However, if you stretch a picture without maintaining the overall size ratio or blow up a small image that's low quality, you run the risk of ending up with a pixelated and messy photo. This wikiHow will teach you how to stretch a photo using Paint in Windows computers, Preview in Mac computers, and free apps for iOS and Android phones and tablets.
Steps
Using Paint in Windows
-
1Open the photo in Paint. If you find the file in your file explorer, then right-click it and choose Open with > Paint.
-
2Click Resize. You'll see this above the photo editing space in the "Image" grouping. A "Resize and Skew" window will pop-up.Advertisement
-
3Click to select if you want to resize your photo using percentages or pixels. You'll see the numbers change next to their dimensions (horizontal and vertical) to reflect what you've selected.
- For example, if you're more familiar with percentages, then use percentages, so you can quickly resize a photo from 100% to 25%. An image that's 700px horizontal will switch to 100% horizontal depending on which measurement you choose to use.
- If you want to maintain your photo's look, click to check the box next to "Maintain aspect ratio." If you change the number for the horizontal or vertical size, the other dimension will automatically update to maintain the current aspect ratio of the photo. For example, if you choose to maintain the aspect ratio and update an original photo with the dimensions 100px x 100px to 75px, then the other field will update to 75px to maintain the original aspect ratio.
-
4Change the numbers for the horizontal and vertical values. If you have the box checked next to "Maintain aspect ratio," both numbers (pixels and percent) will change accordingly when you edit a number.
- If you resize the photo without maintaining the aspect ratio, the 100px x 100px ratio will be lost when you update the horizontal range to 75px. You'll instead have 75px x 100px, so the image will appear distorted.
-
5Click OK. You'll see this button at the bottom of the pop-up window. When the window closes, your changes will take effect.
- Press Ctrl+Z to undo the resize if you don't like it.
-
6Press Ctrl+S when you're done resizing the photo. This keyboard shortcut will save your edits, and then you can close the program.


Using Preview in Mac
-
1Open the photo in Preview. If you navigate to the file in Finder, right-click it and choose Open with > Preview.
-
2Click the Tools menu. You'll see this in the horizontal menu that runs across the top of your screen.
-
3Click Adjust Size. You'll see this in the second grouping of options on the menu.
-
4Select the units you want to use (pixels or percent). Click the drop-down box next to the text fields for "Width" and "Height" to choose. An image that's 700px horizontal will switch to 100% horizontal depending on which measurement you choose to use.
- Click to check the boxes next to "Scale Proportionally" and "Resample Image" to save your photo's aspect ratio and automatically apply the changes. For example, if you choose to scale proportionally and update an original photo with the dimensions 100px x 100px to 75px, then the other field will update to 75px to maintain the original aspect ratio.
-
5Change the numbers next to width and height to change the size of your photo. If you have the box checked next to "Scale Proportionally," the numbers will change to reflect any of your edits in the other dimension.
- For example, if you change the percentage in the height field from 100 to 50, the percentage in the width field will also change from 100 to 50 to maintain the original aspect ratio.
- If you resize the photo without maintaining the aspect ratio, the 100px x 100px ratio will be lost when you update the horizontal range to 75px. You'll instead have 75px x 100px, so the image will appear distorted.
-
6Click OK. You'll see this blue button in the bottom right corner of the window and the image should update automatically to reflect your changes.
- Press ⌘ Cmd+Z to undo the change.
-
7Press ⌘ Cmd+S to save your work. This will save your photo with the new size and you can close the program.


Using Photoshop
-
1Open your photo in Photoshop. You can either click File > Open when you have Photoshop open, or you can right-click your photo file in your file explorer and click Open with > Photoshop.
- Photoshop is a paid software that you can use if you have the program installed. If you don't, you can easily use Microsoft Paint or Preview for Mac.
-
2Select the photo from the layers panel. If you have only your photo in the Photoshop project, it is most likely the "background" layer.
- A single click on the layer will select it.
-
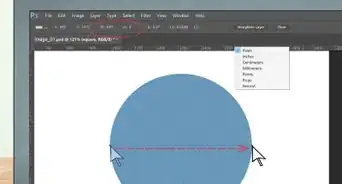
3Press Ctrl+T (Windows) or ⌘ Cmd+T (Mac). This activates the Transform tool, so you'll be able to freely change the size of the photo.
- If you want to maintain the ratio, you can press ⇧ Shift as you drag the photo size.
-
4Drag and drop the highlighted borders of the photo. Once you've activated the Transform tool, the boundaries of the photo should darken so you can pick them out easier. You can drag and drop them to change the photo's size.
-
5Press ↵ Enter (Windows) or ⏎ Return (Mac). You'll finalize the transformation when you press this key.[1]


Using a Free Mobile App
-
1Install an app that can resize pictures. Android and iOS phones and tablets do not have the ability to resize images in default applications, but there are many apps available that can do that for you. You can find many of these apps for free in the Google Play Store and App Store. Some of the most popular image resizing apps include Photoshop Express, Image Size - Photo Resizer, and Photo Compress & Resize.[2] [3]
-
2Open the resizing app and give it access to your photos. When you launch the app for the first time, you may be prompted to give it access to your stored photos. This is necessary so that the app can load photos stored on your device.
-
3Open the photo you want to resize. The process to open your photo to resize will vary depending on the app, but generally, you can tap the "Select photo" button on the app's main menu to open your local photos.
- If you're using an app similar to Photoshop Express, you can tap to select your image from the main page.
-
4
-
5Select the size you want to make the image. You'll most likely see the original size of your photo in both pixels and file size and, depending on the app, you may be able to select from preset image sizes (like Instagram's ratio 4:5), or enter custom sizes. When entering a custom size, you can just enter one value and the other value will scale accordingly if you have selected to maintain the original ratio.
- If you're using Photoshop Express, you'll see that there are pre-sized selections, like a Facebook Ad, a Facebook Profile Cover, and a Twitter post. You can tap any of those to see your image resized automatically. Pick "Custom" at the end of the menu to enter your own dimensions.
-
6Save your resized image. After resizing the image, tap the "Save" or "Export" button to prompt the app to save a copy of your photo. Depending on what app you're using, you can follow the on-screen prompts to export a copy of the edited image to your camera roll.


Community Q&A
-
QuestionCan I stretch the entire photo taller and narrower?
 CJ89483Community AnswerYes. To make a photo half shorter, you can use the resize tool in your preferred photo editing software and reduce the height by 50%. This will effectively make the image half as tall as its original size. Keep in mind that resizing an image can result in loss of image quality, especially if you are making it significantly smaller. To minimize this, it's best to work with high-resolution images whenever possible, and save your edited image as a new file rather than overwriting the original.


References
About This Article

1. Open the photo in Paint.
2. Click Resize.
3. Click to select if you want to resize your photo using percentages or pixels.
4. Change the numbers for the horizontal and vertical values.
5. Click Ok.
6. Press Ctrl + S when you're done resizing the photo.