wikiHow is a “wiki,” similar to Wikipedia, which means that many of our articles are co-written by multiple authors. To create this article, volunteer authors worked to edit and improve it over time.
There are 9 references cited in this article, which can be found at the bottom of the page.
This article has been viewed 7,717 times.
Learn more...
A photo booth is fun for guests of all ages, and it will give your attendees something to do when they need a break from the main event. Photo booths, on the other hand, can be very expensive, ranging from $125 to $200 per hour with a 2 or 3 hour minimum. The average cost of hiring a photo booth for a wedding is $300 – $600 or more, with corporate event rates even higher due to the additional customization and branding required. By making your own photo booth, you could cut the average photo booth cost in half! Here's how to make your own photo booth.
Steps
-
1Choose your lighting. Good lighting is essential for a good photo booth. A photography umbrella and spotlight (available online or at camera supply stores) diffuses the light and adds a flattering glow to your friends' faces. Natural lighting can give your photos a soft, warm glow, especially during the golden hour. Bring in artificial lighting fixtures to give your photos a unique effect if you want to elevate your lighting.
- Fixtures allow you to control the temperature, color, and patterns of your lights – an especially fun addition to a whimsical photo shoot! If you don't want to use lighting, turn on your camera's flash or place a floor lamp beside the camera facing the backdrop.
- Options for lighting include rope lights, LED lights, ring lights, laser lights, and galaxy lights. Ring lights
-
2Get a camera. Although you can use almost any camera for your DIY photo booth, a high-quality camera will help to ensure that all of your photos are crystal clear. If you're on a budget, know that cameras under $100 won't have cutting-edge features or massive megapixel counts, but all of the cameras on our list are dependable, capable, and will do the basics. A few average cameras include:
- AKASO EK7000 Pro
- Instax Mini 11
- Fujifilm Instax WIDE 300
- If you have a relative or friend with a quality camera, you could ask them to do photography (for a small price or for free.)
Advertisement -
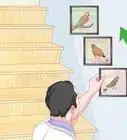
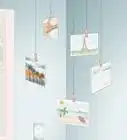
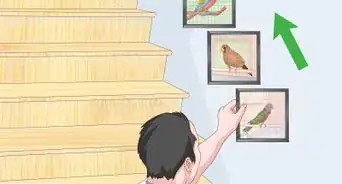
3Create a backdrop. This is your opportunity to demonstrate your creative abilities. The most common type of backdrop is a printed fabric backdrop, but why limit yourself to store-bought options? Create one that brings the photos to life. There are countless backdrop options for a DIY photo booth. When setting up your photo booth at a party, a backdrop with an exciting and cheerful tone is a great way to get guests excited for their photos. Geometric paper cutouts, glitter streamers, or flowers can also be used to create a one-of-a-kind look.
- Instead of a backdrop, you can add dimension to a wall in your home or event space by stringing together rows of balloons or something even more unique, such as decorated plates lined up in a row.
-
4Choose a location. Take a look around your event space before unpacking all of your equipment and determining the best location for your photo booth setup. The location you select should ideally allow the photo booth to be set up against a wall with easy access to electrical outlets, in a large hallway, or somewhere out of the way of the action.
-
5Assemble your set-up. Once you've decided on a location, remove all wall decor and furniture from the room. Cover any windows in the area with a dark cloth to ensure that the flash properly illuminates the photos. Place the camera on the tripod a few feet away from the wall. Frame the shot and adjust the camera's angle accordingly. Request that someone stand in front of the camera while you compose the shot.
- Place a simple sign near the prop table instructing guests to choose a prop and strike a pose. Set up a prop station and display items that guests can easily grab to pose with.
-
6Create or buy props. Use colorful, glitter foam sheet or a foam sheet and trace out shapes in pencil, such as glasses, bows, lips, or the classic mustache. Cut out the shapes and glue them to wooden dowels. Then, your guests can pose in the booth with props.
- Alternatively, you could buy your props from a party store. Props from party stores are made with stronger materials and have a wider range of designs that can't be cut out.
- Fill an old crate or basket with glasses, mustaches, cowboy hats, whiteboard or chalkboard conversation bubbles, and other accessories.
-
7Once you have everything set up and your guests are ready, shoot some photos! A photo booth is an enjoyable, simple way to create memories and fill the silence at your event. This photo booth is great for birthday parties or a private celebration.
-
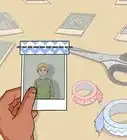
8Save and share your photos. Depending on the software you use for your DIY photo experience, you should have a variety of options for sharing the photos with guests and keeping a copy for yourself. Ideally, your guests will be able to instantly email or text the photo to themselves. This will necessitate that your photo booth has an active internet connection, whether through Wi-Fi or a hotspot.
- You can also download the pictures from your iPad/iPhone and upload them to an online gallery as long as your photo booth software saves a copy of each session.


Community Q&A
-
QuestionHow do I make a photo booth using a digital camera?
 Community AnswerAttach the camera to a tripod and use props to create the booth. Try using some curtains with a stool to sit on. You could even hang up bedsheets around your booth for added effect!
Warnings
- If your camera has a flash, be sure to alert the guests.⧼thumbs_response⧽
Things You Will Need
- A tripod (optional)
- A camera or iPad
- A backdrop
- Props
- Lighting


References
- https://freshbooths.com/wedding-photo-booth-cost/
- https://www.hgtv.com/lifestyle/entertaining/how-to-set-up-your-own-diy-photo-booth
- https://www.hitched.co.uk/wedding-planning/photography/diy-photo-booth/
- https://blisslights.com/blogs/blisslights/diy-photo-booth-lighting-how-to-create-the-best-setup
- https://www.digitalcameraworld.com/buying-guides/best-camera-under-100
- https://www.marthastewart.com/7888763/wedding-photo-booth-worth-the-splurge-pros-cons
- https://www.bhphotovideo.com/explora/photography/tips-and-solutions/ten-tips-creating-awesome-photo-booth
- https://photographyconcentrate.com/how-setup-simple-photo-booth/
- https://boothmasters.com/blog/diy-photo-booth/