This article was co-authored by Karen Parziale. Karen Parziale is a Home Stager, Home Organizer, and the Founder of The Real Estate Staging Studio based in Hoboken, New Jersey. Karen has over 15 years of home staging and decorating experience and has staged over 5,000 homes. She specializes in project management, space planning, material selections, and builder, architect, and client relationships.
There are 9 references cited in this article, which can be found at the bottom of the page.
This article has been viewed 11,745 times.
If you're hoping to hang pictures on the wall without making any holes, Velcro is a perfect tool to use to achieve this. It comes in all shapes and sizes, and there are even Velcro strips designed specifically for hanging pictures to make your process easier. All you'll need are some Velcro strips, a level, and your picture, and you're ready to start hanging!
Steps
Choosing Velcro and Preparing the Wall
-
1Purchase Velcro hanging strips strong enough to hold your picture. The Velcro brand offers Velcro strips designed specifically for hanging picture frames, and they’re called Hangables Picture Hanging Strips. Find these strips in a home improvement or big box store and pick out the ones that are designed to hold the weight of your frame. You might need to purchase multiple strips to hang the picture properly and safely.[1]
- These strips can hold up to 16 pounds (7.3 kg), depending on the size strip you buy.
- Plan to purchase enough strips to place one on each corner of your frame.
-
2Wipe down the wall with a clean cloth to remove any dirt. Use a dry cloth to remove surface dust, or dampen the cloth with clean water to wipe off any dirt or residue. Let the wall dry for a few minutes so the Velcro will stick to it securely.[2]
- Cleaning the wall before adding the Velcro will make sure the adhesive sticks much better.
- You can also wipe down the wall with rubbing alcohol so it's clean.
- These strips will attach to drywall, wood, glass, laminates, and other smooth surfaces.
Advertisement -
3Use a level to mark where the picture will go on your wall. Decide where you’d like the picture frame to hang and hold up a level to the wall in that spot. Use a pencil to mark an even line that you’ll use to place your picture on the wall.[3]
- If you don’t have a real level, try downloading a level app on your phone.


Lining up the Velcro
-
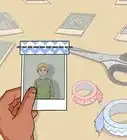
1Peel the backing off each Velcro strip and place them on the frame's corners. Find the Velcro strip that attaches to the back of the frame and peel the plastic or paper backing off. Place this piece of Velcro in a corner of the frame and press down firmly so it sticks.[4]
- The backing of each side of the strip will tell you whether it goes on the wall or the frame.
- If the Velcro backing has an arrow on it, make sure the arrow is pointing upwards towards the ceiling instead of towards the floor when you attach the strip.
-
2Place the wall-side Velcro on top of the Velcro that's attached to the picture. Once all 4 corners of the back of your picture frame have the frame-side Velcro on them, place the wall-side velcro on each one so that they're stuck together. Each corner should have a pair of Velcro pieces that are lined up.[5]
- The adhesive side of the Velcro that will stick to the wall should be facing towards you.
-
3Remove the Velcro’s wall-side backing and hold it up to the wall. Peel off the last pieces of paper or plastic that are covering the sticky side of the Velcro that will attach to the wall. Once all 4 of them are peeled off, line your picture frame up against the wall using the marking you made in pencil so the picture is even.[6]


Attaching the Picture to the Wall
-
1Press the picture into the wall for 30 seconds. With the picture lined up straight, press the frame into the wall so that each corner has pressure on it. Keep pressing the picture into the wall for 30 seconds to give the adhesive time to stick and adhere well.[7]
-
2Slide the frame up and away from the wall to separate the Velcro. Instead of pulling the frame away from the wall directly, move it upwards and away so you don’t pull off the Velcro. Now the wall-side Velcro should be the only thing on the wall.[8]
- Be gentle as you pull the picture off the wall and go slowly.
-
3Rub the wall-side Velcro for 30 seconds as you press it into the wall. Put the picture down and use both hands to rub the Velcro strips that are still attached to the wall in circles using your fingers. Do this for at least 30 seconds so this adhesive backing has time to adhere correctly.[9]
-
4Put the picture back on the wall by lining up the Velcro strips after 1 hour. Let the Velcro strips stay on the wall without holding any weight for 1 hour so they adhere fully. After an hour, it’s safe to hang your picture on the wall! Line up the Velcro strips so they’re on top of one another and press the picture firmly into the wall so the Velcro pieces stick together.[10]
- When it’s time to remove the Velcro from the picture and wall, it should peel off easily without leaving any damage.


Expert Q&A
-
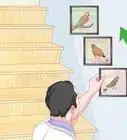
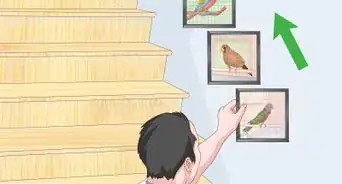
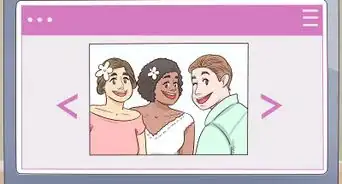
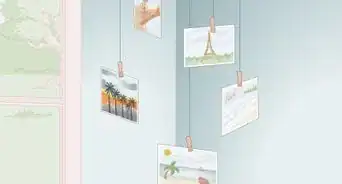
QuestionWhat's a good layout for hanging multiple pictures on the wall?
 Karen ParzialeKaren Parziale is a Home Stager, Home Organizer, and the Founder of The Real Estate Staging Studio based in Hoboken, New Jersey. Karen has over 15 years of home staging and decorating experience and has staged over 5,000 homes. She specializes in project management, space planning, material selections, and builder, architect, and client relationships.
Home Stager & Interior DesignerIf you're going for a photo gallery, I like to stick to 6 photos maximum. Remember, if you have a photograph or a piece of art, you want people to appreciate it. If you have 20 pictures, it can look a bit cluttered. Space the photos 3 inches apart all around.
Warnings
- Pull on the bottom of the tabs gently to remove the strips—if you try to peel them off a different way, you might damage your wall.⧼thumbs_response⧽
- Avoid hanging pictures with Velcro strips over beds or on wallpaper.⧼thumbs_response⧽


References
- ↑ https://www.velcro.com/blog/2019/04/how-to-hang-a-heavy-picture-without-nails/
- ↑ https://www.youtube.com/watch?v=LTKJBZIRjCg#t=9s
- ↑ https://www.youtube.com/watch?v=DzTszOB5K64#t=49s
- ↑ https://www.youtube.com/watch?v=N2YykncJnz4#t=24s
- ↑ https://www.youtube.com/watch?v=LTKJBZIRjCg#t=24s
- ↑ https://www.youtube.com/watch?v=LTKJBZIRjCg#t=26s
- ↑ https://www.youtube.com/watch?v=N2YykncJnz4#t=30s
- ↑ https://www.youtube.com/watch?v=LTKJBZIRjCg#t=42s
- ↑ https://www.velcro.com/blog/2019/04/how-to-hang-a-heavy-picture-without-nails/
About This Article