This article was co-authored by Adam Kealing. Adam Kealing is a Professional Photographer based in Austin, Texas. He specializes in general wedding, destination wedding, and engagement photoshoots. Adam has over 11 years of photography experience. His work has been featured in Green Wedding Shoes, Style Me Pretty, Once Wed, and Snippet Ink. His work has won numerous awards with Fearless Photographers and Masters of Wedding Photography.
There are 9 references cited in this article, which can be found at the bottom of the page.
This article has been viewed 128,662 times.
Do you have old photos at home that you would love to share with friends and family? Or are you looking for a way to declutter some of those boxes that are full of unorganized photos? Learning about the different ways you can photograph old photos will help you decide how to digitize those keepsakes so you can easily access them and share them with others!
Steps
Capturing Images Using Your Phone
-
1Use the Notes app if you have an iPhone with iOS 11. Open the app and create a new note. Tap on the black “+” button above the keyboard. Choose “Scan Documents.” Follow the onscreen directions, and you will be able to scan photos to your phone easily! [1]
- The app will show a yellow box and all you need to do is line your document up within the yellow box. When it’s aligned, press the camera button to take a photo. The app will automatically correct for any tilting.
- You can take multiple scans in a row. After you tap “Keep Scan,” it returns to the scanning page so you can keep working.
- Tap “Save” once you are done to return to your main documents page.
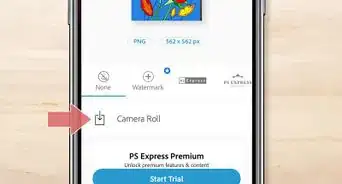
- You can edit photos from the app by clicking on the scanned image. You can crop and change color and orientation, and you can share the photo directly from the Notes app.
-
2Use the app PhotoScan for either Android or iOS phones. Download the app, which is free to all users. Once it has downloaded, you are ready to open the app and start scanning! [2]
- With the app open, point the camera at the photo you want to capture. The app will augment 4 dots over the image and will direct you to hold the camera over each dot for several moments. This won’t take more than 2 minutes, if that.
- This app detects the edges of the photo for you automatically so you don’t have to worry about cropping.
- The app will remove any glare for you automatically, so you can start taking photos without much prep work.
- The app will combine the photos you took from each augmented circle and will create a single, glare-free image.
Advertisement -
3Use other scanning apps if you can’t access PhotoScan or Notes. These other apps provide similar services, like automatic cropping, editing capabilities, and perspective correction. If you have an iPhone with an older operating system, these options could come in handy! [3]
- Some apps to check out are Photomyne, TurboScan or Shoebox. Some of these do cost money ($1.99 to $4.99), so check out their functions carefully to make sure they’ll meet your needs before committing to one.
- Once you choose an app to use, download it from your phone’s app store and follow the guide it gives you when you first open it. Most apps give step-by-step instructions on how to capture and modify images.


Using a Digital Camera
-
1Use a tripod to ensure stability while you photograph. Taking free-hand photos can result in blurry images because of shaky hands. Mount your camera upside down between the tripod legs. Use a level on top of the camera to make sure the lens is parallel to the photo. [4]
-
2Lay a large piece of white poster board under the tripod. You can also use a large piece of paper. This provides a clean background for your photo. Avoid using dark wood or black paper underneath your photo—this can make the edges harder to see later when you crop images. [7]
-
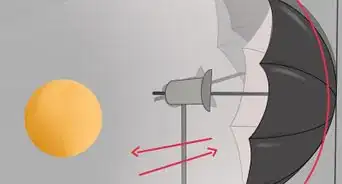
3Turn the flash off on your camera and check the room’s lighting. Most digital cameras have good tools to combat poor lighting, but it is still a good idea to avoid photographing in a dark room. Using lamps, overhead lighting, or natural lighting will help you obtain the best quality photos. [8]
- Flash photography will give you captured image a glare.
- Turn on lamps or use natural light to brighten the room.
-
4Choose the right aperture depending on the lighting in your room. A smaller aperture is good for a brighter room, while a larger aperture will help your camera capture more brightness in a dim room. This is same reason your pupils dilate when it starts to get dark—you want to get the most light in sight as possible. [9]
- A lot of times your digital camera will automate these settings for you, but don’t be afraid to manually change them to see the different results. You may be surprised at the quality difference from one aperture size to another!
-
5Set your film speed to the lowest setting possible. This is your “ISO,” and the minimal setting on most cameras is 100. This reduces the graininess of a photo. The higher the ISO, the brighter the image, so keeping it low will make more of your photos usable. [10]
-
6Choose a low shutter speed to reduce blurriness. The shutter speed is the length of time your camera shutter is open. The longer a shutter takes to capture an image, the blurrier it will be. Since you are taking pictures of still images, you don’t need to worry about opting for a longer shutter speed. [11]
- Try using a few different settings once you have your lighting set up. This way you can decide which ISO setting will be best for the quality you are looking for.
-
7Use a remote or the self-timer option on your camera. This helps keep your hands away from the camera itself, which will reduce the risk of shaking it. Once you have the settings on your camera where you want them and your table set up, snap away! .[12]
-
8Take a few photos and then check the quality. Look at your photos and make any adjustments you need to. Doing this as you begin taking photos will save you having to retake hundreds of photos if you find out you had a setting wrong!


Scanning Your Photos
-
1Choose an auto-feed scanner for a large quantity of photos. If you have hundreds or thousands of photos to scan, having an auto-feed scanner is going to save you a lot of time. [13]
- Once your scanner is turned on and connected to your computer, you can follow instructions and feed one photo after another into the scanner without pausing in between images.
- If choosing this option, it helps to put your photos in order ahead of time. Images will be stored in the order they are scanned, so taking some time to arrange them ahead of time will save you more time once the scanning is done.
-
2Choose a flat-bed scanner if you are concerned with optimal quality. This way you can individually adjust settings for each photo, if you want. These scanners usually have automatic edge detection capabilities [14]
- Lay up to 4 photos on the scanner glass at a time to scan.
- Most scanners will have a button you can press to indicate the photos are ready to be scanned. Press this button and watch your images get uploaded to your computer!
-
3Use a DPI (dots per inch) between 300 and 600. 300 is a minimum and 600 DPI will provide enough pixels to enlarge the photo but also maintain quality. This is a great trick so you can make larger prints of photos in the future! [15]
-
4Use glass cleaner to prevent smudges on your scanned photos. Use the cleaner along with a lint-free or microfiber cloth for the best results. Make sure the glass is completely dry before scanning photos. [16]


Paying a Company to Digitize Photos
-
1Check out a local photo shop to support local businesses. Call or stop in in person to find out what their digitizing options are. Make sure to ask about pricing and turn-around time for getting your photos back. They may want you to organize your photos beforehand, which is good to know as that will take time to prepare.
-
2Send your photos away to let someone else digitize them. There are a lot of online companies that specialize in digitizing everything from old photos to videos to slides! Look online for reviews and choose a company that has dozens of high ratings and reviews. [17]
- DiJiFi, Legacybox, iMemories, or EverPresent are well-reviewed companies to check out.
- When packing up your photos to mail, put them in plastic bags before putting them into a box. This will keep them dry if the box gets wet in transit. This can also help you organize the photos before sending them off. [18]
- Use a sturdy box for shipping—you don’t want it to get crushed and leave you with bent or damaged photos!
-
3Hire a personal organizer for more control and personalization. If the thought of organizing your photos and getting them digitized seems overwhelming and causes you anxiety, making an investment in a personal organizer can help relieve those worries [19]
- The National Association of Professional Organizers (NAPO) maintains a code of ethics and curriculum for Certified Professional Organizers (CPOs). Look for someone who is certified by the NAPO when deciding who to hire [20]


Community Q&A
-
QuestionIs it better to scan or photograph photos?
 wikiHow Staff EditorThis answer was written by one of our trained team of researchers who validated it for accuracy and comprehensiveness.
Staff AnswerwikiHow Staff EditorStaff AnswerIn general, it’s easier to get a good image with a flatbed scanner. A good scanner can create a clear, very high-resolution image and cuts down on problems like blurriness and glare. -
QuestionWhat is the best resolution to scan old photos?wikiHow Staff EditorThis answer was written by one of our trained team of researchers who validated it for accuracy and comprehensiveness.
Staff AnswerwikiHow Staff EditorStaff Answer300 dpi works just fine for most images. If you’re really determined to get a scan that shows every tiny detail, go with 600 dpi. Going any higher won’t make much of a difference except to make your file size bigger. -
QuestionHow much does it cost to scan old photos?wikiHow Staff EditorThis answer was written by one of our trained team of researchers who validated it for accuracy and comprehensiveness.
Staff AnswerwikiHow Staff EditorStaff AnswerIf your local library has a scanner, you may be able to do it there for free! If you have a scanner at home, you can also do it at home using free scanner software. If you have your photos scanned by a professional service, such as ScanCafe or ScanMyPhotos, prices tend to start at just a few cents per photo.


References
- ↑ https://www.macrumors.com/how-to/ios-11-document-scanner-notes/
- ↑ https://www.wired.com/2016/11/google-photoscan-app-scan-your-old-photos/
- ↑ https://blog.fractureme.com/photography/scan-your-old-photos/
- ↑ http://www.rideau-info.com/photos/genealogy-copying.html
- ↑ http://www.rideau-info.com/photos/genealogy-copying.html
- ↑ http://www.rideau-info.com/photos/genealogy-copying.html
- ↑ https://www.subchaser.org/photographing-documents
- ↑ https://www.subchaser.org/photographing-documents
- ↑ http://www.rideau-info.com/photos/genealogy-copying.html
- ↑ http://www.rideau-info.com/photos/genealogy-copying.html
- ↑ http://www.rideau-info.com/photos/genealogy-copying.html
- ↑ http://www.rideau-info.com/photos/genealogy-copying.html
- ↑ https://blog.fractureme.com/photography/scan-your-old-photos/
- ↑ https://www.loc.gov/rr/print/tp/LookForAScanner.pdf
- ↑ https://www.subchaser.org/photographing-documents
- ↑ https://www.makeuseof.com/tag/safely-clean-tablet-smartphones-touchscreen/
- ↑ https://blog.fractureme.com/photography/scan-your-old-photos/
- ↑ https://www.thesprucecrafts.com/packaging-paper-collectibles-and-photographs-for-shipping-148647
- ↑ https://www.lifestorage.com/blog/organization/hiring-a-professional-organizer-to-help-you-declutter/
- ↑ https://www.lifestorage.com/blog/organization/hiring-a-professional-organizer-to-help-you-declutter/
About This Article

If you have old photographs you want to preserve, there are a few different ways you can make digital copies of them. One way is to lay the photos on a large white piece of paper one at a time and take a photo of them with your camera. Make sure you light the room well and turn off your camera’s flash for the best results. If you have a good quality camera on your phone, you can also use a photo scanning app like PhotoScan, Photomyne, or TurboScan. If you have an iPhone with IOS 11, use the note app’s “Scan documents” feature. Alternatively, scan your photos with a scanner or all-in-one printer. For an easy option, take your photos to a local photo shop so they can digitize them for you. For more tips, including how to set up your camera for the best quality photos, read on!