X
wikiHow is a “wiki,” similar to Wikipedia, which means that many of our articles are co-written by multiple authors. To create this article, volunteer authors worked to edit and improve it over time.
There are 7 references cited in this article, which can be found at the bottom of the page.
This article has been viewed 70,611 times.
Learn more...
The Acer Aspire One is a small Windows notebook designed for users who primarily browse the Internet. When your Aspire One starts lagging or running slowly, speed its performance and efficiency by disabling unneeded features, installing more RAM, replacing outdated software, and more.
Steps
Part 1
Part 1 of 9:
Disabling Startup Applications
-
1Click the Start menu and type “system configuration” into the search box.
-
2Select “System Configuration” from search results.Advertisement
-
3Click on the “Startup” tab, then remove checkmarks next to processes you don’t want running after startup. This prevents applications you don’t use from automatically running in the background after your computer starts up, leading to slowness and lagging.
-
4Click “OK.” Going forward, these processes will no longer run automatically following startup.[1]


Advertisement
Part 2
Part 2 of 9:
Disabling Performance Options
-
1Click the Start menu and type “system” into the search box.
-
2Select “System” from search results, then click on “Advanced system settings.”
-
3Click on the “Advanced” tab, then click “Settings” under Performance. These options control visual effects and performance features, some of which could be clogging your system.
-
4Remove checkmarks next to options as desired, then click “OK.” For example, disable the feature labeled “Animate windows when minimizing and maximizing” if you don’t wish to see animations when minimizing windows.[2]


Advertisement
Part 3
Part 3 of 9:
Enabling Manual Services
-
1Click the Start menu and type “services” into the search box.
-
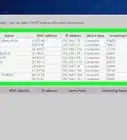
2Select “Services” from search results. Windows automatically starts services such as IP Helper and Print Spooler upon startup, even when not needed.
-
3Double-click on each service in the Services window and change its Startup Type to “Manual.” Going forward, these services will only start at your command. Examples of services you can disable are Diagnostic Policy Service, Print Spooler, and Distributed Link Tracking Client.


Advertisement
Part 4
Part 4 of 9:
Disabling McAfee
-
1Click the “Start” menu and select “Program and Features.”
-
2Right-click on the installed McAfee software and select “Uninstall.” Most Aspire One models come pre-loaded with McAfee antivirus software, which runs in the background at all times to keep your system protected from malware and viruses.
- Consider installing another security program that consumes fewer resources, or stick to visiting websites you trust to avoid malware and viruses. Disabling McAfee antivirus security software makes your computer more vulnerable to malicious software and third parties.


Advertisement
Part 5
Part 5 of 9:
Turning Off Sounds
-
1Click the Start menu and type “sound” into the search box.
-
2Click on “Sound” in search results. This opens the Sounds menu. By default, Windows plays sound effects that use system resources when performing actions such as closing programs and restarting.
-
3Click on the “Sounds” tab, then select “No Sounds” next to Sound Scheme.
-
4Remove the checkmark next to “Play Windows Startup sound,” then click “OK.”[3]


Advertisement
Part 6
Part 6 of 9:
Installing More RAM
-
1Click the Start menu and type “system” into the search box.
-
2Select “System” from search results.
-
3Note the value next to “Installed memory (RAM).” This tells you how much RAM is already installed in your computer.
-
4Refer to the user’s manual for your Acer Aspire One to determine the maximum amount of RAM it takes. Alternately, visit Acer’s official website at http://www.acer.com/ac/en/US/content/drivers to access the manual. For example, if your computer supports up to 3.5 GB RAM and one GB is already installed, you can install 2.5 GB additional RAM.
-
5Install extra RAM on your own, or hire a computer technician to install it for you. Following installation, your computer will run faster and more efficiently.[4]


Advertisement
Part 7
Part 7 of 9:
Installing Windows Updates
-
1Click the Start menu and select “All Programs.”
-
2Select “Windows Update.” This opens the Windows Update menu. Windows automatically installs updates as they become available, unless you disabled this feature at an earlier date.
-
3Click “Check for updates” in the left pane. Windows will search for the newest software updates from Microsoft.
-
4Click “Install updates,” then type the administrator password if prompted. Your computer will download and install available updates.[5]


Advertisement
Part 8
Part 8 of 9:
Replacing Outdated Software
-
1Replace slower Internet browsers with Google Chrome. Chrome is currently the fastest browser available on Windows computers, and speeds up loading time. Uninstall Internet Explorer, Safari, Firefox, and other browsers, and start using Chrome.[6]
-
2Replace software packages with Web-based applications. Applications that rival Microsoft Office Suite are now available online and free of charge so you can avoid installing extra software. For example, use your search engine to find photo editing software to replace Microsoft Photo Editor, and consider using Google Sheets instead of Microsoft Excel.
-
3Replace outdated programs with newer, more lightweight versions. If you’ve been using programs you installed on your computer several years ago, visit the developer’s website to locate newer versions of the same software that consume fewer memory and resources.
- Alternately, search for similar versions of the same program from other developers and manufacturers. For example, if using antivirus software that consumes too much memory, search for reviews of new antivirus software from another developer that consumes fewer resources.


Advertisement
Part 9
Part 9 of 9:
Removing Pre-Installed Bloatware
-
1Click the Start menu and select “Control Panel.” This opens the Control Panel window.
-
2Select “Uninstall a Program.” This displays a list of all programs installed on your system. Acer Aspire One models come pre-loaded with unneeded programs known as “bloatware” that cause lagging and slowness.
-
3Click on each program you don’t use or recognize and select “Uninstall.” This removes the program from your system.[7]


Advertisement


References
- ↑ http://www.pcmag.com/article2/0,2817,2364937,00.asp
- ↑ http://windows.microsoft.com/en-us/windows/optimize-windows-better-performance#optimize-windows-better-performance=windows-7
- ↑ http://www.computerhope.com/issues/ch000923.htm
- ↑ http://rayli.net/blog/life/acer-aspire-one-slow/
- ↑ http://windows.microsoft.com/en-us/windows-vista/install-windows-updates
- ↑ http://www.pcadvisor.co.uk/how-to/desktop-pc/how-speed-up-windows-image-3502902/
- ↑ http://www.techrepublic.com/blog/10-things/10-ways-to-speed-up-windows-7/
About This Article
Advertisement