X
wikiHow is a “wiki,” similar to Wikipedia, which means that many of our articles are co-written by multiple authors. To create this article, 16 people, some anonymous, worked to edit and improve it over time.
This article has been viewed 253,228 times.
Learn more...
Are you tired of using your email service's web inbox? It can be difficult to organize and manage your mails from a web browser interface. If you're an active email user, you may find Outlook to be a bit more powerful. You can quickly enter in your email account information and start sending and receiving emails in minutes.
Steps
Method 1
Method 1 of 4:
Configuring Gmail
-
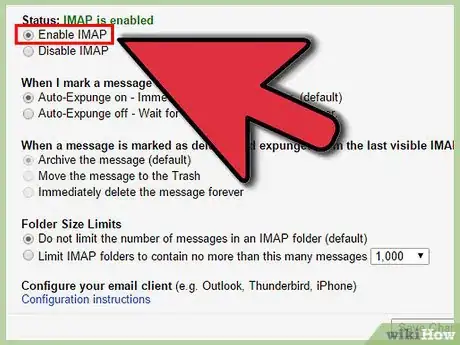
1Enable IMAP mail in Gmail. IMAP allows two-way communication from your email client and is less prone to message loss. IMAP is also better for checking email on multiple devices, which is becoming more and more common. Messages read in your Outlook client will be marked as read in your Gmail inbox as well, and vice versa.
- Sign into Gmail and click the Gear icon in the upper-right corner.
- Click Settings.
- Click the "Forwarding and POP/IMAP" tab.
- Select the "Enable IMAP" radio button.
- Click "Save Changes".
-
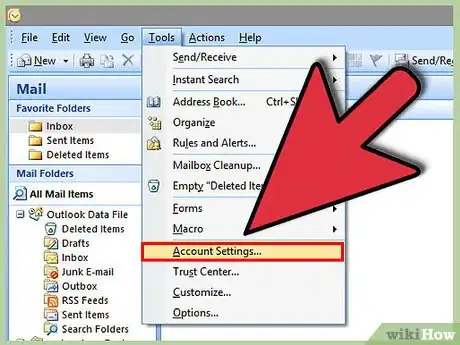
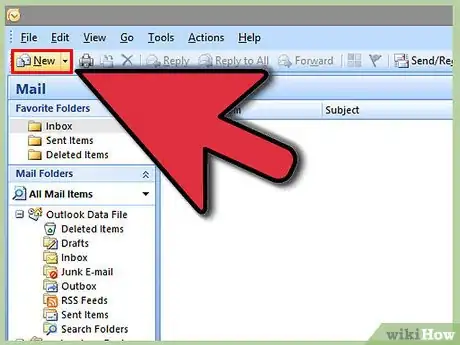
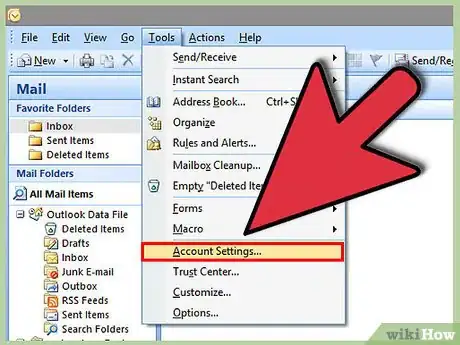
2Open Outlook. Click the Tools menu and select "Accounts or Email Accounts" and then click Add. If you are using Outlook 2010 or 2013, click the File tab and select the Info option. Click "+Add Account".
- Select "Manually configure server settings or additional server types".
Advertisement -
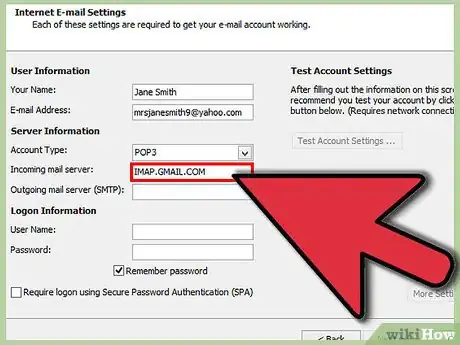
3Enter the information for your Incoming Mail (IMAP) Server. You will need to enter the following information in order to successfully connect to your Gmail account and receive email:
- Server: imap.gmail.com
- Port: 993
- Requires SSL: Yes
-
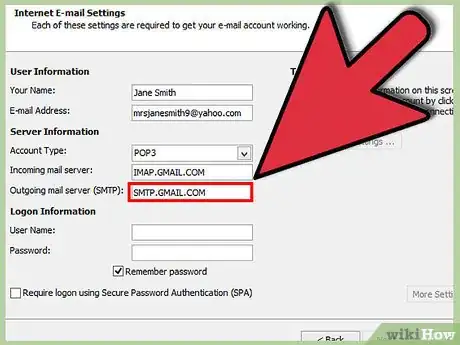
4Enter the information for your Outgoing Mail (SMTP) Server. You will need to enter the following information to successfully connect to your Gmail account and send email:
- Server: smtp.gmail.com
- Port: 465 or 587
- Requires SSL: Yes
- Requires authentication: Yes
- Use same settings as incoming mail server.
-
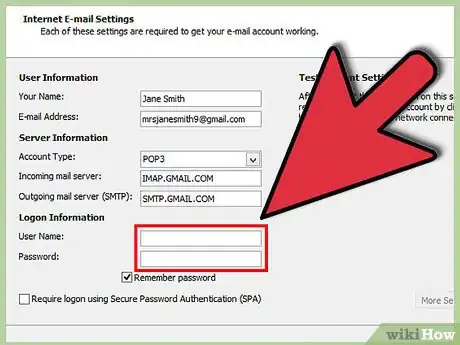
5Enter your account information. Besides entering server information, you will also need to enter in your account information. This will allow Outlook to sign into Gmail on your behalf and properly label messages:
- Full Name or Display Name: This is the name you want to appear when people receive messages from you.
- Account Name or User Name: Your Gmail address (yourname@gmail.com)
- Email address: Your Gmail address again.
- Password: Your Gmail password.
-
6Send and receive emails. Once you have Gmail configured, you can start using Outlook to send and receive email messages through your Gmail account. Start getting your life organized by making the most out of Outlook.[1]
Advertisement
Method 2
Method 2 of 4:
Configuring Yahoo!
-
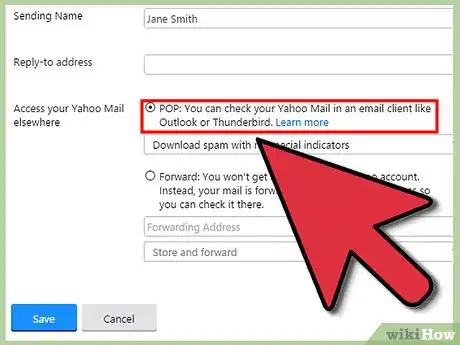
1Enable POP mail in Yahoo. Yahoo Mail only supports POP mail for external clients unless its mobile. For Outlook, this means you'll need to use POP. With POP, emails read on one client will not show as read in another. This means that your Yahoo web mail inbox and Outlook inbox will not always be in sync.
- Sign into Yahoo Mail and click the Gear icon in the upper-right.
- Click Settings.
- Click Edit.
- Select POP. This option is located to the right of "Access your Yahoo Mail elsewhere".
- Choose your POP spam option by clicking the drop-down menu. You have three options:
- Don't download spam email - Only your Inbox messages will be forwarded to your client.
- Download spam with no special indicators - Spam messages will be delivered but will not be labeled as anything.
- Download spam, but prefix the word "Spam" - Spam messages will be delivered and will be marked as "Spam" in your Outlook inbox.
- Click Save.
-
2Open Outlook. Click the Tools menu and select "Accounts or Email Accounts" and then click Add. If you are using Outlook 2010 or 2013, click the File tab and select the Info option. Click "+Add Account".
- Select "Manually configure server settings or additional server types".
-
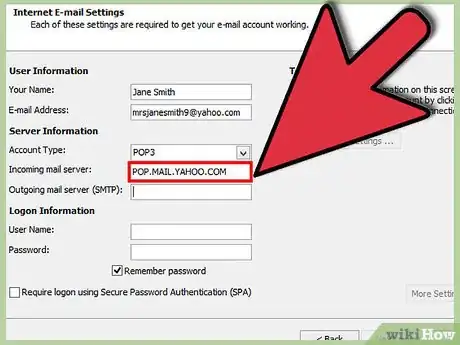
3Enter your incoming mail information (POP3). Enter in the connection settings so that Outlook can retrieve your Yahoo inbox.
- Server: pop.mail.yahoo.com
- Port: 995
- Requires SSL: Yes
-
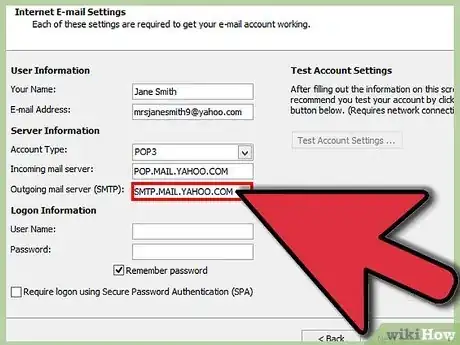
4Enter your outgoing mail information (SMTP). Enter the following connection so that you can send mail through your Yahoo address through Outlook.
- Server: smtp.mail.yahoo.com
- Port: 465 or 587
- Requires SSL: Yes
- Requires Authentication: Yes
-
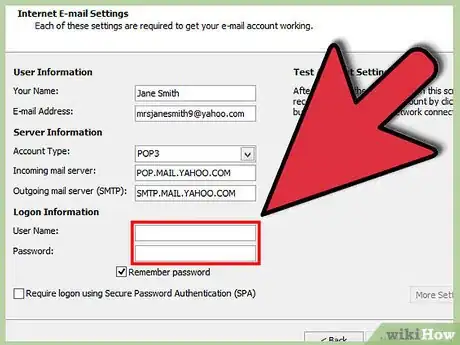
5Enter your account information. Besides entering server information, you will also need to enter in your account information. This will allow Outlook to sign into Yahoo on your behalf and properly label messages:
- Full Name or Display Name: This is the name you want to appear when people receive messages from you.
- Email address: Your Yahoo Mail address (yourname@yahoo.com)
- Password: Your Yahoo password.[2]
-
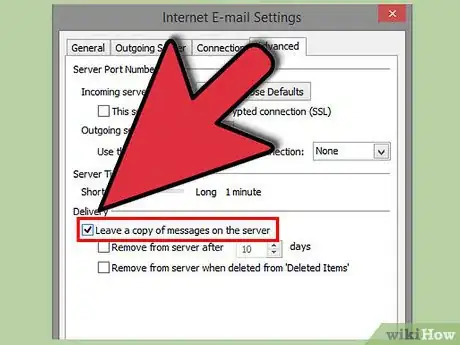
6Click the Advanced tab. You will need to choose how you want to handle downloading messages. You can either delete the copy on Yahoo when you download to Outlook, or you can leave a copy on Yahoo after you download to Outlook.
- Messages deleted from the Yahoo server cannot be retrieved.
-
7Send and receive emails. Once you have Yahoo configured, you can start using Outlook to send and receive email messages through your Yahoo account. Start getting your life organized by making the most out of Outlook.
Advertisement
Method 3
Method 3 of 4:
Configuring Hotmail (Outlook.com)
-
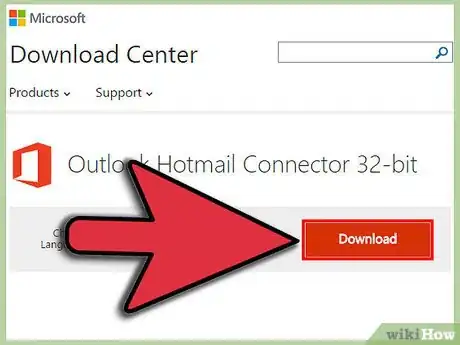
1Download the Outlook Connector. This program will allow you to connect your Outlook.com (Formerly Hotmail) account with Outlook. This will allow two-way communication between the two, syncing messages, contacts, calendar information and more.
- The Outlook Connector is free and is required to make the connection. It works with all versions of Outlook. If you are using a 64-bit system, make sure to download the 64-bit program.
- Run the Connector program after downloading it. Follow the prompts to install it.
-
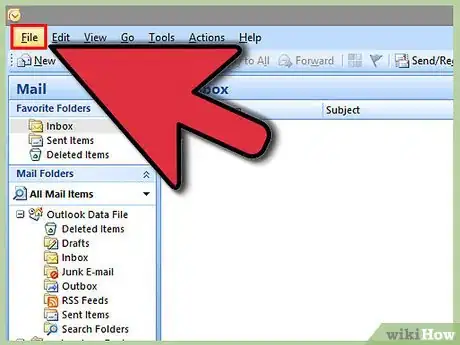
2Open Outlook. Click the File tab and select "Add Account".
-
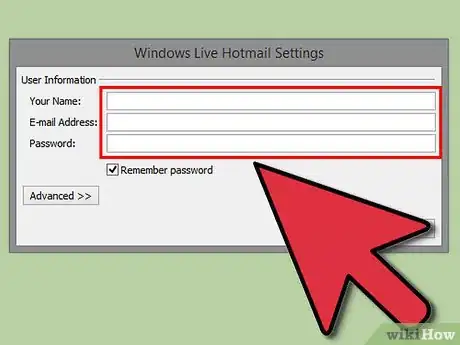
3Enter your Outlook.com information. Make sure that the "E-mail Account" radio button is selected. Enter the following information:
- Your Name: The name you want to appear on mails that you send.
- E-mail Address: Your Outlook.com or Hotmail email address.
- Password: Your Outlook.com or Hotmail password.
-
4Click Next. If you have not already installed the Connector, you will be prompted now. If the Connector is correctly installed, your Outlook.com account will be synced with Outlook.
- If you ever change your Outlook.com password, make sure to change it in Outlook too. You can do this from the Account Settings button in the File tab.
-
5Start using Outlook. Now that your Outlook.com account is connected, your emails, contacts, and calendars are all synced. You can add and remove items from either the web interface or from your Outlook client.[3]
Advertisement
Method 4
Method 4 of 4:
Configuring Comcast
-
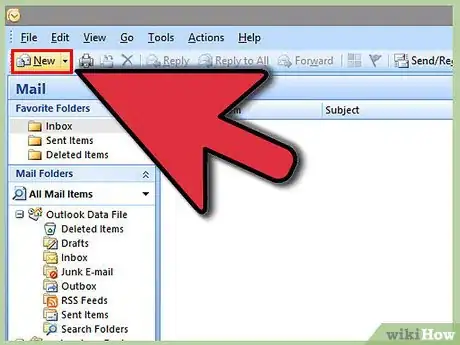
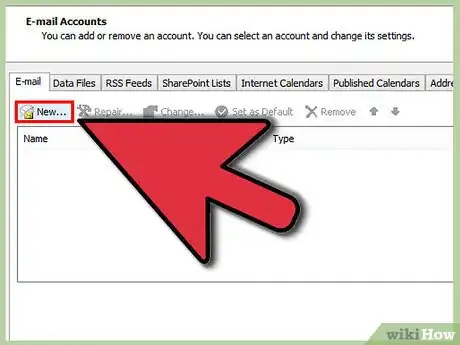
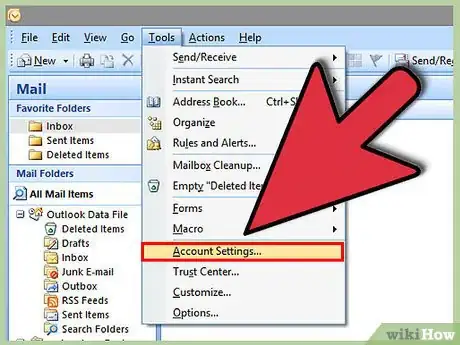
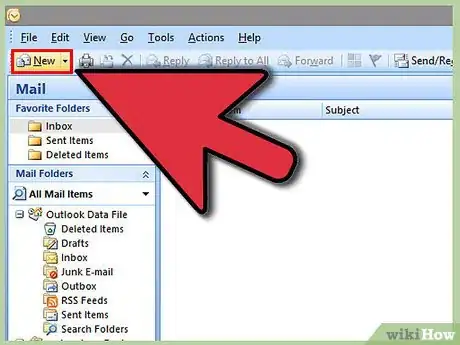
1Open Outlook. Click the Tools menu and select "Accounts or Email Accounts" and then click Add. If you are using Outlook 2010 or 2013, click the File tab and select the Info option. Click "+Add Account".
- Select "Manually configure server settings or additional server types".
-
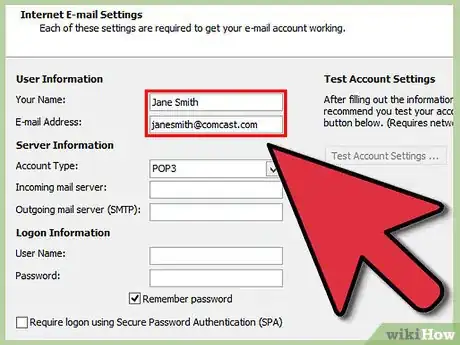
2Enter in your display name and account information. Your display name is the name that will appear when you send an email to someone.
- In the email address field, enter: username@comcast.net
-
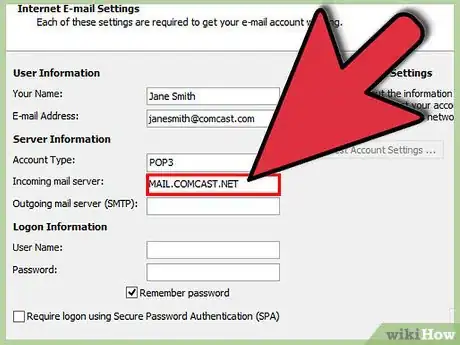
3Enter your incoming mail information (POP3). Enter in the connection settings so that Outlook can retrieve your Comcast inbox. Check the Advanced tab to find all the fields.
- Server: mail.comcast.net
- Port: 995
- Requires SSL: Yes
-
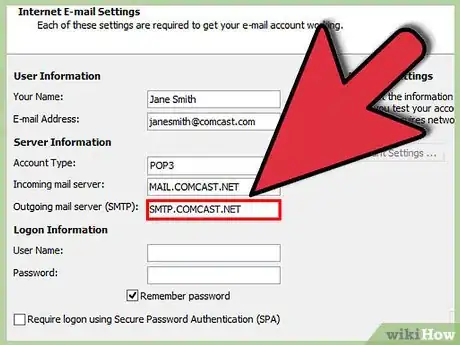
4Enter your outgoing mail information (SMTP). Enter the following connection so that you can send mail through your Comcast address through Outlook. Check the Advanced tab to find all the fields.
- Server: smtp.comcast.net
- Port: 465
- Requires SSL: Yes
- Requires Authentication: Yes
-
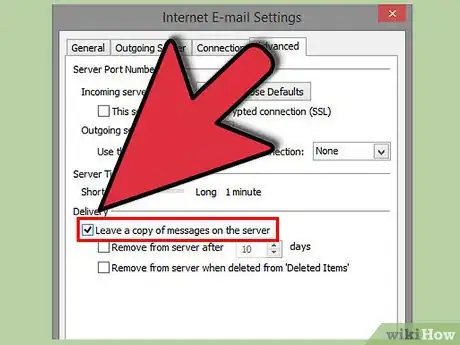
5Click the Advanced tab. You will need to choose how you want to handle downloading messages. You can either delete the copy on Comcast's server when you download to Outlook, or you can leave a copy on Comcast after you download to Outlook.
- Messages deleted from the Comcast server cannot be retrieved.
-
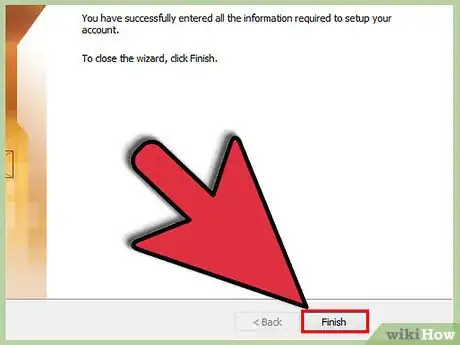
6Send and receive emails. Once you have Yahoo configured, you can start using Outlook to send and receive email messages through your Yahoo account. Start getting your life organized by making the most out of Outlook.
Advertisement
Community Q&A
-
QuestionWhere is my verification for my Microsoft account?
 Community AnswerWhen you sign in, the page will ask you, if you haven't already, to put verification info (phone number, another email address, etc.). That is your verification.
 -
QuestionCan you explain how I would check for new emails in MS Outlook?
 Community AnswerPress F9 and the inbox will automatically appear highlighted with number of unread e-mails.
 -
QuestionHow do I change my password?
 Community AnswerJust go into your account and click on your user name and then change your password and save it.
Advertisement
References
About This Article
Advertisement
