This article was written by Garnik Ovsepyan and by wikiHow staff writer, Travis Boylls. Garnik Ovsepyan is a Computer Specialist and the Owner of HeliX PC based in Burbank, California. With over 25 years of experience, Garnik specializes in custom computer builds, computer repairs, virus removal, computer tune-ups, hardware and software troubleshooting and installations, diagnostics, and data backup and recovery.
This article has been viewed 252,526 times.
Since Windows 10 version 1809 was released, Quick Removal mode has been set to the default setting for removable USB drives. This means that it is safe to remove a USB drive as long as Windows is not actively writing to the drive. However, if you switch to Better Performance mode, you will need to go through the process of safely removing your USB drive to avoid data loss. This wikiHow teaches you how to safely remove a USB drive using Windows 10.
Steps
Removing a Thumb Drive Quick Removal Mode
-
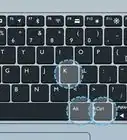
1Save any open documents you have on the flash drive. In most programs, you can save your progress by click File and then Save. Generally, you can also press "Ctrl" and "S" at the same time to save your work.
-
2Make sure Windows isn't writing any files to the USB drive. When saving larger files to a flash drive, it may take Windows a few minutes to finish copying them. Windows displays a progress bar when copying files to another drive. Check the taskbar there are no files in the process of being copied. You can also press "Windows Key" and "E" at the same time to open File Explorer. Open the USB drive under "This PC" and check that all files have been copied.Advertisement
-
3Gently remove the USB drive. If you are using the default Quick Removal setting and no files are currently in the process of being copied, you can remove the USB drive at any time without the risk of losing data. Gently pull it out of the USB slot to remove it.


Enabling Better Performance Mode
-
1Make sure your flash drive inserted in your computer. Insert the USB drive in any available USB port on your computer. When Better Performance mode is enabled, Windows uses a local write cache when writing to a USB drive. This makes the process of writing to the drive quicker, but it also increases the risk of data loss if the drive is not removed safely.[1]
-
2Right-click the Start button. It's the Windows logo in the bottom-left corner of the screen. Doing so will display a pop-up menu.
- You can also hold down the "Windows Key" and tap "X" to bring up the pop-up menu.
-
3Click Device Manager. This option is toward the top of the pop-up menu.
-
4
-
5Right-click your flash drive's name. The flash drive's name will vary, but you will usually see "USB" in its title.
-
6Click Properties. This option is at the bottom of the right-click drop-down menu.
-
7Click Policies tab. It's the second tab at the top of the "Properties" window.
-
8Click the radio option next to "Better Performance." It's the second option in the Policies menu.
-
9Click OK. This enables Better Performance mode. This makes writing to the disk drive faster, but you must remove the drive using one of the safe removal methods to avoid data loss.


Using the Safe Removal Options in the Taskbar
-
1Save any open documents you have on the flash drive. In most programs, you can save your progress by click File and then Save. Generally, you can also press "Ctrl" and "S" at the same time to save your work.
-
2
-
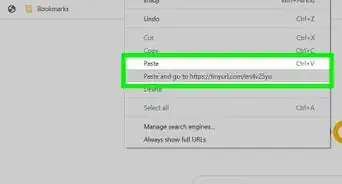
3Click the icon that resembles a USB drive. This is the icon to safely remove a USB drive from your computer. Doing so displays a drop-down menu.
-
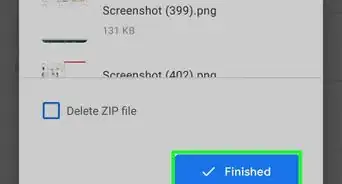
4Click Eject. This option is at the bottom of the drop-down menu. It will typically say something like Eject SDHC (E:) with your flash drive's name written after the "Eject" prompt.
-
5Wait for the "Safe to Remove Hardware" prompt. Once this notification displays in the bottom-right corner of your computer's screen, it is safe to remove your USB drive.
-
6Gently tug the flash drive away from your computer. It should slide out. The next time you plug your flash drive into your computer, all of your files should be as you left them.


Using File Explorer
-
1Save any open documents you have on the flash drive. In most programs, you can save your progress by click File and then Save. Generally, you can also press "Ctrl" and "S" at the same time to save your work.
-
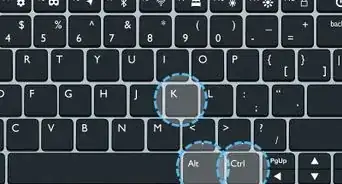
2Press ⊞ Win+E to open File Explorer. File Explorer has an icon that resembles a folder with a blue click. Click the File Explorer icon or press "Windows Key" and "E" at the same time to open File Explorer.
-
3Click the "This PC" icon. It's a computer monitor-shaped image in the panel to the left in File Explorer.[Image:Remove a Flash Drive from a Windows 10 Computer Step 10 Version 2.jpg|center]]
-
4Find your flash drive's name. It will appear below the "Devices and drives" heading that's in the middle of the page. Typically, your flash drive will be on the right side of this page. You'll usually see "(E:)" or "(F:)" after the flash drive's name.
- Alternatively, you can find it in the sidebar panel to the left.
-
5Right-click your flash drive's name. A drop-down menu will appear.
-
6Click Eject. It's near the middle of the drop-down menu. Once you do this, the flash drive's name should disappear from the This PC window.
-
7Wait for the "Safe to Remove Hardware" prompt. Once this notification displays in the bottom-right corner of your computer's screen, it is safe to remove your USB drive.
-
8Gently tug the flash drive away from your computer. It should slide out. The next time you plug your flash drive into your computer, all of your files should be as you left them.


Community Q&A
-
QuestionHow do I check what files are open that are stopping the removal of the flash drive?
 Κωνσταντίνος ΚορναράκηςCommunity AnswerCheck if an application, file, open document, music or video file or any other application is in use and close it. You can also run the Task Manager to "kill" any processes used by the device. Be careful—ending tasks doesn't damage your computer per-se, but it can lose unsaved files and corrupt existing open files if you close a program that is using them, and it can cause your computer to do an emergency shutdown. It won't cause permanent damage unless the program is doing something like flashing the BIOS (in which case, you shouldn't be removing flash drives!).
 -
QuestionI do not have a system tray button, how do I install one?
 Community AnswerThe system tray isn't something that you can download. It should be on all Windows 10 computers in the right hand corner. It looks like this ∧.
 -
QuestionThere is no message saying that the flash drive can be safely removed, but I clicked the USB stick in the System Tray Icon. Then, I couldn't access some movies on the flash drive. How do I fix this?
 Community AnswerUsually you can just take the USB Flash Drive out without safely removing it. Only when you are doing stuff on it like moving files from or to it, or watching movies from it. Even then, there is a low possibility that it's going to become corrupted or something.
Warnings
- You shouldn't use Quick Removal for external hard drives. Since they store significantly more data than a typical flash drive, using the "Eject" process is a much safer way to remove an external hard drive.⧼thumbs_response⧽
- Not properly ejecting a flash drive can damage the file system and cause you to lose data.⧼thumbs_response⧽


References
About This Article

1. Press "Ctrl + E" to open File Explorer.
2. Right-click your USB drive.
3. Click Eject.
4. Wait for the prompt that says "Safe to remove hardware."
5. Remove your USB drive.