This article was co-authored by wikiHow Staff. Our trained team of editors and researchers validate articles for accuracy and comprehensiveness. wikiHow's Content Management Team carefully monitors the work from our editorial staff to ensure that each article is backed by trusted research and meets our high quality standards.
This article has been viewed 110,189 times.
Learn more...
A plaque mount is a classy way of displaying your favorite posters. By doing this on inexpensive MDF board, you can save yourself some money. Once you’ve got your MDF plaque cut, you can attach your poster with double-sided adhesive paper or spray on adhesive. Double-sided adhesive paper will be easier, but posters attached with spray adhesive will last longer and have a more professional appearance.[1]
Steps
Measuring, Cutting, and Sanding the MDF
-
1Measure the dimensions of your poster. You may have the option of getting your MDF board cut to size when you purchase it at a hardware store or home center. If so, you’ll need to know the length and width of your poster. Take these measurements with your tape measure.[2]
- The guided example provided in the following steps assumes you’re working with a rectangular poster. If your poster is irregularly shaped, you’ll need to find the length of each individual side.
-
2Use thicker MDF to make your plaque mounting more prominent. There will likely be many different sizes and thicknesses of MDF to choose from. Select a piece big enough to fit your entire poster and a thickness that best exhibits your poster.Advertisement
-
3Mark the cutting lines on your MDF, when necessary. If your MDF is larger than your poster, you’ll need to cut it down to size. To ensure your lines are straight and even, use your tape measure and a pencil to mark the dimensions of the poster on the MDF.[3]
- Use a straight edge, like a square or level, to draw a solid line around the perimeter where you’ve marked. This will make it easier for you to cut the MDF.
- Check the corners of your markings with a carpenter’s square. Each corner of a rectangular poster will form a perfect right angle, like an L-shape.
-
4Cut your MDF to size. Use a circular saw or a table saw to cut the MDF board along the new perimeter you’ve drawn. Work slowly and carefully; uneven edges are usually fairly obvious.[4]
- While cutting, protect your eyes with safety glasses and your lungs with a breathing mask.
- Always operate power saws with caution. These can cause serious harm or property damage if used improperly.
- Though it might take longer, if you don’t have a power saw available you can always use a hand saw to get the job done.
-
5Sand the edges smooth. Run your fingers along the edge you’ve just cut. Does it feel jagged or rough? This can create bumpiness around the edges of your mounted poster. Use a medium grit sandpaper in the 60- to 100-grit range to sand the edges until they are smooth and regular.[5]
- There will likely be sawdust from the sanding. This can also create bumpiness in the mounted poster. Use a vacuum with a brush attachment and a dry, lint-free rag to remove all sawdust.
- Since you’re going to be covering up the MDF mounting with your poster, you don’t have to spend too much time trying to sand the edges to perfection.[6]


Mounting a Poster with Double-Sided Adhesive Paper
-
1Mark and cut your adhesive paper. Place your clean, cut MDF board onto your adhesive paper. Follow the perimeter with your pencil to outline it onto the paper. Now you’re ready to cut the paper along the outline with a utility knife or scissors.
- If you’re using a utility knife to cut the adhesive paper, be careful you don’t accidentally cut into your work surface. You may want to put something underneath when cutting, like cardboard.
- It’s best to cut your paper too large than too small. Paper that’s too large can be easily trimmed down to size after being attached.[7]
-
2Stick the adhesive paper onto a corner of the MDF. Carefully remove the backing on your cut piece of adhesive paper. Line up one corner of the paper with the corresponding corner of the face-up side of the MDF and press it into place lightly.
- If you’ve cut your adhesive paper correctly, it should fit the MDF board perfectly.
-
3Press the opposite corner of the paper into place. Use your clean fingers to smooth the adhesive paper to the MDF from the attached corner the one opposite. Check the alignment with the edge as you go and make adjustments as necessary.
- You may need to lightly pull up the paper where it has been attached to reorient it so it is properly aligned with the edges of the MDF.
-
4Attach the remaining half of the adhesive paper. Work little by little from the attached side to the non-attached side. Use your fingers or a tool, like a roller, to press the paper smoothly into place on the MDF. There should be no bubbling or folded over parts.
- Bubbles can be chased to the outer edges of the paper with your fingers or a straight edge, like a ruler.
- Worst-case scenario, use a pin to create a small hole in bubbled areas. When these deflate, smooth them as best you can with your fingers or a straight edge.
-
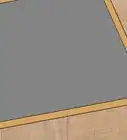
5Smooth the poster into place on the adhesive paper. You’re finally ready to mount your poster to the MDF! Peel the remaining backing off the adhesive paper and attach your poster in the same fashion you did the adhesive paper.
- Avoid storing your plaque mounted poster in direct sunlight or exposing it to heat. These can cause the glue to degrade and lose its stickiness.


Using Spray Adhesive
-
1Arrange newspaper under the MDF. This will prevent spray adhesive from getting on your work surface. Completely cover your work surface with newspaper and lay the cut MDF atop it, roughly in the center.[8]
-
2Orient your poster face up on the MDF backing. Your poster should fit the MDF perfectly. In the event it doesn’t, you may be able to trim the poster with scissors or a utility knife so it fits the backing.
- If the cut of the MDF is way off, you may need to cut a new mounting for the poster.[9]
-
3Weigh down and cover one half of the poster. Take a few clean pieces of paper towel and layer them at about the middle of one half of the poster. Place a clean paperweight on the paper towel. Next you’ll need to cover this half of the poster with more newspaper.[10]
- Be thorough when covering the weighted portion of the poster with newspaper. Gaps may get sprayed with adhesive and ruin the quality of the finished product.
-
4Fold back the unweighted side to expose the back of the poster. The paperweight should hold the weighted half in place as you do this. The pulled back half should overhang the newspaper covered weighted half.[11]
-
5Cover all remaining MDF with newspaper. You’re going to be spraying adhesive directly onto the back of the poster, and only the back of the poster. So the MDF exposed by folding back the unweighted half of the poster will also need to be covered with newspaper.[12]
-
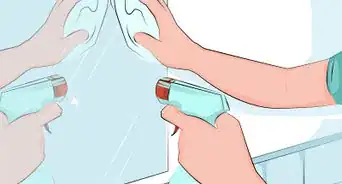
6Apply adhesive to the poster. Hold the can 6 in (15.2 cm) away from the poster. Position the can of adhesive spray at about the poster’s middle. While you spray, twist your wrist back and forth so the spray passes in an S-shape to coat that half of the poster back.[13]
- Spray adhesive usually has a strong, unpleasant odor. Allow some time for these fumes to dissipate before moving on.
-
7Remove all newspaper cover except the work surface cover. Spraying the back of your poster likely got adhesive on the newspaper covering the weighted portion of the poster and the MDF. Without getting any adhesive on your hands, remove and throw away the newspaper.[14]
- Avoid touching the newspaper covering your work surface or moving the MDF after spraying adhesive. This can cause glue to spread to the MDF, which can be a pain to remove.
- Glue on the side or back of the MDF won't be obvious and, in many cases, can be left to dry. If you’re dead set on removing the glue, rub it lightly with clean paper towel until it comes off.
-
8Smooth the glued half of the poster onto the MDF. Use a clean piece of paper towel to press the poster onto the MDF starting from the middle and working your way to the edges. Take your time and work in small increments to prevent the formation of bubbles.[15]
- Bubbles can oftentimes be chased to the edges of your poster where they’ll disappear. Use a plastic card or your clean fingers to gently smooth out uneven parts of the poster.
-
9Check for glue and remove seepage with paper towel. When the glued half of the poster is in place, feel its surface with your clean hands. You’re looking for mis-sprayed glue that got on the poster’s topside or seeped out along the edges. Rub glue gently with clean paper towel to remove it.[16]
- Glue can discolor the surface of your poster or create roughness. It’ll be easiest to remove errant glue while it’s still fresh.
-
10Repeat this process on the unglued half of the poster. Remove the paperweight and set it off to the side. Cover the glued half of the poster with fresh newspaper and peel back the second half of the poster so it overhangs the covered glued half. Only spray adhesive on the exposed back of the poster.
- Before you spray the adhesive, all areas of the poster and MDF should be covered with newspaper except the part that’s been peeled back to overhang the glued half.
- Smooth the adhesive sprayed poster back to the MDF in the same way you did previously, by rubbing it in small increments with a clean piece of paper towel.
- The second half of your poster will likely have more glue seep along the edges than the first.[17]


Decorating the Bare Edges of the MDF
-
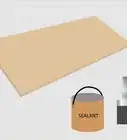
1Add nailhead trim around the bare edges of the MDF mounting. You can do this similarly to how you would add nailhead trim to upholstery, but you should avoid kinds installed with nails. Instead, use trim with adhesive backing that can be pressed into place along the bare edges of MDF.
- MDF is a pretty resilient wood and, in many cases, it will cause nails to bend as they’re pounded in. If you absolutely must use nails on MDF, use a nail gun.
-
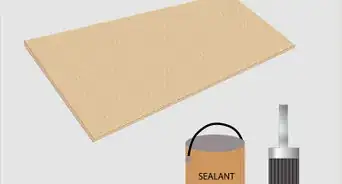
2Paint bare MDF. Choose a color that complements your home color scheme or the content of the poster. When in doubt, black is a simple, elegant color that goes with most kinds of decor. Consider painting before you mount your poster to prevent paint from getting on the poster.
-
3Bevel the edges of the MDF mounting like crown molding. This is the most common style for a plaque mount. Beveled edges will give your MDF a professionally finished appearance and make it even more prominent.


Warnings
- Most kinds of spray application glue create harmful fumes. Avoid breathing these fumes and make sure your work area has good airflow.⧼thumbs_response⧽
Things You'll Need
- MDF board
- Circular saw (or table saw)
- Pencil
- Measuring tape
- Carpenter’s square (or t-square)
- Spray adhesive glue (or double-sided adhesive paper)
- Utility knife (optional)
- Newspaper
- Paper towel
- Paperweight
- Poster
- Safety glasses
- Breathing mask
- Lint-free rag (like one made from microfiber)


References
- ↑ http://photographyspark.com/the-art-of-mounting-and-framing-photos/
- ↑ http://www.manmadediy.com/users/bryson/posts/3409-how-to-mount-posters-and-art-to-plywood-for-an-affordable-modern-look
- ↑ http://www.manmadediy.com/users/bryson/posts/3409-how-to-mount-posters-and-art-to-plywood-for-an-affordable-modern-look
- ↑ http://www.manmadediy.com/users/bryson/posts/3409-how-to-mount-posters-and-art-to-plywood-for-an-affordable-modern-look
- ↑ https://www.bobvila.com/articles/2145-quick-tip-choosing-sandpaper/#.WU2qxFQrLIU
- ↑ http://www.manmadediy.com/users/bryson/posts/3409-how-to-mount-posters-and-art-to-plywood-for-an-affordable-modern-look
- ↑ http://photographyspark.com/the-art-of-mounting-and-framing-photos/
- ↑ https://www.youtube.com/watch?v=v3J8yph1wX8
- ↑ https://www.youtube.com/watch?v=v3J8yph1wX8
- ↑ https://www.youtube.com/watch?v=v3J8yph1wX8
- ↑ https://www.youtube.com/watch?v=v3J8yph1wX8
- ↑ https://www.youtube.com/watch?v=v3J8yph1wX8
- ↑ https://www.youtube.com/watch?v=v3J8yph1wX8
- ↑ https://www.youtube.com/watch?v=v3J8yph1wX8
- ↑ https://www.youtube.com/watch?v=v3J8yph1wX8
- ↑ https://www.youtube.com/watch?v=v3J8yph1wX8
- ↑ https://www.youtube.com/watch?v=v3J8yph1wX8
About This Article