This article was co-authored by Jesse Kuhlman. Jesse Kuhlman is a Master Electrician and the Owner of Kuhlman Electrician Services based in Massachusetts. Jesse specializes in all aspects of home/residential wiring, troubleshooting, generator installation, and WiFi thermostats. Jesse is also the author of four eBooks on home wiring including "Residential Electrical Troubleshooting" which covers basic electrical troubleshooting in residential homes.
There are 12 references cited in this article, which can be found at the bottom of the page.
This article has been viewed 82,972 times.
Electronics is the science of controlling electricity, so it’s a very important field that is, fortunately, less difficult to learn than you may think. You can start right away by reading up on electrical currents and circuits. For a more hands-on approach, order building kits or make your own circuits. With enough studying, you may be able to make your own electronic gadgets someday.
Steps
Learning the Basics
-
1Read books to learn the fundamentals of electronics. Visit your local library or a bookstore to begin reading about electronics. Even older books have a lot of information about electrical circuits and how they work. Use it to study the basics before you begin building your own circuits.[1]
- Try books like Make: Electronics, The Art Of Electronics, or Foundations of Analog and Digital Electronic Circuits.
- If you want to become a residential electrician, study the residential part of the most current NEC code book.[2]
- For more resources, search online for informative websites and digital book copies.
-
2Download a phone application to study electrical engineering. Search your phone’s Play Store to find a number of informative, hands-on apps. Some apps teach you the basics of electronics, while others let you design your own circuit board using a touchscreen.
- For example, try Electronics Basics or ElectroDroid.
Advertisement -
3Study how a current travels along a wire. An electrical current consists of electrons, which are the negatively charged particles in atoms. In a current, the electrons flow from a negative source, such as a battery terminal. Then, it flows around the circuit and returns to the positive terminal.[3]
- You can think of it like a faucet. When the faucet turns on, “water” is pushed through until it reaches the end of the pipe.
-
4Read about the voltage in a circuit. Voltage is a measurement of the force needed to make a current flow through a circuit. In a circuit, the electrons accumulate near the battery’s negative terminal. Energy is needed to get the current to flow through the circuit, and this measurement is the voltage.
- Think of it as pressure in a water tank. When water is drained from the tank, the pressure goes down and less water flows out.
-
5Study the resistance factor of different objects. Resistance slows the current in a circuit. Different materials inhibit electricity more than others. You will need a stronger electrical current to pass through insulation than a conductive material like metal. This increases the voltage.
- For example, imagine water pipes of different sizes. Water faces more resistance flowing through the smaller pipe due to the lack of space.
-
6Read circuit diagrams to understand the notation. Electrical diagrams and schematics use symbols to denote components. Before you can copy one to build your own circuit, find out what the symbols mean. Search online for a list of symbols used as shorthand in diagrams.[4]
- The straight lines are wires. A battery is represented by a + sign followed by a long and short straight line.
- Diodes, for example, are represented by triangles. Resistors are represented by squares or jagged lines.


Mastering the Tools
-
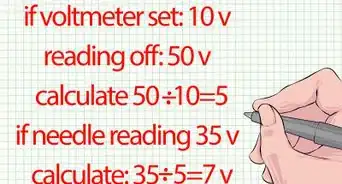
1Measure an electrical current with a multimeter. A multimeter is a handy way to measure the different forces that make up an electrical charge. It’s helpful to have one on hand to test the current in any electrical circuit. Get one that measures the current, voltage, and resistance.[5]
- The current is the flow of electricity in a circuit. It is measured in amperes.
- A current’s voltage, measured in volts, is the pressure pushing the current along the circuit.
- Resistance indicates how much the circuit resists the flow of electricity. It is measured in ohms.
-
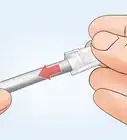
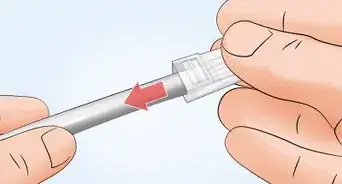
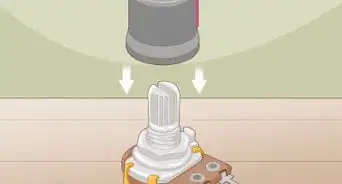
2Limit an electrical current with a resistor. Resistors are small tubes on wires. They don’t actively do anything, but they are important in limiting the electrical current. Without a resistor, the electrical current can become too strong and ruin other components.[6]
- For example, if you attach an LED light to a circuit without a resistor, the light can burn out.
-
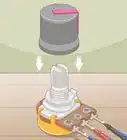
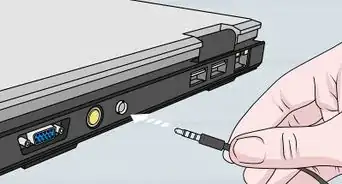
3Store electricity with a capacitor. Capacitors are the opposite of resistors. Instead of limiting the flow, they encourage it by storing a little bit of electricity. This way, if the power is disrupted, the circuit continues to work.[7]
- For example, if you unplug your computer, the capacitors will ensure the electrical current runs smoothly from the battery.
-
4Control electrical currents using diodes and transistors. These components have + and - terminals that help conduct electricity. When activated, electricity flows through one end and out the other. Diodes have 2 ends while transistors have 3.[8]
- Diodes are used to make an electrical current flow in 1 direction only.
- Transistors are like switches that change the direction of a current.
-
5Practice cutting and stripping wires. For basic electrical work, you will need a wire cutter and a wire stripper from a hardware store. To do this, cut the wires to the length first. Then, strip about 1⁄4 in (0.64 cm) of insulation off the ends before connecting them to components.
- To work with the wire, hold the exposed ends against the components or tape them in place. If you use a breadboard, simply push the exposed end into the hole.
- When you first begin, you do not need to learn how to solder.
-
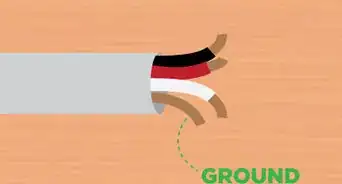
6Read about how wires of different colors are used. Electrical wires are generally all copper. However, they are cased in different colors of plastic to distinguish their uses. Always connect like wires together. Use black and red wires to power your circuits.[9]
- Black wires are the main current conductors in a circuit. Red wires are secondary carriers.
- Blue and yellow wires are uncommon but are used to carry electricity in complex circuits.
- White and gray wires are considered neutral because they conduct unused electricity.
- Green wires are grounding wires which bring the current to the ground for safety.


Getting Hands-On Experience
-
1Build a circuit using a circuit diagram. Search for circuit diagrams online to find a few simple ones you can attempt to build on your own. Read the diagram to figure out what components you need. Then, build the circuit so it looks like the diagram. It will help give you an idea of how a circuit works.[10]
- It is best to start with a smaller circuit. Pick one with few branching lines and available components like a battery and light bulb.
-
2Make a closed loop using a light bulb. Gather 2 copper wires, a fresh battery, and a light bulb. Set the components on a table, then hold the wires to connect the battery terminals to the bulb’s metal base until the light bulb lights up.[11]
- You can light the bulb with only these components.
- The electrical current flows from the negative terminal to the positive one, passing through the light bulb along the way.
- Seeing this closed loop make your light bulb come to life can give you a better understanding of how electricity moves in a circuit.
-
3Purchase a kit for practice projects. Go online to find a variety of beginner kits for electronics. There are a wide variety of kits available, each one packaged with the parts to complete a simple product. This is a good way to begin learning about electronics without building your own circuit board.[12]
- For example, an educational rover is a small, pre-built robot. It is used to learn some basic customization and programming techniques.
-
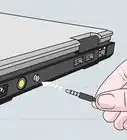
4Practice working with Arduino boards. Arduino boards are inexpensive circuit boards used in most electronic projects. These are included in any kits you buy, but you can also purchase them separately online. They are beginner-friendly, so try using one to build some basic circuits and projects.[13]
- A typical starter project is the “blinking light,” which teaches you how to make an LED light blink with some simple Arduino programming on your computer.
- If you don’t want to purchase a kit, you can get started with an Arduino board and a USB cable. Connect the board to your computer and download the Arduino software online.
-
5Build circuits using a breadboard. A breadboard is a way to build a circuit without soldering. It looks like a piece of plastic with a bunch of holes in it. Push the wires into the holes to connect them in a circuit. Connect the wires to an Arduino board or battery to create an electrical current.[14]
- Try activating an LED light using the breadboard. You will need wire, an LED, a resistor, and an Arduino board.. All of these parts can be ordered online.
-
6Make your own projects with online schematics. Once you are comfortable building circuits, come up with a few projects you would like to make, such as an alarm or sensor. Schematics are design diagrams that show you how to build a project. Many schematics can be found by searching online.
- For example, type “blinking light schematic” to find a few ways to build a circuit with an blinking LED light.


Advancing Your Knowledge
-
1Get a job working for a company that does electrical work. The best way to learn about the electrical field is to get a job in the area you want to work. Decide what field you want to work in, like working in homes, offices, or outdoors. Then, find a company that does that kind of work and get started![15]
- For example, if you want to work outdoors, you might enjoy working for a company that does solar installation.[16]
-
2Master a programming language to operate electronics. Give your electronics directions by installing a microcontroller. This is a small computer chip that fits on your circuit board. Using one involves studying a computer programming language like C or C++, then typing out code through your computer.
- Arduino is a simple way to program microcontrollers for beginners. Plug the Arduino board into your computer, then download the Arduino software to begin coding.
-
3Design your own schematics using computer software. Download a simple, free design program like Fritzing on your computer. Use the program to put together your own custom electrical circuit. This helps you understand electrical circuits and schematics better. Also, you can use the program to design something unique to build.
- You can also use more complicated PCB design software like Eagle and KiCad.
- Once you have made a circuit, you can send it to a prototype manufacturer for printing.
-
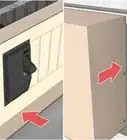
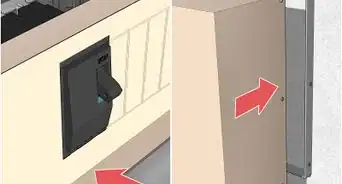
4Take apart electrical appliances for studying. Deconstruct an old TV, toaster, or another device. Use it to study the electrical components inside. Then, try putting it back together again. You can also attempt to fix broken devices to get a better understanding of how the components work.[17]
- Take precautions to avoid electrical shock.
- Get permission before working on any devices you don't own.
-
5Take a school course on electronics. No matter what age you are, you can find a class that will help you get started with electronics. Look online for introductory classes to electronics or electrical engineering. You may even find some in your area.
- Once you get started, you can move on to more advanced classes or practice making your own electrical circuits.
- Some high schools and colleges offer courses on these subjects.
- Also look for free online courses on sites like Coursera or edX.
-
6Practice soldering wires and electronics. As you progress, you will eventually need to connect wires or fasten them to electrical boards. With a soldering iron, you can glue components together by heating up tin soldering material. This helps you create better electrical circuits that last longer.[18]
- Breadboards are easy to use, but the connections fall out over time.
- Remember to take precautions when working with a hot iron and metal. Never leave the iron on or place it on a flammable surface.


Expert Q&A
Did you know you can get expert answers for this article?
Unlock expert answers by supporting wikiHow
-
QuestionWhat tools do I need to become an electrician?
 Jesse KuhlmanJesse Kuhlman is a Master Electrician and the Owner of Kuhlman Electrician Services based in Massachusetts. Jesse specializes in all aspects of home/residential wiring, troubleshooting, generator installation, and WiFi thermostats. Jesse is also the author of four eBooks on home wiring including "Residential Electrical Troubleshooting" which covers basic electrical troubleshooting in residential homes.
Master ElectricianThe basic tools will be hand tools like screwdrivers, pliers, strippers, and cable cutters; power tools like drills, screw guns, a sawzall, and a skill saw; and a multimeter.
Support wikiHow by unlocking this expert answer.
Warnings
- Always take precautions to avoid electrical shock. Avoid touching live wires.⧼thumbs_response⧽
Things You’ll Need
- Multimeter
- Wire strippers
- Electronics kit
- Arduino board
- Breadboard
- USB cable
- Computer


References
- ↑ https://boingboing.net/2015/11/10/the-best-book-on-learning-elec.html
- ↑ Jesse Kuhlman. Master Electrician. Expert Interview. 30 June 2020.
- ↑ https://www.livescience.com/53889-electric-current.html
- ↑ https://startingelectronics.org/beginners/read-circuit-diagram/
- ↑ https://sciencing.com/what-is-basic-electronics-13580662.html
- ↑ https://sciencing.com/what-is-basic-electronics-13580662.html
- ↑ https://sciencing.com/what-is-basic-electronics-13580662.html
- ↑ http://engineering.nyu.edu/gk12/amps-cbri/pdf/Basic%20Electronics.pdf
- ↑ https://www.allaboutcircuits.com/textbook/reference/chpt-2/wiring-color-codes/
- ↑ http://www.physicsclassroom.com/class/circuits/Lesson-2/Requirements-of-a-Circuit
- ↑ http://www.physicsclassroom.com/class/circuits/Lesson-2/Requirements-of-a-Circuit
- ↑ https://hackaday.com/2017/09/14/whats-the-best-way-to-learn-electronics/
- ↑ https://hackaday.com/2017/09/14/whats-the-best-way-to-learn-electronics/
- ↑ https://www.sciencebuddies.org/science-fair-projects/references/how-to-use-a-breadboard
- ↑ Jesse Kuhlman. Master Electrician. Expert Interview. 30 June 2020.
- ↑ Jesse Kuhlman. Master Electrician. Expert Interview. 30 June 2020.
- ↑ https://www.edsurge.com/news/2015-05-21-making-by-breaking-why-taking-things-apart-is-essential-to-making-them-work
- ↑ https://www.sciencebuddies.org/science-fair-projects/references/how-to-solder
About This Article