This article was co-authored by wikiHow staff writer, Travis Boylls. Travis Boylls is a Technology Writer and Editor for wikiHow. Travis has experience writing technology-related articles, providing software customer service, and in graphic design. He specializes in Windows, macOS, Android, iOS, and Linux platforms. He studied graphic design at Pikes Peak Community College.
The wikiHow Tech Team also followed the article's instructions and verified that they work.
This article has been viewed 117,409 times.
Learn more...
This wikiHow will teach you how to connect to your router using a Ethernet (wired) connection as well as how to setup your Ethernet settings in Windows and Mac. A wired internet connection is often a lot more secure and reliable than a wireless connection. In order to connect to your router, you will need an Ethernet cable (also known as an RJ-45 cable, or CAT 5 cable).
Things You Should Know
- Ensure your modem/router is online. Connect an Ethernet cable to the modem/router in the port labeled "LAN". Connect the other end of the cable to your computer.
- To verify the connection on Windows 10, go to > > "Network & Internet" > Ethernet and check for "Connected".
- To verify the connection on Mac, go to > System Preferences… > Network > Ethernet > Advanced > TCP/IP. Look for "Configure IPv4 to say "Using DHCP". Click Renew DHCP Lease.


Steps
Connect to Your Modem or Router
-
1Connect your modem to the internet cord. Connect the cable, DSL, or Fiber optic line from the wall to your modem.
-
2Connect your modem to the router. If you are using a separate wireless router, use an Ethernet cable to connect from the modem to the internet port on your router. The internet port may be labeled "Internet", "WAN", "UpLink", or "WLAN". A lot of modern modems act as a wireless router. If you are not using an external wireless router, go ahead and skip this step.Advertisement
-
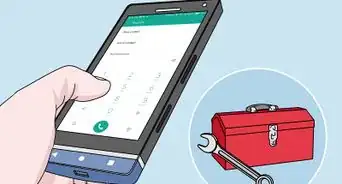
3Check to make sure your modem/router is online. Check the lights on the front of the modem/router. The lights labeled "Power", "Internet/Online" and "US/DS" light should be solid. If they are blinking, your modem/router is not connected to the internet. You may need to contact your service provider for assistance.
-
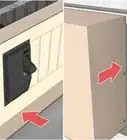
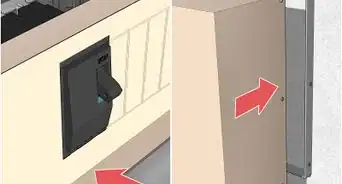
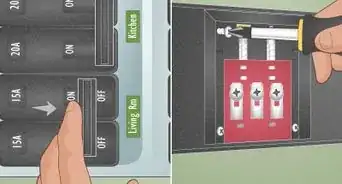
4Connect an Ethernet cable to the modem/router. Connect one end of the Ethernet cable to the port on the modem/router that is labeled "LAN".
-
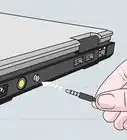
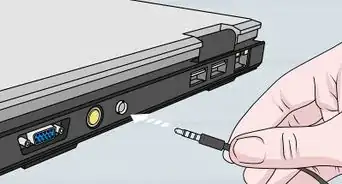
5Connect the other end of the Ethernet cable to your computer. You computer should have an Ethernet port on it. On laptops, it's usually located on the left side or right side of the keyboard. On towers and all-in-one monitors, the Ethernet port is usually located on the back of the device.


Verify Ethernet Connection on Windows 10
-
1
-
2
-
3Click the "Network & Internet" icon. It's the icon that resembles a globe.
-
4Click Ethernet. It's in the column to the left. It should say "Connected" next to the Ethernet icon at the top of the page. If it says "Not connected" try a different LAN port on your router, or a different Ethernet cable. If that doesn't work, contact your service provider for assistance.


Verify Ethernet Connection on Mac
-
1
-
2Click System Preferences…. It's the second option in the Apple menu.
-
3Click Network. It's the icon that resembles a sphere with white lines arcing all over it.
-
4Click Ethernet. It's in the box to the left. It should say "connect" and have a green dot next to it. If it doesn't, your Ethernet is not connected. Try a different LAN port on your Modem, or a different Ethernet cable
-
5Click Advanced. It's in the lower-right corner of the window.
-
6Click TCP/IP. It's the second tap at the top of the Advanced Window.
-
7Verify "Configure IPv4 says "Using DHCP". It's just below the tabs at the top. If it doesn't say "Using DHCP" select "Using DHCP" from the drop-down menu.
-
8Click Renew DHCP Lease. This will ensure that you are able to access the internet while connect via Ethernet.


About This Article

1. Connect your cable/DSL/Fiber Optic cable to the modem.
2. Connect an Ethernet cable from your modem to the WAN port on your router.
3. Connect an Ethernet cable to the LAN port on your router.
4. Connect the other end of your Ethernet cable to your computer.