X
wikiHow is a “wiki,” similar to Wikipedia, which means that many of our articles are co-written by multiple authors. To create this article, 11 people, some anonymous, worked to edit and improve it over time.
This article has been viewed 41,878 times.
Learn more...
Installing car audio amplifiers can be one of the hardest things for an unskilled person to do on their own. Car amp installation requires time and patience. It also requires you to remove panels and to have an assortment of wires ran throughout your car. By reading through this step by step guide, you will be able to install your amplifier.
Steps
-
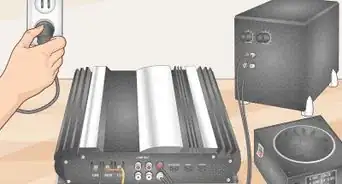
1Raise the hood on your vehicle and look to see which side your battery is located on. Disconnect the negative battery terminal.[1]
-
2Look along the firewall and see if there is a good spot to run your power wire through. Some vehicles have places that have an empty rubber grommet that hides an unused factory hole. You can just put a hole in this grommet and run your wire through. If your vehicle does not have a factory hole in it, then you will have to make one.Advertisement
-
3Take out your cordless power drill and steel drill bit. Check the area very carefully before you start drilling. You don't want to drill into anything unnecessarily.
-
4Protect the drilled hole with paint from rust. Rust can cause damage to the firewall in the future.
-
5Place a rubber grommet into the hole so that it won't harm the wire. [2] This is very important. High voltage will be traveling through this wire and if it were to chafe and touch the firewall, problems will occur.
-
6Run the power wire from the interior of the vehicle, through the hole, and to the battery area. You must pay close attention during this process. Make sure you do not pinch the power wire or accidentally cut the power wire while you are running it through the engine bay.
-
7Install an inline fuse.[3] This should be installed as close to the battery as possible. This fuse will protect your vehicle from being destroyed in case of a power wiring shorting.
-
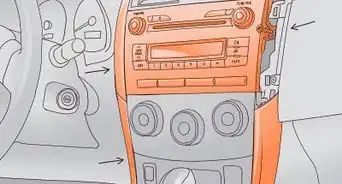
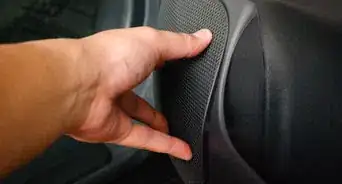
8Pull back the carpet along the driver´s side so you can run the power wire. You will need to remove the rocker panel and kick panel covers to do this as well. [4]
-
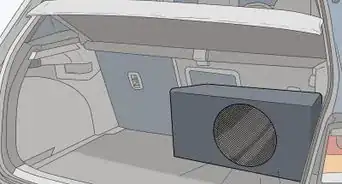
9Continue to run your power wire to it's destination point (where the amp is mounted). Be mindful to avoid any pinch points such as seat tracks or door jambs.
-
10
-
11Use plastic zip ties to secure your power wire to make sure it doesn't move or interfere with surrounding wires.
-
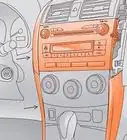
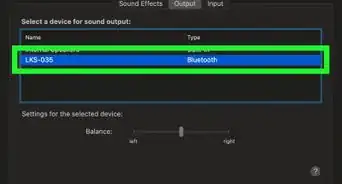
12Run the RCA cables and the remote turn-on wire (typically a blue wire but you will need to check your head unit's manual) from the back of your head unit to your amplifier's mounting location.[5] You will need to follow a process similar to that of the power wire. However, run your RCA cables on the opposite side of vehicle. You do not want to run power wires and signal cables on the same side of the vehicle. This could induce noise into your system. Connect the remote turn-on wire to your amplifier using an appropriate connector (such as a ring terminal).
-
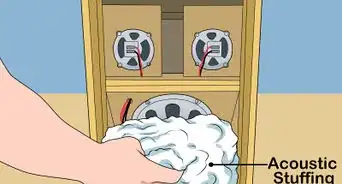
13Run your speaker wires from your speakers to your amplifier. If your running your speakers from the inside of your vehicle; make sure you run them on the same side as your RCA cables.
-
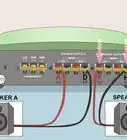
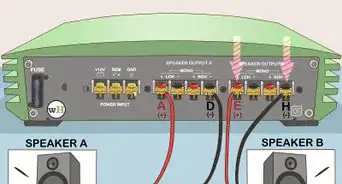
14Connect the speaker wires to your amplifier using the appropriate connectors.[6] Most speakers have indicators that read either a + for positive or a - for negative.
-
15Connect the negative terminal of the amplifier to the chassis ground of your vehicle. The negative wire does not have to be a long piece of wire. If possible, scrape an area that is clear of the gas tank and insert a metal screw. The metal to metal contact will conduct a chassis ground. After you have the negative terminal connected to ground, cover the connection with paint, caulk or a similar protective material to prevent rust (corrosion = noise).
-
16Check over your work and make sure everything is secure. After this is done, you may then insert your inline fuse.
-
17Reconnect the negative battery terminal and you´re done.


Advertisement
Community Q&A
-
QuestionMy head unit doesn't have RCA cables, what do I do?
 Community AnswerYou could get a line-out converter. You can usually find them at auto parts stores or online. You splice them into your speaker wires, per the instructions, and run your RCA cables from the converter.
Advertisement
Warnings
- Be careful when you are attempting to place a hole for the chassis ground. Make sure you survey the area carefully so that you do not drill into the gas tank.⧼thumbs_response⧽
Advertisement


References
- ↑ https://www.youtube.com/watch?v=Ef6r6g1kAeo
- ↑ http://www.caraudiohelp.com/how_to_install_a_car_amp.html
- ↑ https://www.popularmechanics.com/cars/how-to/a10359/installing-a-diy-car-amplifier-16639127/
- ↑ http://www.caraudiohelp.com/how_to_install_a_car_amp.html
- ↑ https://www.popularmechanics.com/cars/how-to/a10359/installing-a-diy-car-amplifier-16639127/
- ↑ https://www.youtube.com/watch?v=8XSIfZo7CRA
About This Article
Advertisement