wikiHow is a “wiki,” similar to Wikipedia, which means that many of our articles are co-written by multiple authors. To create this article, 9 people, some anonymous, worked to edit and improve it over time.
This article has been viewed 98,452 times.
Learn more...
Calendars are available commercially in a variety of sizes and designs. Microsoft Publisher lets you create your own calendar in one of a variety of designs, to which you can add your own pictures and text. You can incorporate pictures of your grandchildren, pin-up poses of your favorite game show model, action images of your favorite superheroes or anything else of personal interest to you. The instructions given below for how to design a calendar in Microsoft Publisher are geared to Microsoft Publisher 2007, but you can adapt them to other versions of Publisher as noted.
Steps
Creating Your Calendar
-
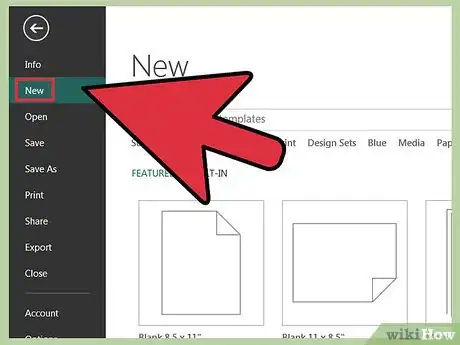
1Create new file and select "Calendars" from the Publication Types list. The center pane will display the various calendar template options.
- In Microsoft Publisher 2003, this option can be found in the Popular Template Categories task pane. (A task pane is a window that displays the commands you're likely to use most often.)
-
2Choose what kind of calendar you want to create. You can select from the options Full Page, Wallet Size or Blank Sizes that appear just under "Calendars," or you can display any of the calendar options under "Classic Designs" (Full Page or Wallet Size) or "Blank Sizes" (generic sizes or sizes by brands of specialty calendar papers). Click once on a calendar option to see an enlarged sample of what the calendar page will look like in the upper right corner of the Publisher screen. Double-click an option to select it and open a work screen.
- Calendars are displayed in tree fashion, with subcategories displayed with a box to the left displaying either a plus or minus sign. Click either the category name or the box to show or hide the available options. (When the options are hidden, the box displays a plus sign; when they're shown, it displays a minus sign.) Click the option representing the calendar you want to create.
Advertisement -
3Select the font and color scheme for your calendar. Choose these options from the Customize task pane. (This task pane is displayed on the right side of the main Publisher window and in the Format Publication window on the left side of the work screen.) You can either choose one of the pre-made schemes from the Color Scheme or Font Scheme lists or create your own by choosing the "Create New" option.
- If the calendar you're making is a business calendar, you can add your business information to it by selecting "Create New" from the "Business information" option list. Enter your information in the fields of the "Create New Business Information Set" dialog, give it a name and click "Save." You can then select this name from the option list when creating subsequent calendars.
-
4Set the other options for your calendar. Use the options in the Options task pane (called "Calendar Options" in Publisher 2003) to determine whether the calendar is laid out in Portrait (vertical) or Landscape (horizontal) format, whether all 12 months are displayed on a single page or each month gets its own page, what the starting and ending month and year are and whether the calendar includes a schedule of events.
- The Options task pane is not available if you choose a blank size for your calendar. In addition, if you choose a blank size first for your calendar, you will then have to add a template from the Calendar Options section of the Format Publication pane in the work screen to see a calendar.
- You can change the page size of your calendar by clicking "Change Page Size" in the Publication Options section of the Format Publication pane. The selection of Blank Page Sizes will show how your calendar will look on that page layout. (If the layout shows your calendar overlapping the sides of the page, you can still select that option and then manually adjust the calendar elements.)
Adding Your Own Pictures
-
1Click the "Picture Frame" button. Look for a button showing the picture of the sun over a mountain. You can find this button in the "Objects" toolbar on the left side of the Publisher work screen.
-
2Choose 1 of the 4 options that appear. The 4 options are Clip Art, Picture from File, Empty Picture Frame and From Scanner or Camera.
- Choose Clip Art to insert a line art image from your hard drive. You then browse for the image using the Clip Art pane.
- Choose Picture from File to insert a picture file from your hard drive. You then move your cursor to the calendar, hold down your left mouse button and drag to create a frame, and then select your picture from the Insert Picture dialog.
- Choose Empty Picture Frame to trace out a picture frame. You then move your cursor to the calendar, hold down your left mouse button and drag to create a frame. You can rotate or re-size the frame using the dots around the frame and then select the picture to insert using one of the options in the Picture toolbar. (Use this option to block out where to place pictures before actually inserting them.)
- Choose From Scanner or Camera to insert a picture image from a digital camera or scanner connected to your computer.
-
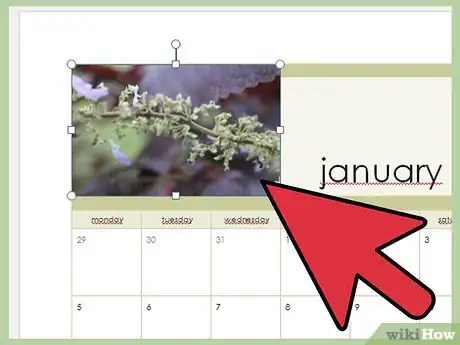
3Change the picture size as desired. Click the picture to display the sizing handle dots around it. Hover your cursor over a dot until it changes to a two-headed arrow, then hold down your left mouse button and drag your cursor in one of the directions indicated by the arrow. If you move toward the picture center, it will shrink in that direction; if you move away, it will expand in that direction.
- To change the picture itself, click the Insert Picture button in the Picture toolbar after clicking on the existing picture. Select the new picture; it will replace the current picture.
Adding Your Own Text
-
1Click either the Word Art or Text Box buttons. Both of these buttons are found in the Objects toolbar. The Word Art button displays a pair of capital A's leaning to the right, while the Text Box button resembles a newspaper page, with a capital "A" in the upper left.
- Use the Word Art option for short, decorative text. Word Art offers the option to shape the text layout as well as change the font, size and color or bold and italicize.
- Use the Text Box option for longer text. You can change the font, size and color or bold and italicize, but you can't change the shape and layout as you can with Word Art. You can, however, change the color of the box the text appears in.
-
2Type and place your text. The order in which you do these two steps depends on whether you're inserting Word Art or text in a text box.
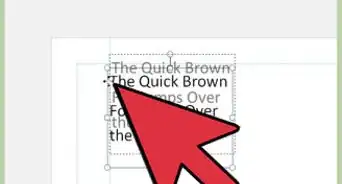
- If you're inserting Word Art, select one of the style options from the Word Art Gallery, then select your font options and enter your text. When you click "OK," your text will appear surrounded by sizing handle dots. You can move this text to the place you want by placing your cursor over the text so that your cursor pointer becomes a four-headed arrow. Use your mouse to drag the Word Art text where you want it.
- If you're inserting a text box, move your cursor to where you want to put the text box, then drag your mouse button to create the text box in the size you want. (The box will appear surrounded by sizing handles when you release the cursor, allowing you to re-size the text box if necessary.) Type your text at the cursor.
-
3Edit the text as necessary. Once you've placed your text as Word Art or in a text box, you can modify its appearance as you wish by first clicking on it and following the instructions below.
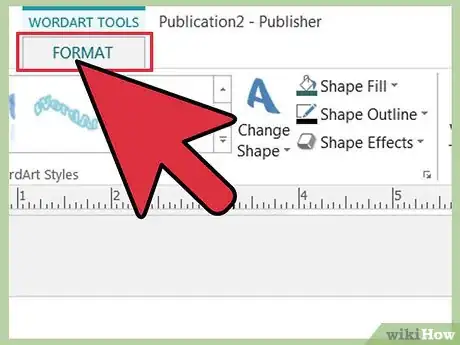
- To modify the appearance of Word Art, use one of the options in the floating Word Art toolbar to change the color, shape or formatting � or to choose a new option from the Word Art Gallery.
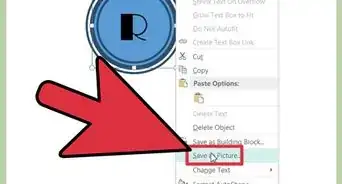
- To change the appearance of text in a text box, click on the box with your right mouse button to display a floating menu. Choose an option in the Change Text sub-menu to alter the text's appearance, such as Font to change the font and point size. Select Format Text Box to change the text box's appearance, such as adding a fill color to the box or a border. To change the text itself, click on it to highlight it and type the new text, or place your cursor at a point in the text to insert or delete individual text characters.
- You can make changes to either Word Art or text box text, but you cannot directly change one into the other. You can, however, select the text from a text box or Text field in the Edit Word Art Text dialog, copy it to the Clipboard by pressing Ctrl-C on your keyboard and then paste it into the other place by pressing Ctrl-V.
Community Q&A
-
QuestionHow do I add a colored text box over a day of the week in a calendar?
 Community AnswerJust insert a text box. Then add color.
 -
QuestionHow about a blank calendar? Where did that option go to?
 Community AnswerIn my version of Publisher the blank calendar is titled "Understated" in the list of templates. Otherwise look through the established templates, there should be one that's pretty plain.
References
- Rodney Ruff, Omaha, NE; who has created his own custom calendars in Microsoft Publisher
