This article was co-authored by wikiHow staff writer, Darlene Antonelli, MA. Darlene Antonelli is a Technology Writer and Editor for wikiHow. Darlene has experience teaching college courses, writing technology-related articles, and working hands-on in the technology field. She earned an MA in Writing from Rowan University in 2012 and wrote her thesis on online communities and the personalities curated in such communities.
This article has been viewed 205,303 times.
Learn more...
This wikiHow will show you how to curve text in Adobe Illustrator using the Warp option in the Effects menu or by using the Type on a Path Tool on a computer. Unfortunately, the mobile app, Adobe Illustrator Draw, does not support the features used in this wikiHow.
Steps
Using the Menu
-
1Open your Illustrator project. You can do this from the Illustrator “File” tab or you can find the file in your file browser, right-click, and select “Open With…” and “Illustrator.” This method is the easiest and works for both Mac and Windows computers.
-
2Select the text you want to curve. You can create new text by clicking the text tool from the tool menu or pressing "T" on your keyboard.Advertisement
-
3Click the Effect tab. You'll see this either above your project area or along the top of your screen.
-
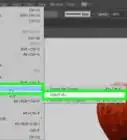
4Click the Warp tab. A menu will slide out to the side.
-
5Click Arc. A window will pop up.
- Click to select the box next to "Preview" so you will see the changes as you make them.
- You can play around with the percentages here to change the curve of your text, but the default settings provide a basic arc.[1]
-
6Click OK to apply those settings. If you had "Preview" enabled, you will see the same settings you had set in the dialog box applied.
Using the Type on a Path Tool
-
1Open your Illustrator project. You can do this from the Illustrator “File” tab or you can find the file in your file browser, right-click, and select “Open With…” and “Illustrator.” This method works for both Mac and Windows computers.
-
2Draw a circle or shape with the Ellipse Tool. You'll see this in the tool menu. You can also press "L" to select the Ellipse tool.
- Drag and drop your mouse on the canvas to create a circle.
-
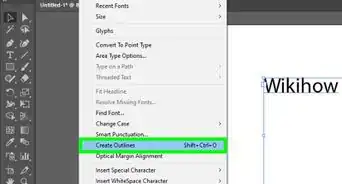
3Click and hold down on the text tool in the tool menu. More options for the text tool will pop up to the side.
-
4Click the Type on a Path Tool. This is usually 3rd in the list.
-
5Click the circle to activate your cursor. As you type, the text will hug the circle. Although this method focused on writing on a circle, you can write on any shape.
- Click the Direct Selection tool from the tool menu (it looks like a cursor arrow) to edit your text.[2]
References
About This Article
1. Open your Illustrator project.
2. Select the text you want to curve or create new text.
3. Click the Effects tab.
4. Click Warp.
5. Click Arc.
6. Adjust the settings and click OK to apply.
