This article was co-authored by wikiHow staff writer, Rain Kengly. Rain Kengly is a wikiHow Technology Writer. As a storytelling enthusiast with a penchant for technology, they hope to create long-lasting connections with readers from all around the globe. Rain graduated from San Francisco State University with a BA in Cinema.
The wikiHow Tech Team also followed the article's instructions and verified that they work.
This article has been viewed 46,239 times.
Learn more...
Do you want to create a Venmo account on your iPhone or iPad? When creating your account, you'll need a phone number to verify your identity, along with an email address. You must be at least 18 years old and live in the United States to use Venmo. To create a Business account, you must have a Personal account. This wikiHow will teach you how to install and sign up for a Venmo Personal or Business account using your iOS device.
Things You Should Know
- You need a phone number and email to register for a Venmo account.
- Venmo is only available in the United Sates and compatible with U.S banks and phone numbers.
- You can sign up for a Personal or Business account.
Steps
Create a Personal Account
-
1Download the Venmo mobile app. You can find this by searching Apple's App Store.
- Type Venmo in the search bar.
- On the Venmo app page, tap GET, then INSTALL.
- Venmo will take a moment to download.
-
2Open Venmo. This will look like a white V with a blue background.Advertisement
-
3Click Create account. This button will be in blue.
-
4Choose Personal then click Get started.
-
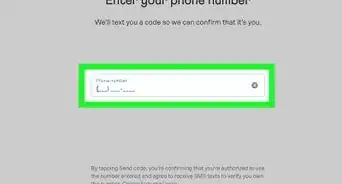
5Enter your phone number. Venmo will text you a code to confirm your identity.[1]
-
6Click Send code. This will be in blue.
-
7Enter the code. Venmo will display the phone number that should have received the code. The code will be sent via SMS text message.
- If you didn't receive the code, click Resend code below the text box.
-
8Press Confirm it. This will be in blue.
- If the number is already registered with a Venmo account, you will need to choose Sign in with this number or Try another phone number.
-
9Input your personal information. You'll need to input your: Legal first name, Legal last name, Username, Email, and Password.
- Your Venmo username will need to be unique and unclaimed by another.
- You can always change your username later in your Profile settings.
-
10Check off the agreements. Make sure to check off I'm at least 18 years old and agree to the following terms. If you don't check it off, you will not be able to create an account.
-
11Click Next.
-
12Click Agree. Venmo will show you their User Agreement and Privacy Policy. Read them to understand the terms.
-
13Sync your contacts. You can choose to Sync phone contacts or Sync Facebook contacts.
- You can also choose to Skip for now.
- You can always add friends on Venmo later by going into your Friends & Social settings.
-
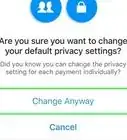
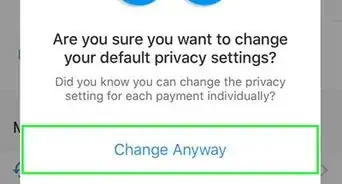
14On the Privacy page, click Done. A page will pop up with Venmo's different privacy and payment settings.
-
15Click Allow notifications or Not now. Depending on your preference, choose your notification settings.
- You can change your notifications later in your settings.
- Your Venmo account is now active.
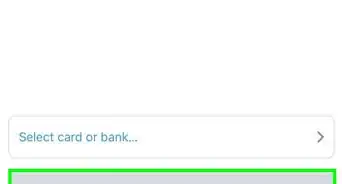
- You can add a bank account to Venmo to send money to others.
- If you need to create a Business account, follow the method below.


Create a Business Account
-
1Open Venmo. This will look like a white V with a blue background.
- Login to your Venmo if you haven't already.
-
2Navigate to the "Me" tab. This will be in the bottom right corner with your profile picture.
-
3Tap Create a business profile. This can be found at the top left of the page, above your name and Venmo username.[2]
- Venmo Business profiles are for individuals, sole proprietors, and registered businesses only.
-
4Tap Create your profile. You will see more information about Venmo for Businesses.
-
5Click Your SSN or Your business EIN. Venmo will ask which number you use when filing your taxes. Choose the appropriate option.
-
6Name your business. You will need to input your Business name and Business username.
- You can also add a banner photo and profile picture in this step.
-
7Input a Business bio. You have 140 characters to describe your business.
-
8Input a Business category. Search for a category. Results will appear as you type.
- Click the category you want.
-
9Click Next.
-
10Enter your registered business and contact info. You will need to enter your Business legal name, Business address, Business EIN, Registration type, and Business phone number.
-
11Enter your business email. This is how people can connect with your business.
- Business email will be visible for all Venmo users.
-
12Click Next. You'll be able to review your Business profile. You can edit any information before you publish.
-
13Click Publish. Your Business profile will now be live.
- You can request money from others or protect your profile by setting a PIN.


Community Q&A
-
Questiondo i need to add contacts if they are sending money to me?
 wikiHow Staff EditorThis answer was written by one of our trained team of researchers who validated it for accuracy and comprehensiveness.
Staff AnswerwikiHow Staff EditorStaff AnswerYou do not need to be friends with contacts to receive or send money from them, but they will need to know your Venmo username to find you on the app. Syncing your contacts will make sending money easier, but it's not required. -
Questionhow do I get the cash?wikiHow Staff EditorThis answer was written by one of our trained team of researchers who validated it for accuracy and comprehensiveness.
Staff AnswerwikiHow Staff EditorStaff AnswerIf you have received money, you will see your balance on your "Me" tab. Click "Transfer money" then select "Instant" or "1-3 biz days". Instant transfers will charge a small fee.


References
About This Article