This article was co-authored by wikiHow Staff. Our trained team of editors and researchers validate articles for accuracy and comprehensiveness. wikiHow's Content Management Team carefully monitors the work from our editorial staff to ensure that each article is backed by trusted research and meets our high quality standards.
There are 7 references cited in this article, which can be found at the bottom of the page.
This article has been viewed 29,410 times.
Learn more...
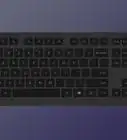
Ducky is a manufacturer of high-performance mechanical keyboards and other computer accessories. A cool feature of Ducky keyboards is that they are designed to be customized, which you can do by replacing the keys with keycaps of different colors and designs or made out of various materials. If you want to replace the spacebar on your Ducky keyboard, all you need is a pair of keycap pullers and a replacement Ducky spacebar key. In just a few minutes you can be well on your way to giving your keyboard a new look and feel that sets it apart!
Steps
Removing the Old Spacebar Keycap
-
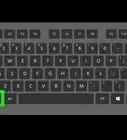
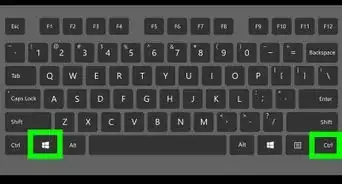
1Unplug your Ducky keyboard and move it close to you. Sit down at your desk or wherever you have your keyboard set up. Unplug the cable from the back left-hand corner of the keyboard and slide the keyboard into a comfortable working position in front of you.[1]
- If you want more room to comfortably work, you could move your Ducky keyboard to a dining room table or other workspace.
-
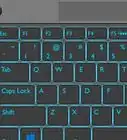
2Insert a keycap puller under each end of the spacebar. Hold a keycap puller in each hand with the wires facing straight down. Gently slide the wires underneath the spacebar at each end, so that both the wires of each keycap puller are under the spacebar keycap.[2]
- A keycap puller consists of 2 bent wires attached to a handle. The wires are squared off at the bottom to fit perfectly underneath the keys of a keyboard in order to pull them up.
- Each Ducky keyboard comes with a keycap puller, so you should have at least 1 Ducky keycap puller. You can use any brand of keycap puller for the second one, since they all work the same.
Tip: If you don’t have 2 keycap pullers, you can improvise one out of a paper clip. Just unbend it and reshape it into a 3-sided rectangular shape, so that the bottom section of the paper clip fits horizontally underneath the spacebar.[3]
Advertisement -
3Pull up gently until the spacebar comes off. Lift the keycap pullers up towards you simultaneously. Try to pull up with the same amount of force at each end of the spacebar and keep lifting up until it comes off of the pegs underneath.[4]
- Ducky spacebar keycaps are held in place on the keyboard by 3 cross-shaped pegs, called Cherry MX key switches, which fit into 3 cross-shaped slots on the underside of the keycap.


Installing a New Spacebar Keycap
-
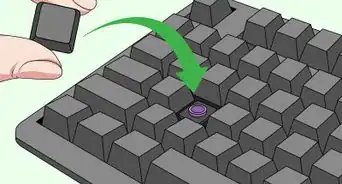
1Line your new Ducky spacebar keycap up on your Ducky keyboard. Orient the spacebar so that the Ducky logo is facing the edge of the keyboard closest to you. Look at the cross-shaped slots on the underside of the keycap and line them up with the cross-shaped pegs on the keyboard.[5]
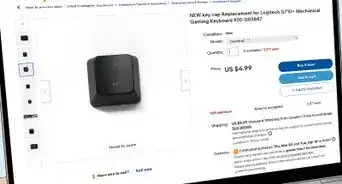
- You can either use a new spacebar keycap from a set of Ducky keycaps or remove one from another Ducky keyboard and swap the spacebars between the keyboards.
- You can find a list of Ducky retailers around the world on the company’s website here: https://www.duckychannel.com.tw/en/location/domestic.
Tip: You could also use a spacebar keycap made by a company other than Ducky, as long as it is compatible with Cherry MX switches. However, make sure that the new spacebar keycap is the right length for the space on the keyboardand, as some keyboards have longer or shorter spacebars.
-
2Press the spacebar keycap down onto the pegs on the keyboard. Gently push the spacebar down, so the cross-shaped pegs on the keyboard slide into the cross-shaped slots on the underside of the keycap. Push it on as far down as it will go, then press it a few times to make sure it moves up and down like it should.[6]
- It shouldn’t be hard to press the keycap on at all. If it doesn’t seem like it’s going on, double-check that you have it lined up correctly.
-
3Plug your Ducky keyboard back in and test it out. Return the keyboard to its regular position in front of your computer. Plug the keyboard cable into the back left-hand corner of the keyboard. Try typing something on your computer to make sure the space bar works.[7]
- You don’t have to stop at just changing your Ducky keyboard’s spacebar. You can use this same process to change other keys as well to give your keyboard a unique custom look that suits your tastes!
-
4Finished.


Things You’ll Need
- 2 keycap pullers
- Ducky spacebar keycap


References
- ↑ https://www.youtube.com/watch?v=9DrqQyZHXaI&feature=youtu.be&t=30
- ↑ https://www.youtube.com/watch?v=UfMuqV8wFVU&feature=youtu.be&t=224
- ↑ https://www.youtube.com/watch?v=Z50HAAaPk2U&feature=youtu.be&t=77
- ↑ https://www.youtube.com/watch?v=UfMuqV8wFVU&feature=youtu.be&t=232
- ↑ https://www.youtube.com/watch?v=UfMuqV8wFVU&feature=youtu.be&t=454
- ↑ https://www.youtube.com/watch?v=UfMuqV8wFVU&feature=youtu.be&t=456
- ↑ https://www.youtube.com/watch?v=9DrqQyZHXaI&feature=youtu.be&t=427
About This Article