This article was co-authored by wikiHow Staff. Our trained team of editors and researchers validate articles for accuracy and comprehensiveness. wikiHow's Content Management Team carefully monitors the work from our editorial staff to ensure that each article is backed by trusted research and meets our high quality standards.
The wikiHow Tech Team also followed the article's instructions and verified that they work.
This article has been viewed 2,834,697 times.
Learn more...
If you've forgotten your iPhone's passcode, you can erase the phone's data and passcode with iTunes, then restore using a backup. Your passcode will be removed in the process, allowing you to set a new one. You can also use Siri to get around the lock screen; please note that doing so on any iPhone other than your own can be illegal. Also note that the Siri bypass only works on iOS 9, and is subject to change; as with any methods that allow you to bypass the passcode, this glitch is unintentional and thus liable to be fixed by Apple as soon as they recognize it.
Steps
Bypassing the Lock Screen on iOS 9.2.1
-
1Make sure your phone is running the proper iOS version. This bypass won't work on iPhones running iOS 9.3 and up; downgrading your iOS version is possible if you're willing to jailbreak your iPhone, but be aware that doing so will void your warranty with Apple.
-
2Ensure that your iPhone is actually locked. This method doesn't disable your passcode, so you'll still need to perform an iPhone restore to remove the passcode permanently.Advertisement
-
3Hold down the home button for two seconds. This will activate Siri.
-
4Ask Siri to tell you what time it is. This should bring up a clock icon with your local time.[1]
- Siri responds to "What time is it?" better than other inquisitions (e.g., "Would you tell me the time?", etc.).
-
5Tap the clock icon. This will take you to your World Clock menu.
-
6Tap the "+" sign. This is in the upper right-hand corner of your screen.
-
7Type a few characters into the search bar. The search bar is at the top of your screen. These characters don't need to mean anything--you just need to be able to select them for copying.
-
8Tap and hold the search bar, then release your finger. This should highlight the text.
-
9Tap the text again, then tap "Copy". This will copy the selected text, making it available for pasting later.
-
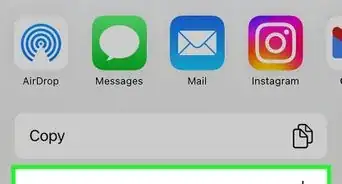
10Tap the arrow to the right of "Copy", then tap "Share". This will open a menu with various share options.
-
11Tap the "Message" option. This will open a new message window.
-
12Tap and hold the "To" field, then tap "Paste". The "To" field is at the top of your screen.
-
13Wait for two to three seconds, then press the home button. This will minimize the iMessage window, taking you directly to your home screen. You have successfully bypassed the lock screen on iOS 9.2.1!


Erasing and Restoring with iTunes
-
1Attach your iPhone cable to your phone and computer. The USB end of the cable--e.g., the larger end--should fit into your computer, while the small end fits into the charging port on your iPhone.
- Although you can use any USB-to-iPhone charger, use the one that came with your iPhone for best results.
-
2Open iTunes on your computer if it doesn't open automatically. Depending on your model of computer, you may have to confirm that you want to open iTunes automatically after attaching your phone.
-
3Wait for your iPhone to sync to iTunes. The bar at the top of your iTunes window should say "Syncing [Your Name]'s iPhone (Step [X] of [Y])". After your iPhone finishes syncing to iTunes, you can begin the restoration process.
-
4Click the "Device" icon to open your iPhone's summary tab. This icon resembles an iPhone and is located beneath the "Account" tab.[2]
-
5Click "Back Up Now" under the "Backups" section. While optional, doing this will ensure that your data is as up to date as possible when you restore from a backup point.
- If you have automatic backups enabled, you don't need to back up again--your phone will have done so when you plugged it into your computer. Check the date of the latest backup under the "Backups" section to confirm that your phone's data backed up.
- When backing up your phone, you can choose either iCloud, which backs up your phone to your iCloud account, or "This computer", which saves your phone's data on your current computer.
-
6Click "Restore iPhone". This is in the iPhone-specific box at the top of the iTunes page.
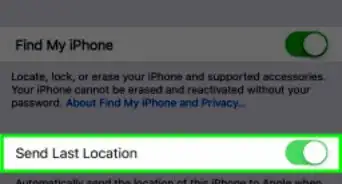
- If you have "Find My iPhone" enabled, iTunes will prompt you to disable it before restoring. Do this by tapping the Settings app to open Settings, scrolling down and tapping "iCloud", scrolling down and tapping "Find My iPhone", and sliding the switch next to "Find My iPhone" to the right to disable the Find My iPhone feature. You may need to enter your iCloud password to complete this process.
-
7Click "Restore and Update" to confirm your decision. Be sure to read the information on the pop-up before continuing so you know what to expect when you restore your iPhone.
-
8Click "Next", then click "Agree" to initiate the restore process. This means that you accept the terms and conditions of use for Apple's software.
-
9Wait for your restore to finish. This can take several minutes, since iTunes is erasing and reinstalling iOS on your phone.
-
10Select your restore point from the "Restore from this backup" option. Click the bar with your iPhone's name in it to do so. The date and location of your selected backup will display below the bar; pick the most recent one for the best results.
- Click the circle next to "Restore from this backup" to enable it if it isn't your default option.
-
11Click "Continue" to initiate the restoration. Your iTunes will begin restoring your phone; you should see a "Time remaining" value on the bottom of the restoration pop-up window.
- The overall phone restoration time can take quite awhile--generally around 20 to 30 minutes--depending on how much data you have to restore.
-
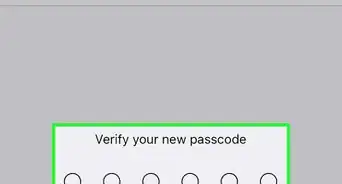
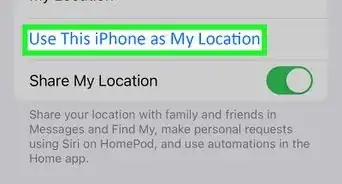
12Swipe the "Slide to unlock" text on your phone's screen. This will unlock your phone; note that you will not need to enter a passcode![3]
- You can place a new passcode on your phone at any time from the "Passcode" tab in the Settings app.
-
13Enter your Apple ID password when prompted. This will restore your phone and its data. Please note that you will need to wait an additional amount of time to let your phone's apps update and resume their pre-erase status.


Community Q&A
-
QuestionHow do I change a passcode if I do not know the current one?
 Jean bozenCommunity AnswerYou could reformat your iPhone or flash it or even use iTunes. Note: all your data and media will be erased.
 -
QuestionWill this work for an iPhone 4?
 Community AnswerYes, these tips will work on an iPhone 4.
 -
QuestionHow do I bypass iPhone passcodes?
 Community AnswerThere is no possible way to do this.
Warnings
- As of iOS 9.3.3, you can no longer use Siri-related bypasses to access your phone.⧼thumbs_response⧽
- If you don't have any existing backups before erasing your phone, you won't be able to recover your data.⧼thumbs_response⧽


References
About This Article

1. Press and hold the Home button.
2. Ask Siri to tell you the time.
3. Tap the clock icon.
4. Tap +.
5. Type a few characters into the search bar.
6. Copy the characters you just typed.
7. Tap the arrow next to "Copy."
8. Tap Message.
9. Tap and hold the "To" field and select Paste.
10. Wait 3 seconds and press the Home button.