Compress your files and folders to save space
This article was co-authored by wikiHow staff writer, Kyle Smith. Kyle Smith is a wikiHow Technology Writer, learning and sharing information about the latest technology. He has presented his research at multiple engineering conferences and is the writer and editor of hundreds of online electronics repair guides. Kyle received a BS in Industrial Engineering from Cal Poly, San Luis Obispo.
The wikiHow Tech Team also followed the article's instructions and verified that they work.
This article has been viewed 123,327 times.
Learn more...
Archiving (zipping) folders will create a new, smaller folder and free up storage space! Zipping a folder means compressing it into a .zip file. No info is lost, and it can be unzipped at any time. In Windows and macOS, you can right-click and zip a folder. This wikiHow guide will show you how to archive folders on Windows or Mac using the built-in operating system tools.
Things You Should Know
- For Windows, archive a folder by right-clicking the folder, then selecting Send to > Compressed (zipped) folder.
- On Mac, right-click the folder, then select File > Compress. This will create a zipped copy of the folder.
- To unzip the folder: double-click it (macOS), or right-click > Extract All (Windows).
Steps
Windows
-
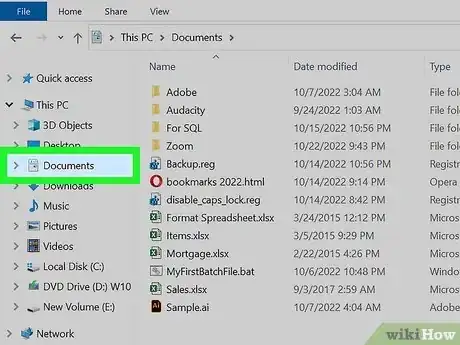
1Navigate to the folder you want to archive. Open File Explorer by clicking the folder icon on your Taskbar. Or, press Windows + E. This method will cover how to compress the folder into a ZIP file.[1]
-
2Right-click the folder. This will open the folder’s options menu.Advertisement
-
3Select Send to. Then click Compressed (zipped) folder. This will create a new zipped folder in the same file location as the original folder.
- If you have a specific location you want to keep zipped files in, you can now move your ZIP file there. This might be a different folder or drive on your computer, or a portable storage drive.
- To unzip a zipped folder, right-click the folder and choose Extract All.
macOS
-
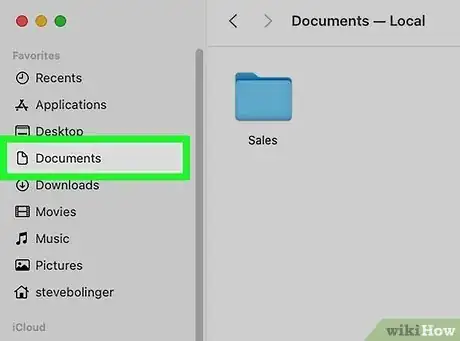
1Navigate to the folder you want to archive. Open Finder by clicking the Finder icon (a smiling blue and white face). Then, go to the folder you want to compress.[2]
-
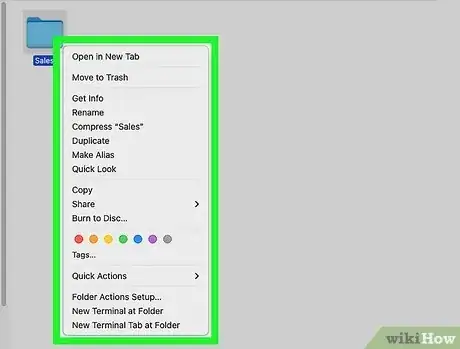
2Right-click the folder. This will open the folder options pop-up menu.
-
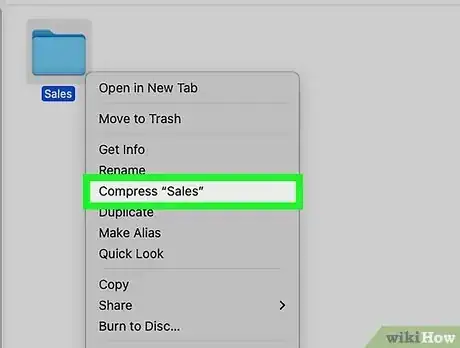
3Click Compress. This will compress the folder into a new ZIP file called “Archive.zip”.
- Rename the file to something that describes the contents. For example, “camping_trip_photos.zip”.
- Double-click on the .zip file to expand and unzip it.
- You can also synchronize folders if you’re looking for a way to access a folder from multiple computers.
Expert Q&A
-
Questionwhere are my archived files
 Kyle SmithKyle Smith is a wikiHow Technology Writer, learning and sharing information about the latest technology. He has presented his research at multiple engineering conferences and is the writer and editor of hundreds of online electronics repair guides. Kyle received a BS in Industrial Engineering from Cal Poly, San Luis Obispo.
wikiHow Technology Writer Archived (compressed) files will appear in the same location as the original, uncompressed file. You can move the compressed file to a new location (such as a different folder or drive).
 -
QuestionAfter archiving, the folder is not showing in my computer. What can I do?
 Community AnswerCheck in your trash folder. Perhaps you accidentally deleted it.
Warnings
- Archiving and compressing does not equal backup. Always back up your work on a removable disc, flash drive or store it in the cloud. If your computer crashes, your archived folders will not be protected.⧼thumbs_response⧽
