X
wikiHow is a “wiki,” similar to Wikipedia, which means that many of our articles are co-written by multiple authors. To create this article, 11 people, some anonymous, worked to edit and improve it over time.
This article has been viewed 27,614 times.
Learn more...
These days most people have more than one email account. Whether it is for business or personal, the built-in Windows Mail application (app) has got you covered. It only takes a few simple steps to add different email accounts to the app. This app is included in Windows 10 and 8.
Steps
Method 1
Method 1 of 2:
Windows 10
-
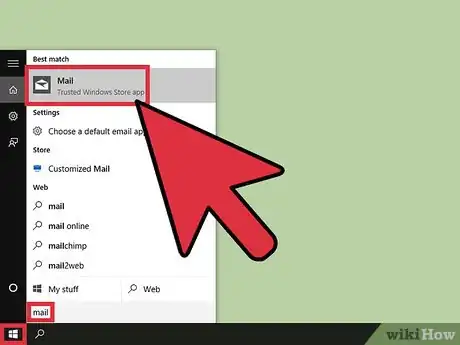
1
-
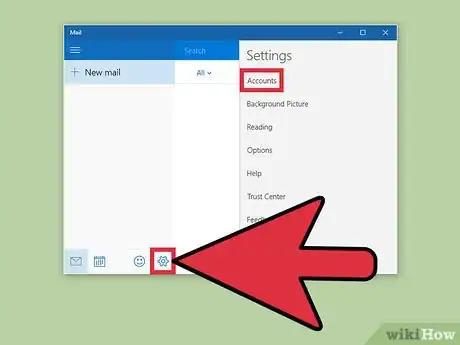
2Open the Account Settings menu. Once the app finishes loading, you should see a series of 4 icons in the lower right-hand corner. The bottom icon should look like a small gear. Click this and a small menu should slide out from the right-hand side of the screen. From the options given, click Accounts to continue.Advertisement
-
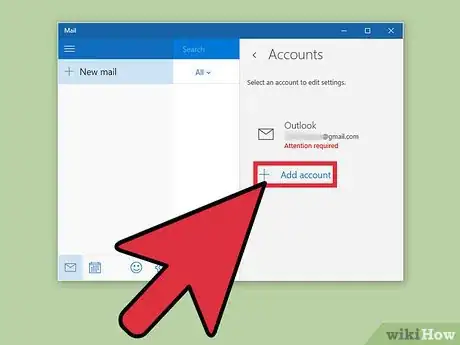
3Choose an account type. Click the Add account button from the Account Settings menu, and a small box should appear and show you a series of different options. These options are “Outlook.com (Outlook.com, Live.com, Hotmail, MSN), Exchange (Exchange, Office 365), Google, Yahoo! Mail, iCloud, and Other account (POP, IMAP).” If you are trying to add an account from any of the listed options, click on it to continue.
- If you are entering a custom email address, and know the specific options you will need to connect, click the Other account button at the bottom to enter the necessary information.
-
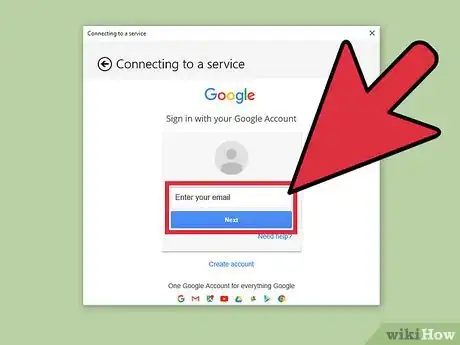
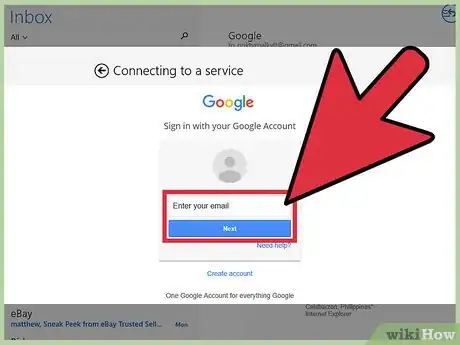
4Enter your account information. You will be required to enter your username and password before you can have access to your email account. Click the type of account you are trying to access. A new window will pop up requesting your account information. Follow the prompts to continue.
- This process is not the same for every type of email account, but it is generally very similar.
-
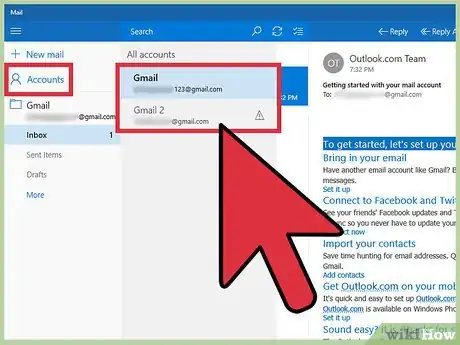
5Access your email account. After you have added an account to your Mail app, you will want to access it. In the upper left-hand side of the Mail window, you should see a list of connected accounts. Select the account you want to access, and you're all done.
Advertisement
Method 2
Method 2 of 2:
Windows 8
-
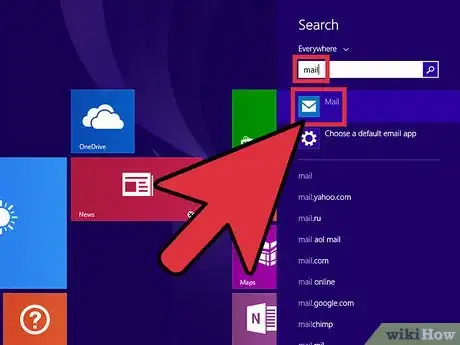
1Open the Mail App. Tap the Windows key⊞ Win on your keyboard, or click the Windows icon in the lower left-hand corner of your Start menu. Type mail and a search bar should automatically pop out from the right-hand side of your screen. The top app in the list should be the app you looking for. Click it to continue.
-
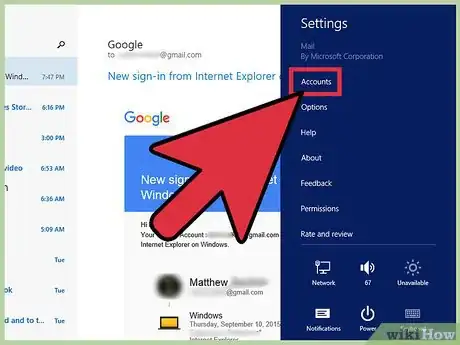
2Access the Accounts Settings menu. Move your mouse into the lower right-hand corner of your screen and then slide up along the same side. You should see a menu pop up. Click the Settings button at the bottom of this menu. It should have a gear for an icon. Now you should see a new menu. At the very top of this menu you should see Accounts listed. Click this once to continue.
-
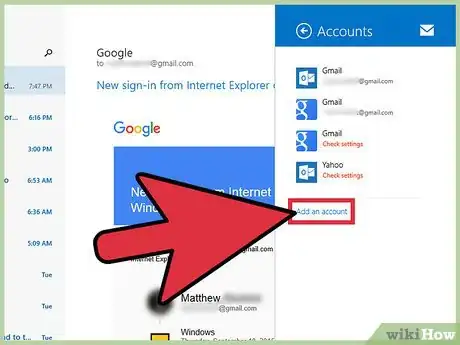
3Choose an account type. Click the Add an account button from the Account Settings menu. A small box should appear and show you a series of different options. These options are “Outlook.com (Outlook.com, Hotmail, Live.com), Exchange (Exchange, Office 365), Google, Yahoo! Mail, Other account (POP, IMAP), and AOL.” If you are trying to add an account from any of the listed options, click it to continue.
- If you are entering a custom email address, and know the specific options you will need to connect, click the Other account button at the bottom to enter the necessary information.
-
4Enter your account information. You will be required to enter your username and password before you can have access to your email account. Click the type of account you are trying to access. A new window will pop up requesting your account information. Follow the prompts to continue on.
- Different email services will require different information, but most operate very similarly. Check your email service’s Support page if you can’t get your email address connected to the Mail app.
-
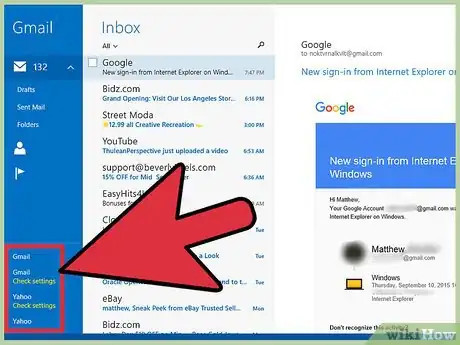
5Access your email accounts. After you have added an account to your Mail app, you will want to access it. In the lower left-hand side of the Mail window you should see a set of options. The accounts that you have added should be listed here under their service names. (Gmail, Hotmail, Live, etc.). Click the email account to access the folders for that email address.
Advertisement
About This Article
Advertisement
